A quilting week

This has been quite the week in my quilting life, and in my ordinary life too. Beyond the quilting is a tribute to my friend June, and to others who reside(d) at Brandywine Assisted Living.

Community Service Sewing Day

Last week was the Ocean Waves Quilt Guild Community Sewing day on Monday. I signed up to do a “quilts of love” baby quilt. When I arrived I picked up a kit and got to work. When I left, I was still stitching the rows together. Thankfully I had done the webbing method for the project, so it was easy to finish at home. Part of the fun of Community Sewing Day is visiting with people around the room. I may have chatted more than others who finished their project. (Note – webbing is a way to keep things in order while you are joining the pieces into columns and rows. Check out this you – tube video if you need to know “how to do it” https://fb.watch/mqED8ltCG9/

Quilts of Love OWQG
Quilts of Love, ready to finish

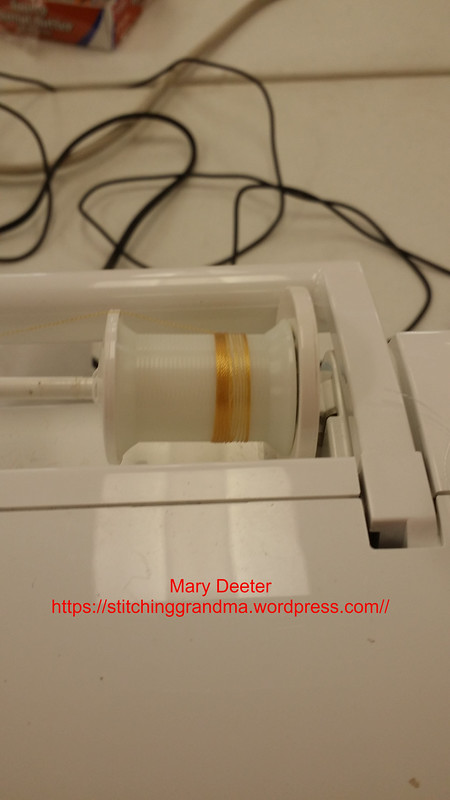
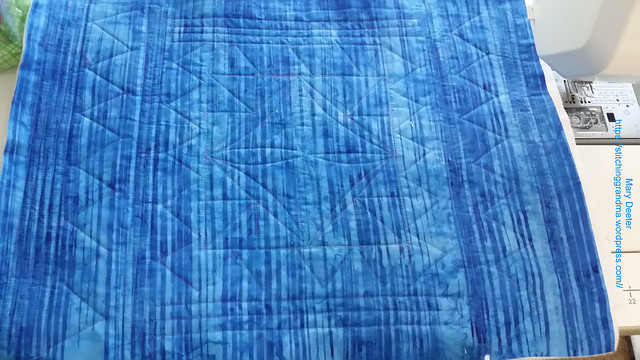
It didn’t take long to finish up at home, and I was on to quilting using my Janome 8900 and the serpentine stitch. Yes, I flipped that one block over before I layered it with the provided batting and backing.

QOL quilted
Trimmed and ready to bind

The group, Quilts of Love, usually does “self binding” baby quilts, but I can never get that to look right. So, I managed to get the quilt top over far enough to the side and save enough backing to make the binding. Of course, I did Susie’s Magic Binding and found some green fabric for the piping in my stash. Check this link for video instructions if you like a binding that is all done by machine! NO hand sewing!

Susie's Magic binding
Susie’s Magic Binding (Sometimes called “binding with a flange)

I just loved the backing fabric!

SWEET fabrics for QOL

Special afternoon of sewing

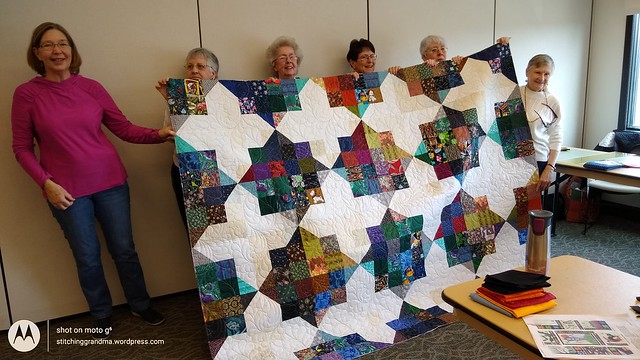
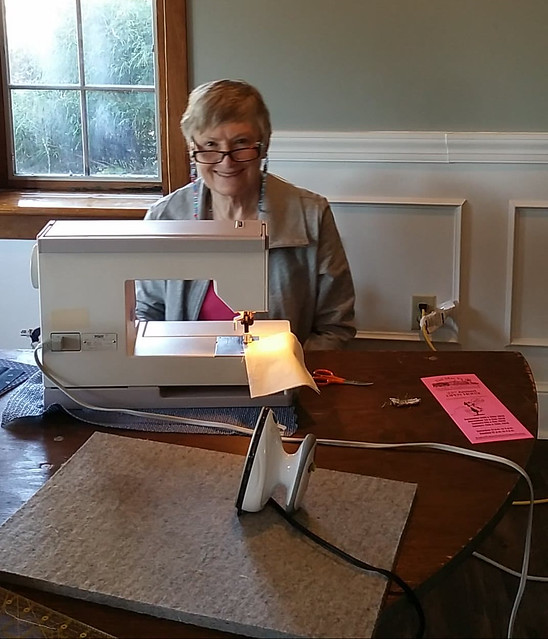
My granddaughter and I had a sewing afternoon to work on the Virginia Star Quilt. We picked up the pace, and I pinned as fast as I could while Virginia stitched. After nearly 4 hours, we had made great progress on 3 more blocks.

Progress in one afternoon
4 rounds on each block, 4 more to go.
Virginia Star block progress
The blocks are growing

Since we finished the first big block, it was easier to understand the construction and Virginia worked on all 3 at once. This coming week we will get the last 4 rounds on the remaining 3 blocks. We did a “floor photo” because I still didn’t have my Scrap Dance Quadrille (2023) off the design wall. While she was in my sewing room, we chatted about the backing, the fabric that came with the kit for the binding, and the quilting. When she comes this week, I think I will have her make the final selection on the backing fabric. We have made a lot of progress over 4 sessions!

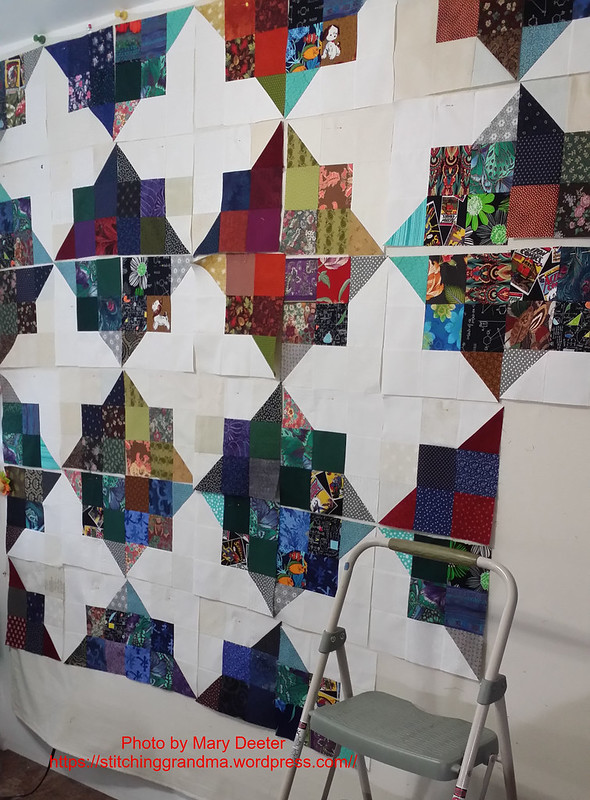
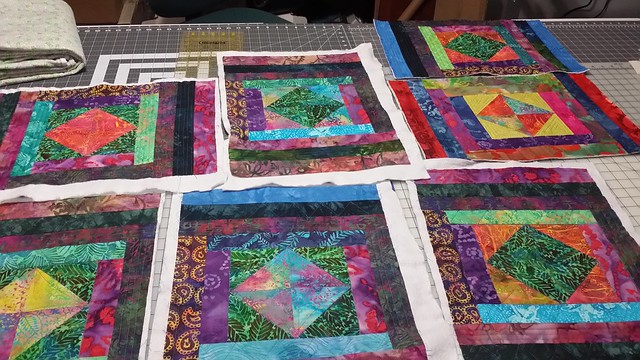
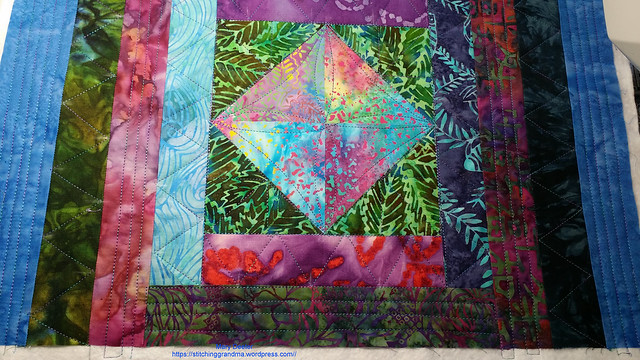
Time for Scrap Dance Quadrille

After she left, I thought it was time to get the first round of borders on Scrap Dance Quadrille and it looks quite nice.

Scrap Dance Quadrille 2023
54″ x 67″
Once the pieced border (3″) was on, it was time to decide if more borders would be added, and what fabrics and how big. I decided to add a 2″ border (finishes at 1.5″) in green, and another border (5″) in pink floral. That will still be a manageable size for me to quilt myself.
Scrap Dance Quadrille 2023 border 2
2″ green border
Thinking about borders
considering the final border

I have about 4 or 5 yards of the pink floral, and may have enough for the backing too. It is pretty vintage fabric, from my dear friend June’s stash. I pulled it out to use because it was “so JUNE!”. She loved flowers ! I will be cutting the next round of borders and putting it on this week.

Remembering June

I’d like to just say a few words about my friend June today. She and her husband moved into assisted living long before COVID struck in 2020. My hubby and I packed up her sewing room, including the furniture and brought everything to our house. For the last few years, I have been sorting the boxes, and measuring and folding her fabrics and boxing by colors. Prior to COVID, I used to go as often as once a week to work with the residents and sew. In the photo below, they were on a “field trip” to our local quilt shop. They are holding placemats that they created, and were donating at the quilt shop to the “Meals on Wheels” drive. The photo is from August, 2019.

Brandywine Ladies with their placemats
June, Trish, Anna and Stella

My dear friend, June, in the red top passed away on Sunday, August 13, 2023, at the age of 90. In the back row, on the far left is Trish who died last year. I haven’t kept up with the other two ladies since the lockdown, and because of privacy, the facility can’t “tell me” their status.

I am really going to miss June. I have known her since before I married Bill. June has treated me like a daughter and she reminded me so of my dear great aunt. Family dynamics are strange. June was my husband Bill’s mother in law, and she loved him like a son. He has been part of her family since the mid 1970’s. June and her hubby Walt were at our wedding in 2006. Bill always said “she adopted you” when she lost her daughter years ago. I believe June died of a broken heart. Her beloved Walt left this earth on their 75th wedding anniversary, less than 2 months ago, the day before her 90th birthday. It still gives me chills to think of the connection being severed, even for just a short time.

The last couple of years

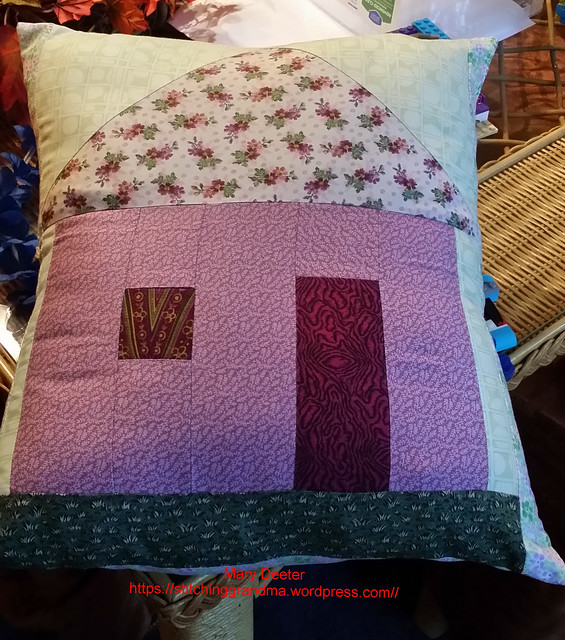
June hadn’t really sewn in the last couple of years, but in the past she loved to make things. I have some of her wall hangings in my sewing room, and I think of her when I see them. I enjoyed making small projects for her. One thing I did love was to make something using her fabrics, and then gifting it to her. I would point out when the fabric came from “her” stash. She loved a handmade gift, and she loved showing off the gifts I made for her. I made her a new “walker bag” a couple of years ago, and she really treasured it and told me at every visit how it was a conversation starter. I used her stash, and had fun with my embroidery machine making that bag. I know I have shared a lot of projects on this blog that went to her.

I was sewing with these ladies at Brandywine Assisted Living, because June had asked me to come and we all enjoyed the companionship. I even had my husband helping, and Trish had taken quite a fancy to “Mr. Bill”.

Quilting at Brandywine Assisted Living
Bill and Trish

When Trish passed last year, I was told to come and collect the fabric she wanted me to have. It took me two SUV trips to bring it all home. Trish was quite the lady too.

One of the last projects I worked on with the group included helping June to finish up a “block of the month” from a kit she had purchased. I was pleased to see it on her coffee table at every visit after she finished it.

Brandywine Quilter
June – Dec 30, 2019

June was a real sweetie. She always had a smile and was so glad to have visitors. She loved my Bill, and I couldn’t help but love her too. I will miss how her face lit up when I came to visit.

Remember to plan –

Many of the items that came from June’s sewing room and Trish’s apartment have been donated to other groups who can use them. It is so important to make a plan for disposition of your crafting items, so they don’t end up “in the trash” because someone doesn’t appreciate or know the value .

Remaining days —

If you are lucky to still have your elderly loved ones, don’t let the chance to call or visit as often as possible slip by. I am cherishing the time I am spending with Virginia. She will be grown up in the blink of an eye, and we baby boomers will be the “elderly loved ones” in our own right in the next 10 years. Plan a visit while you can. And go have some fun while you are still fit and able!!!

I want to be like June, to the last week of her life, where she still wanted to go outside, take a walk and smell the flowers! On our last visit, she said to me multiple times “Let’s go somewhere”. Of course, we couldn’t take her at that point anywhere, but I did enjoy in prior times, taking her to quilt shows and the fabric store, the yarn store, and just out “to lunch”.

What’s on your list of things to do in your “last week” ?? My list includes going out and having fun! Make plans, and go enjoy every day!!!

Final Prep for the Quilt Show Second Time Around booth

I have a relaxing morning (for an hour at least) before the buzz starts.  This weekend is the quilt show with Ocean Waves Quilt Guild.  (See previous post – Ocean Waves Quilt Guild presents Birds Blooms and Butterflies Quilt Show  )

Today I have to make a run to the church where our guild meets and “double check” the storage closet for items I might want to take to the show to sell.   We store things at the church for Second Time Around in between meetings, and I honestly don’t remember what I left in the closet since our March meeting.  After this leisurely morning things are going to “get hectic” !

This afternoon I have 3 people coming with their SUV’s to “load up” boxes.  We have over 40 boxes of fabric prepped for the show; so that takes a lot of space. ( My big lesson is to use the “SAME BOXES” so they stack and store easily.  I purchased bankers boxes last show and “between” shows they fold up and go into a couple of plastic totes.) My “drivers” will transport the boxes tomorrow morning to the school and  I will be there with a cart and a dolly to unload and roll into the small gym where my booth is located.  Three of us will do a lot of “staging” and preliminary set up of the booth before lunchtime.

I have 6 volunteers coming in the afternoon to help set the booth for the show. It is a VERY large booth so there is a lot to do.  When the show opens on Friday morning my volunteers will work in 2 hour shifts (5 or 6 at a time) in the booth helping shoppers; checking out customers; bagging purchases etc.    I’ve spent the last 2 months “organizing” all those schedules; booth plans etc in between getting the fabric ready.  Thank goodness for the people who have come once or twice a week in the last year to iron; trim; measure fold and price fabric donations.

I’m an “organizer” and I make lists and spreadsheets to keep it all straight; use a 3 ring binder and hope for the best results. The best part of our guild is that people volunteer readily. We have about 275 members and I am guessing I have had 30 different people helping me throughout the year. During the show I have close to 40 volunteers helping just with my booth. Amazing people, so willing to sign up and SHOW up.

My co-chair and I worked several days last week getting the final bits ready for our Second Time Around Booth.  Yesterday we got together and made up some “starter kits” to build your own wreath.  Back in February some of us got together and had fun with wire wreath frames; odds & ends from the sewing room and the hot glue gun. (See the photos and story at – Fun with buttons and more   )

We made 8 starter kits with instructions and the wire wreath.  In the kit we included some ribbon or lace to wrap the wreath; some old spools of thread, lots of buttons and other notions like bobbins and embroidery floss.  Our “marketing plan” is to display 3 or 4 of the wreaths we made in February near the kits!

I needed some signs for the quilt show to “promote” some of the unusual things we have to sell –

Scrap sign

We have a PLAYPEN full of BIG scraps and wanted to give people ideas on how to use them!

SCRAPS sign

We have a PLAYPEN full of neckties too —

Signs for ties

Nancy made the zipper pouches, small purse and glasses case all from ties.  She is so creative.  Yesterday she sent me a picture of a wreath she made with ties. We will hang it at the show to inspire others!

You might remember that I have been sorting buttons for a while. I mentioned it in March on this  button post  . (It is like a “zen” time for me sorting buttons; by color and type etc….) I have had trays of buttons and cupcake tins and small containers on my dining room table for over a month. I bagged up all the “same” buttons in groups of 10 and 6 and the “unmatched buttons” all ended back into a shoebox sized plastic container.  At the show we will have about 15 baskets of buttons for sale that are bagged or carded along with the “loose” buttons.  I struggle with how to sell them and settled on a “fill the bag” method.

IMG_20190423_144438912

We all have those buttons at home; and wonder how to “use” them.  A few months ago I made a little “button art” project on a 4″x6″ canvas – and I thought I would set it on a tiny easel at the show to inspire.

Button art

After dinner I “played” with buttons for a bit.  I had a  styrofoam Christmas tree and got the glue and straight pins; a paintbrush and tweezers out.  I used the paintbrush to apply the white glue on the back of the button and the tweezers to hold it to keep my fingers from getting glue all over them.  This little button tree took me about an hour and I was just playing. In hindsight I think I should have painted it with green “before” I started.  I really enjoy playing with buttons with interesting shapes.  

Button tree

I hope we inspire the quilters to venture beyond the fabric and do something with buttons and ties and scraps at the show. I have been having fun with these little projects.  I know the blog has been pretty quiet these last few months too.  I am still recovering from hand surgery and hope to be “back to myself” soon.  (Typing with that one finger in a splint has ruined my  60 words a minute skill!)  My quilting efforts have been on the back burner for months too.  After the quilt show I am taking some time for “me to sew” again.   Thanks for following and your comments too!  Feel free to share the info on our quilt show with your friends.

Ocean Waves Quilt Guild presents: Birds, Blooms, and Butterflies Quilt Show

Coming up in just under 2 weeks is the Ocean Waves Quilt Guild Show – Birds, Blooms, and Butterflies!

The show will be held on Friday, April 26, 2019, 10 AM – 5 PM   and Saturday, April 27, 2019, 10 AM – 3 PM at Sussex Academy, 21150 Airport Road, Georgetown, DE 19947


Beyond the 300+ works of art being showed (YES, quilts are works of art!), Victoria Findlay Wolfe will present a Lecture and Trunk Show 4/26/19 ( Friday’s  admission fee includes entrance to the Quilt Show and Victoria Findlay Wolfe’s lecture and trunk show starting at 5:15 PM)  Victoria has a shop in NYC. She is an artist with several books, most recent is her book “Playing with Purpose: A Quilt Retrospective”.  I can’t wait to see her trunk show and lecture on Friday!  Check out her website –https://vfwquilts.com/  .

This is the third biannual show held by Ocean Waves Quilt Guild.  We are excited to have the vendors below at our show –

                                          2019 OWQG Quilt Show Vendor Mart

Artistic Artifacts                                   www.artisticartifacts.com  

    Batik, Bernina Machines & notions, Books, Dyes, Embellishments, Fabric, Ink, and WonderfilThread.  (I am really excited about them because I have a VERY nice gift certificate to use…..) 

Backbay Bottles                                     Facebook:  Backbaybottles

   Electrified Wine and Liquor Bottles decorated with paint. Check out their Facebook page.

  Bucklebee Bags                                                                                           www.bucklebeebags.com/

 Thoughtfully designed handbags. Our bags are fun and easy to sew, and beautiful to carry!

​Cards and Crafts by J              

Catherine’s Quilting/Church Street Fabrics                                       www.Cathsquilting.com

  Professional Longarm Quilting, Fabric

​Classy Yarns                                                                                             Facebook: Classy Yarns

  A craft business making beautiful hand knit scarves and handmade yarn necklaces.

​Cork and Cloth                                 corkandcloth.etsy.com

  Cork fabric is a renewable, sustainable, vegan, alternative to leather great for bags, purses& jewelry.

​Delaware Sewing Center                                                                        www.delawaresewing.com

  Janome machines, Floriani Stabilizers, and Dakota Embroidery Designs

​Everything that Glitters  

   Scarves and necklaces.

Fabric Addict                                     

  Quilts of all sizes, wall hangings, embroidered tea towels, and some stained glass pieces.

​Featherweights & Seam rippers     

  Fiber Arts of the Eastern shore (FACES)                                                    www.fiberartscenter.com

Journey Quilting                          Certified 180 Instructor                    Facebook:  Journey Quilting

  Studio 180 rulers, patterns, and Deb Tucker tools to help make quilt piecing more precise.

Martelli Enterprises                                    www.martellinotions.com

   We make tools, equipment, workstations & machines for sewing, quilting, & embroidery.

Moon-Child Wood Craft                      www.moonchildwoodcraft.com

 Handmade using a scroll saw (no lasers) & other tools, using patterns of my own and purchased.

Nana’s Treasures                        

  Ribbon necklaces and “mini infinity” circular scarves,  goat milk soaps and homemade lotions. 

Pats Sacks of Titusville      

 Featuring feed sacks whole, pieces & items made from them + Vintage quilts top, quilts & pincushions.

Pink Crayon Studio                      artgirlz56@aol.com

 Fun Fabrics and Funky Finds!

Quilt Vine in Trappe, MD                                                                      www.quiltvine.com 

 Designer fabric, notions, patterns, and books. We also have a line of our very own patterns.

​Sewlovelee                                                                                          www.sewlovelee.com

  Premium quality, cotton fabrics from today’s top designers and manufacturers

Shakerwood Woolens                       www.shakerwoodwoolens.com

 Crafting with wood or fabrics or textiles for many years + hand-dyed and mill-dyed wool.

Simply Created  

 Paper or buttons, origami framed art that is created with Japanese seashells and mosaic glass.

Spiezio Spice                               

 Landscape Art Quilt Kits, Beach bags, NFL Bags, Purses.

The Crabby Quilter                                                                              www.thecrabbyquilter.com

 Annapolis’ premier quilt shop with more than 6,000 bolts fabric + BERNINA & Handi Quilter dealer.

The Correctional Arts Program, (JTVCC)

 Multi-medium artwork done on, but not limited to, canvas, paper, and/or wood done by inmate artists

The Pineapple Stitchery                                                                       www.thepineapplestitcher.com
  Boutique shopping, organic cotton fabrics, hand-made fair trade yarns, modern embroidery kits.

The Quilt Ledger                                         www.the-quilt-ledger.com

  Fine modern fabrics, quilting supplies, and sewing notions.

Trish Leeb Design Werks  

  Paper, Cloth, Metal. Fab items for Fabric Lovers.

AND………

Victoria Findlay Wolfe                                                                       www.vfwquilts.com

  Featuring Victoria Findlay Wolfe products (fabric collections, books, and patterns).

​Wood Quilt Blocks               

 Wood inlay designs, wall hangings, clocks, mirrors, pins, earrings, and wood turned sewing tools.

Oh, yes….don’t forget.…I will have the OWQG booth – Second Time Around – where I will be selling BEAUTIFUL fabrics for $3/yard; and fat quarters for $1, and scraps (Fill a gallon bag) and buttons and ties and more….

Wherever you are….make plans and come to the show!  Details – https://www.oceanwavesquiltguild.org/quilt-show

Do you love buttons?

I can’t bring myself to get rid of all these containers of buttons that are donated to the quilt guild.  Shoe boxes, metal tins, ziplock bags, all full of buttons.  Hundreds and hundreds!    I am guessing I have over 20,000 buttons around, waiting for someone to love them!

They are HARD TO SELL at the meetings, because everyone seems to have a bin “just like it” at home. I’ve had “notion” sales at the guild meeting and the buttons sell here and there, but not a lot at a time.

And not all Quilters are crafters!  (I am the first to raise my hand and pronounce I am ‘not crafty’)

I was in Old Town Alexandria Virginia in January and saw “VINTAGE BUTTONS” for sale.

Vintage buttons for sale

There were many on cards, and I thought hmmm…..maybe I am underpricing my carded buttons.  I can’t give them away for 50 cents for 6 buttons or 10 cents for 3 buttons. Maybe I should RAISE the price…..

I’ve sorted and bagged matching buttons. I’ve got 4 cupcake tins full of sorted buttons right now to bag up.  Talk about labor intensive.  The more I sort, the more I love the buttons!  Should I raise the price and rebrand them as “vintage”.  Surely they are!  The metal buttons are my favorite!

  What to do???

My 2nd Time Around Co-chair and I have been pondering the question!  How to get people excited about buttons and ways to use them, beyond your typical garment sewing. How to sell them?   We are getting ready for the  Ocean Waves Quilt Guild Show   on April 26 & April 27, 2019.  My 2nd Time Around committee is going to have a huge booth with lots of fabric for sale.  We are also going to SELL these buttons!  But before they sell, we have to INSPIRE people to buy them!

We’ve been looking at ideas  for crafting with buttons on Pinterest – and I have a “few pins” – Button Fun!

We made a few projects and I wrote about them here Feeling a little crafty   and here Fun with buttons and More!

Carole at  From My Carolina Home  has a great blog post today called Buttonmania Strikes Again !!  Over the years she has posted some very clever projects using buttons.  Oh, yes, she has a Pinterest board too and gives you “fair warning” about going down that rabbit hole!  (I have to set a 20 minute timer when I start on Pinterest).

So, all that said, there is no lack of creative ways to USE these buttons!

We have decided to sell the loose buttons at the show in a “fill a bag” manner.  A big bin of buttons to look through and square snack bags to load up with your treasures for $1.  We are going to display our “sewing room wreaths” to inspire others, and between now and then perhaps make a few more “button crafts”.

The other fun thing we are going to do is make “wreath kits”. Quart size bag full of assorted threads and notions, buttons and lace so you can build your “own” wreath.  We will make just a limited number and see if there is an interest.

Do you have a button box?  What do you save them for?  Have you done any button crafting?  Would you share your ideas?

Don’t forget to hop over to Carole’s blog post and when you comment, tell her I sent you there!

Happy crafting with buttons!

Be sure to check out the  OWQG SHOW  page.  Victoria Findlay Wolfe  is coming and has a special exhibit and lecture and trunk show! She is a spectacular quilter and teacher!  Check out her website –  https://vfwquilts.com/                                     


Busy Queen Bees

I belong to a quilt bee called the “Queen Bees”. It is a group of Ocean Waves Quilt Guild (Lewes Delaware)  members who get together once a month and work on projects. Sometimes we work on a group project, and other times we work on our own projects.

We met this month in a new location and were happy with the lighting, tables etc. We will need to remember to bring our extension cords if we are bring machines. Imagine the “buzz” as 8 to 12 women gather with projects and machines. Good thing there is a door we can close!

One of my favorite parts of our bee is the show & tell time. I often forget to grab my phone to snap a few pictures. This month at our bee I remembered in time to catch these two pictures.

The first is a wonderful applique project done by Sharon J.  She told us the name of the pattern is Jungle Walk for a Cause, by Harebrained Happenings.

This quilt will go to a new niece or nephew.  It is stunning up close and in person.

Sharon's whimsical quilt

I just love the SHOES each animal is wearing.

The other stunning quilt that I took a picture of was by Joyce D.

Joyce redwork quilt

I love all the redwork hand embroidery.  Beautiful job Joyce!

Lastly – I want to share with you the quilt that was made by the members of the Queen Bees.  We made blocks at our October bee for the Carolina Hurricane Quilt project. The block finishes at 12″ and is called the Perkiomen Valley block. This same block was used last year for the California wildfire quilts and is a great “fast sewing” block. I assembled the blocks and our member Sharon J. offered to long arm quilt the top. Marta B. is working on the label for the back, using her embroidery machine.  I will be binding it using my favorite method, “Susie’s Magic Binding”.

Queen Bees Carolina Hurricane Quilt

We had a lot of other show & tell items, as this is a very busy group!  I just failed to get more pictures!

Do you belong to a small group that quilts or sews together?   What do you like best about being in a small group?

From my standpoint, I enjoy the helpful sharing that takes place with this group. There were 8 of us at the bee this week, sometimes we really fill a room with all 12. We are starting our 4th year together and it is so fun to see the friendships grow along with the skills of the former “newbie quilters”.  They are NOT newbies anymore!

Happy stitching!

ps . for information on the Carolina Hurricane Quilt project, visit From My Carolina Home


On the design wall

After I came home from church on Sunday, I spent about 3 hours in my sewing room. I cleared off “most” of the stuff that was on my design wall, and started playing with the Carolina Hurricane blocks. Some of these blocks were made on Tuesday by my friends in the Queen Bees.  One of our members sent her blocks in by mail, since she could not attend the bee, and others have promised additional blocks. Queen Bees is associated with Ocean Waves Quilt Guild in Lewes DE.

The blocks are all 12.5″x12.5″.

I set them on a 6 x 8 grid, and played around until I had a pleasing arrangement.  I currently have 41 of the 48 needed blocks.  I have 7 more sets ready to sew.  Those promised blocks are coming in this week and will add additional variety to this scrappy project.    This layout will produce a 72×96 quilt.  Getting “close” to that queen size.

Carolina Hurricane Quilts

Carole – From My Carolina Home commented on my post on Sunday, she indicated 42 (6×7 grid) blocks would make a full size, and 56 (7×8 grid) would be enough for a queen.

Making a 7×8 grid, I think a new “pattern” for the layout will be needed.  I will leave it “as is” for now and work on the rest of the blocks that I have “ready to sew” this week.

On Friday, 3 Queen Bee members will be at my house and maybe they can help “re-arrange” to make that 7×8 grid.  Maybe we will have enough blocks in by then to go for the BIGGER quilt.

I looked back at the previous quilts that Carole had assembled last fall in response to the California Fires to see those various layouts.  It turns out, she didn’t use this one at all.  So, I kind of like that it is different and unique.

Are you working on blocks in support of the Carolina Hurricane quilt project?  I know some of my readers are, and have them ready to mail in November when Carole posts the address.  Fingers crossed, maybe this quilt top will be sewn together!

Go check out Carole’s blog, link above, and enjoy the other things she has going on during her “Autumn Jubilee”.  Be sure to “tune in” on Monday on Pat Sloan’s afternoon http://www.allpeoplequilt.com/magazines-more/quilting-podcast at 4 pm (ET) and listen for Carole’s interview!  SO cool that Carole has gained recognition from such a famous quilter!

Let me know if you tuned in!

Carolina Hurricane Quilts and Scraps

I mentioned in a post in late September ( Carolina Hurricane Quilts )  about the Carolina Hurricane Quilts project being spearheaded by Carole  Carter on her blog – From My Carolina Home  

I made a few blocks right after that post, and gathered up supplies and made up “kits” to make more blocks.  I have a few scraps and squares and leftover half-square triangles, so it was quick to assemble those kits.  I usually don’t “save’ 4.5″ blocks, but I had LOTS of 5” squares in my Scrap storage system.  More about that in a minute…..

My wonderful bee – the Queen Bee’s took on the challenge of making blocks during our bee gathering last Tuesday.  They came armed with scraps and sewed for about 3 hours.

Queen Bees Carolina Hurricane Blocks

During the bee gathering I snapped some photos and sent them off to Carole!  It was fun to get a group photo.  Here are a couple of pictures of the members, hard at work.

Sharon Oct 2018

Marta and Nancy Oct 2018

(Sorry for the blur ladies….)

Tracy and Mary Oct 2018

(Imagine…I am actually there in a photo….that usually never happens.  Thanks Marta!)

I came home from the bee with a stack of blocks, and still a handful of the kits I made for myself.  I didn’t seem to get as much sewing done there as I had planned, so I spent the week working on more blocks.  My method for working on these has been to make “2 at a time”.  I use those  great little foam core design boards to lay out 2 blocks and move them to the iron and back to the machine, and I can “keep the angles” right fairly easily.  Look back at my blog here – Foam Core Design Boards to get info on the boards and how to construct them.

I keep making blocks, as my hand is continuing to improve following surgery.  Carole asked me if I wanted to put the blocks together into a top, and at the time, I wasn’t sure if I could manage. I think I have about 20  blocks done, and the bee had about 15 done, with more promised.  I planned to “send” them to Carole the 2nd week of November. My Queen Bees who are still making blocks are planning to bring them to me the first Monday of November.  We have such a great variety of fabrics in these blocks.  This afternoon, when the light is better I will put them all up on the design wall for a photo.  Now I am wondering if I am “able” to assemble them.  I will have to get specifics from Carole on size if I decide to do the assembly. (She reads my blog, so I am sure she will write! )

During this bee, it was fun to chat with my “bee mates”, and to learn which ones are following along with Carole on her “Autumn Jubilee 2018”, and who have enjoyed making her mystery quilts. I love that they found her through my blog posts.  I also love that Carole linked to my blog post last week.  The day she did that, I had 82 new visitors.  So, if you are a new reader, and came to find my blog because of Carole, I thank you for reading and coming back for another visit. Be sure to “follow” in your favorite method.  I love reading everyone’s comments too.

At my “next Queen Bee” gathering, I plan to work with one member  and help her come up with a plan for controlling & managing her scraps.  Bonnie Hunter   is one of my FAVORITE well known quilters and in her blog post today she talks about having “variety” in your scrappy quilts and about how to achieve that variety.  (Every January I tend to “clean up” my sewing room and cut my scraps into predetermined sizes. )  Thanks to the lessons I have learned from other bloggers, like Bonnie, and others, such as Joan Ford who has written books about working with scraps too.  I attribute my “scrap storage system” to the inspiration I have found on Bonnie’s blog.  My sizes I save, and my method for storage are unique to me, as it must be for everyone.  I will, no doubt, write about my methods in a future post.  If your curious, you can check out this post- Scrap Storage Containment System

My sister-in-law, Carolyn, wrote about her method on her blog here  One Block Wonder Woman and Scrap Overload .  If you are a “scrappy quilter” how do you “contain” the chaos of scraps?

Stitches and more

I am still hanging out…waiting on the stitches in my hand to be taken OUT in another week!  Things have been quiet on my blog because I haven’t been doing too much.  (Stitches are from surgery, not rotary cutter injury!!!)  Anyway, I am healing and puttering about trying to find ways to entertain myself and not get totally bored.

Two days post surgery I had a morning gathering of quilters come work with me on “Second Time Around” fabrics.  I was pretty useless, so I did things like pretend to iron, and organize, teach and answer questions.  My helpers were great.

The next day I was able to remove the surgical bandages and wash my hair~!~  (If you have been restricted you must know how great that was!) There is really nothing worse than trying to shower with you hand in a plastic bag all taped up! I am now using small bandages which I can change myself and do so everytime I wash my hands.

By the time the next round of helpers came on Monday to work with the “Second Time Around”, I was in much better shape and able to do the ironing with no difficulty.  We got a lot of fabric worked in the last week, setting some aside for the April  Ocean Waves Quilt Guild Show.  I have a big booth to fill with fabric at the show for the guild, and there are going to be some beautiful pieces for sale!  One of my faithful helpers, Joyce, worked at home folding and sorting and arranging fat quarters.  I picked those up from her on Friday morning and I have to say, the arrangement is beautiful.  I think there were at least 75-100 that she folded in cute little triangles.  I am setting those all aside for the quilt show, along with those fantastic patriotic ones I got from another friend on Thursday! It’s hard to not put these all out at the OWQG meetings and to save them for the show, but I want to have the very BEST items at the show!!

I’ve been sorting through donated buttons too, bagging the sets up to prepare to sell.  My dilemma with buttons is how to make all the work of sorting and bagging pay off.  Buttons are a funny thing.  We all buy them, we save them in metal tins, and cute jars or funny boxes. We dig through the box looking for “just the right one”, and when we can’t find it, we go to the store, pay $2-12 for the PERFECT button, use one on the card and throw the rest in the button tin!  I’m looking for creative ways to “market” those buttons at the guild meeting and the quilt show. One of my daughters suggested some “button craft ideas” might help, so I started a Pinterest Button Fun page to gather ideas.

I figured out how to pad the palm of my hand successfully so I could go bike riding, 1 week post op. I have enough grip strength in my right hand to operate the back brake, and to hold on to the hand grips.  This week we got in 2 rides, so I  am happy!  (Last week I only got in the one ride on Sunday at the State Park, so I needed to get out!)

I rode on Wednesday night in the Lifecycle Community Slow Cruise with 25 or so folks.

bike ride milford wed 10 10 18

Headlights, tail lights, bright clothing are in order when you ride just after the sun sets.  I added a light to the back of my bike helmet that flashes red, along with the usual ones on the bike.  I also put on my bright yellow reflective safety vest that I picked up at the local WalMart.  I want to make sure drivers can see me at dusk and later.  Here is a picture of our group right before we set out for the ride.

Bike ride wed night 10 10 Milford

Our usual Thursday morning ride got “rained out”, so I asked my daughter if she would like to try for Friday morning. Hurricane Michael passed through our area on Thursday as a tropical storm, and the weather changed to FALL on Friday.  We got together at Lifecycle and 4 of us went for a ride.  Check out this great video & post. Burley babies  .My daughter led the ride, pulling her toddler a Burley trailer.  I am trying to keep up with those young parents, and do ok most of the time. Our Friday ride was wonderful, great crisp weather, though half way through I had to stop and take off my red windbreaker and stuff it in my backpack.  (Note to self…bring the thinner one next time or wear a long sleeve tee-shirt!)

My daughter leads this route and the only challenging thing is crossing one road near the fire station in Milford.  Took us about 5 minutes to get a break in traffic to get across.  There is a wonderful path in front of the shopping center along the highway, and around the corner…then it just “ends”.  No crosswalks etc.  And no real way to cross at the traffic light.  So we try to cross just down the road at the next corner, but it is tough, because there is so much traffic from the highway, and so much traffic coming out of town toward the highway.  Overall, Milford is a very bike friendly town.

bike ride Milford Friday 10 12 18     5 miles

For the most part, drivers in Milford are very respectful of the Delaware bike laws, which gives bikes “the lane”.  Delaware Bike Code is also very “bike friendly”, yet a lot of motorists are not aware of the latest changes.  A prominent citizen was hit and killed last year on a bike and the driver went to trial recently. The driver is awaiting sentencing later in the month.  Basically, the law requires that vehicles can pass a bike in a lane only when it is safe to do so, giving the bike at least 3 feet of space between the vehicle and the bike, or by going into the opposing lane.  There are not many shoulders that are safe to ride on (unpaved), and attitudes about bikes are all over the spectrum.  One reason I like riding in Milford is, for the most part, the streets in town are wide, all have 25 mph limits.  Bikes are allowed to ride 2 wide in the lane, and operate just like a motor vehicle.   The more I ride in group events the more I see drivers who are aware of the laws.  I observe the other riders giving friendly waves to motorists and see the friendly waves coming back.  So, being seen is good, being acknowledged by a motorist is better with a wave. Did you know, in Delaware, it is illegal to HONK at bike riders to facilitate them to get OUT of the motorist way.  We did have a friendly tractor trailer driver give our big group a nice air horn “toot” when he was traveling in the opposite direction the other night.  He was waving out the window too.  That type of honk was friendly & fun, not scary!

After riding, I did need to ice the hand a bit.  Keeping it in one position on the grips was challenging, so I did try to adjust periodically.   I am trying to follow orders, so I am keeping the ice on periodically through the day to prevent/reduce swelling.  This makes it tough to do any real sewing or spending long periods in the sewing room.

I did make some pot holders on Sunday. My husband has been my assistant, taking things in and out of the oven and was complaining about our old thinning pot holders.  My friend Nancy tossed a scrap bit my way Saturday that was perfect for pot holders, and using my Fiskars 60mm stick style rotary cutter and a fresh blade, I was able to cut the pieces and some batting and Insul Bright thermal batting to size.  Sewing was easier than I thought, and since these were 8×10 pieces, they were easy to quilt. I quilting some warm and natural to each piece of fabric, then sandwiched the Insul-bright in the middle, and added just enough quilting to hold the layers together and keep the Insul Bright from shifting.   I had a terrible time binding them, as my fingers were just not “nimble enough” yet.  They are about 7.5×9.5 finished, and they work, but every time I look at that binding I cringe.  Not my best work, but I do have an excuse and they function.  I certainly won’t take the binding off to fix them at this point. He likes the Insul Bright layer, but said they were rather “stiff” .  I think washing will help to soften them up.

worlds worst binding

There was “just enough” of this cute fabric to get 3 pot holders.

I have played a bit with my embroidery machine this week.  I was able to get something hooped and stitched out.  The project turned out well. I took the embroidered piece and incorporated it into a project for a Christmas gift. No pictures until after Christmas. Secret stuff……  

My embroidery club had the monthly gathering on Tuesday, and I stitched out some free standing lace (FSL) ornaments.

Free standing lace ornaments

I got a little worried when the 2nd one was stitching, thinking I might just “run out” of the gold thread!

Close call

 I still need to put the item back in the hoop and get one or two more stitched.  I learned from one of the members to cut a “larger piece” so I could get more than one in the hoop.  This saves on the stabilizing products. The next ones I stitch out will require a different spool of thread I think!!

 I had a couple of Free Standing lace  (FSL) “FAILS” on Monday when I stitched up a couple of designs.  I don’t know if it was bad digitizing or poor efforts on my part, but the designs fell apart when the vilene was washed out. I was so disgusted, as one design was more than 20,000 stitches.  That was a lot of wasted thread!  I got so mad I deleted all the designs in that group from my computer !  They looked perfect until you washed away the vilene!  Keep your fingers crossed on these designs.  I have 3 friends doing LOTS of FSL to decorate a Christmas tree for a charity event, and I thought I would give it a try.  I am going to survey them to get info on the designs they had success with to order and add to my collection.  

I got a little “design crazy” with embroidery downloads this week, and have some plans for gifts.  I found myself overloaded with the “color charts” that I print when I download a design.  I added 3 new “notebooks” to my filing system, and spent an afternoon “filing” designs in them.  I broke out a couple of categories into their “own” notebook.  I belong to several Facebook groups that send you in search of free designs, so I didn’t spend much on the designs, other than ink and paper.

I read comments/questions from people in groups about how to organize your embroidery design downloads.  I feel like I have a good system.  I have a folder on the computer for all my embroidery design downloads.  Inside that folder are many subfolders, by category.   I have 53 MAIN categories, the rest of the folders are “sub” folders.  My categories are things like Animals, alphabet, verses, sewing designs, Christian, transportation, holidays, seasons etc.  Inside a category, like SEASONS, I have sub folders, WINTER, SPRING, SUMMER, FALL.  Inside each of those sub folders are many ZIP folders with the designs.    I have 1.5 g b in files – 8007 files in 500 sub folders.  That is a LOT to contend with if they were not organized.  

Usually when you download a design it comes in a ZIP folder, so that accounts for the number of sub-folders!  When I print out the color change sheet, I try to file them in a notebook under a tab  that mirrors what is on the computer.  This helps me “find” the actual design on the computer when I want to use it.  I also try to “add” detail to the automatically assigned file name when I download, using what is printed on the color change sheet so I can make sense of it later when I want to stitch out the design.  All in all, this seems to work for me. Most of the designs I have were freebies.  I’ve posted previously about my “sources”.  I very rarely buy a design.  Hubby saw one the other day while I was working on the computer that he wanted for a gift project, so I did break my “no buying” rule.    I am curious how others organize their designs.  I have a friend who just keeps them in the “download” folder on the computer, but has challenges finding what she wants.    

I hope you have been taking the opportunity to follow along with Carole’s Autumn Jubilee posts.  Her post yesterday included an Autumn Jubilee Placemats Sew Along.  Be sure to follow her blog and sew along for a chance to win great prizes.  Are you “sewing along”?  I am following along this season due to my limitations, but enjoying all her posts!

Have a great weekend!


The little things

I do believe it’s the little things that make life fun.  Hubby and I took a ride to Philadelphia last week.  On our drive, once we broke free from the rain, we had a chance to see a fantastic double rainbow.  I was not driving so chanced a few shots thru the wet glass.

Double rainbow

And just when I thought we wouldn’t see it any longer, we went around a bend and I got this –

RAINBOW

The rest of the drive was without rain, for which I was thankful. I called this shot God’s Promise!  It did help me to find a bit of calm to get through the next few days. (Boring medical stuff ….insert sigh here). (No you can’t see those pictures!)

Once back home, we got ready for the arrival of the grandkids along with their parents for the weekend. Coming home from an outing on Saturday, we had a visitor in the driveway. My observant daughter saw the visitor, and I was able to encourage him into the lawn to avoid being run over.

Yard art

Since the kids were visiting on the first day of fall, I decided to put my Autumn Jubilee placemats out on the table. Early one morning the 6 year old was playing with legos at the table, and making a little vignette. I reached into the china closet and pulled out some extra “goodies” to help decorate her lego village.

Autumn has arrived

These little pumpkin candles and cornucopias were favorites of my husband while he was growing up, and he cherishes them. Vintage bordering on antique! His mother carefully packed them away every season into a “cheese box” and into the china cabinet they went. My 6 year old granddaughter loved the little girl witches and the pumpkin salt and pepper shakers. They are fun to take out and have on the table for a little while!

Vintage candles

I wouldn’t be surprised to find a 29 cent price sticker on the bottom of one from the  5&10 store! (Circa 1950).

My 6 year old granddaughter needed a little extra grandma time on Sunday morning, and asked to go to my quilt room.  Once there, she decided she just LOVED a block on my design wall.  Well, she loved 2 blocks, but narrowed her choices to one. In no time at all, we had a little 15″ envelope style pillow case made and stuffed with a pillow form.  She did all my pinning, while I chatted with her about what I was doing. She wanted to make a gift for her big sister, and in under an hour, we were finished!

quick Pillow project with granddaughter

We got the pillow form stuffed in and into a gift bag just in time for departure!  (No the pillow didn’t get quilted, but I think the recipient didn’t mind or notice!)  The funny thing is, she was drawn to the colors of the blocks that my friend had “handed off” to me as UFO’s.  Thanks for the blocks Pam!! The block went to good use!  The little things…

Before you knew it, the weekend was over and the house settled into quiet again. I miss the little voices when they leave. It was wonderful to have both daughters and all 4 grandkids and 2 son-in-laws around the dinner table on Friday night and to listen to the laughter and the chatter and the stories.

I have continued to play with my embroidery machine as time permits.  I had fun working on dish towels – 

Start with Coffee

Espresso design

These 2 designs are from Oh My Crafty Supplies website.  I have a special person in mind for these.  I did two other designs, but won’t show them quite yet…because I forgot to photograph them!

I did a little more quilting on the never ending placemats —

Batik placemats

This is the end of the line with 18 placemats. These need trimmed and they all need squaring up and binding.  I did all the quilting with ONE of my favorite Superior Threads –

Superior Batik Blue #5021

Batik Blue #5021

Superior Batik Blue Fantastico

It’s the little things…..I finished my machine quilting with thread left on the spool and 1/2 a bobbin full. I usually shop for thread at quilt shows, and will have to keep my eyes open for someone vending Superior Thread in the next month or 2! Otherwise, an order will have to go out.  This is the 2nd spool of this thread that I have used and I just love how it blends!

I brought home a quilt to bind, from the assisted living facility where I have volunteered for the last 9 months. I made the binding 2 weeks ago, and this afternoon got it trimmed and bound. I think the “first time” quilter, Trish, did a fine job.  I will deliver it on Thursday to her when I go to volunteer.  I used “Susie’s Magic Binding” and love the little pop of color the flange gives the edge of the quilt. This method is done all by machine, no handwork, which is why I love it.  It’s the little things…

Trish's baby quilt

I’m feeling grateful for the new members of Ocean Waves Quilt Guild who have come the last 2 Monday’s  to help me with 2nd Time Around prep for the Quilt Show. And for my co-chair who keeps taking home large quantities of fabric to prep!  I love that people are so willing to volunteer.  And I love that people in the guild are willing to donate their “scraps” and unwanted fabrics. We had the most BEAUTIFUL batiks come through the donations!!  (No – my placemat batiks did not come through the guild…they came from a friend at my church!)

The rest of this week is busy busy busy, with the Queen Bees gathering on Tuesday, and hopefully a bike ride on Wednesday evening and Thursday morning!  I missed riding in the last 3 weeks!  Another fabric donation pick up on Wednesday morning, a few appointments scattered in, and more 2nd Time Around prep for the guild meeting next Monday.

In the coming weeks, I am not going to be going at my normal pace.  I need to have 2 surgeries on my right hand; so my involvement will be limited to doing what I can with the “other” hand.  For a 2 handed typist, my blog posts will be scarce, projects limited etc. For 2nd time around, I will be restricted to folding and pressing with “the other hand”.  I guess I can sort and price buttons!!   And boy, do we have some awesome buttons!   Like I said, it’s the little things.

As you go through your day, look for the little things to find joy!   

.


More small projects and storms

BUSY WEEK !!  Monday was Ocean Waves Quilt Guild meeting, so that meant an afternoon of loading containers in the SUV, and a 7 am departure to unload and set up for sales before the meeting began, then pack up, store some boxes and bring the empty containers home.  (We sold 85% of the fabric we took to the meeting!)  I am grateful to be able to store at the church where we meet, and only have to bring home empty containers and new donations.

As the week has unfolded, we have had rain coming down in bucket loads. We got most of our unloading and reloading done between rain showers. Our area on the mid-Atlantic coast has been beaten with a Nor’easter storm.  Amazing amounts of rain in some areas, with flash floods.  Fortunately, I am not on a waterway, or a known flood zone.  I have a friend whose parked car flooded in a shopping center lot, where she had parked to carpool for the day.  While that particular storm raged for a short time, I was miles away stitching at Embroidery Club. A couple of the husbands called their wives at the club to report on the rains. Yet where we were, 30 miles away, the skies were just grey and gloomy.  Early in the week the discussion about Hurricane Florence in the news made us wonder if it was going to come this far North.  This morning, the maps look like North Carolina is going to take the worst of the weather.  We will be lucky in that case. We are already so saturated after nearly 2 weeks of rain!  I can not imagine having to pick and choose what to pack up and take with me in the event of evacuation. We are fortunate!

On Tuesday afternoon, while the rain came down, we were busy stitching.  I took 2 projects with me to work on at the Embroidery Club.  I purchased a design from Embroidery Library and one from Oh My Crafty Supplies.  I stitched both designs out on cream colored craft felt.

Crafty Christmas Sewing Machine

Crafty Christmas Sewing Machine  – Embroidery Library X14180  -3.86″ x 3.19″

Embroidery Library calls this design a “stuffie”, done “in the hoop”.  I chose to use my applique scissors and cut out after the stitch-out.  I will try again cutting the shape first, using the dieline template and see which look I like better.  It was suggested to me not to use a Water Soluble Topper (WSS) on top of the felt, as it would be too hard to remove, pull stitches or cause problem with the felt.  I used a tweezers to remove most of it, and lightly misted the remaining, blotting with a paper towel.  I had to use tweezers to stuff the filling in.  The stitch out left an opening on the bottom for filling and I used my regular sewing machine and matching thread to stitch it closed .

The key fob below is the perfect thing to hold onto my flash drive full of embroidery designs!

Sewing machine key fob

ITH Sewing Machine Key Fob Embroidery Design by Oh My Crafty Supplies Sketch design 2.9″ x 3.8″
This stitchout did not give you “placement lines” or “dielines” for placements, so I ran the first color “twice”.  First run to create a dieline on my stabilizer, then the second run tacked down the felt with those read stitches on the stabilizer. Right before the final outline stitch, I placed a piece of felt on the back of the hoop so I could have a nice finished backing.  Rather than use a snap, I used my sewing machine to close the loop around the keyring.  Thoughts –  I felt the “fill” on the 2nd one (blue machine) was too thin.  I should have gone back in and run the fill a 2nd time.  I posted this picture on the Facebook group for Oh My Crafty Supplies and someone said the “SKETCH” design was why the stitching was so light.  Hindsight!  I am going to try this stitchout on a different fabric and see if I like it better.  I haven’t removed the WSS on this one yet, so you still see “shiny bits”.  This one I also “trimmed” after the stitchout.  It is small, only 4628 stitches, so I think I will try again.  LEARNING CURVE….

I’ve been working on my batik placemats.  There are 18 of them and more in the works!  I took about 6 and used a different backing fabric.  I decided to not do free motion quilting on this group, instead, switched out to my walking foot.  I have 4 done and 2 to go.  I do a much better job with the walking foot I think!

Walking foot quilting Batik placemats

Batol placemats quilted with walking foot

quilting detail batik placemats

here is a peak at the back!

back of placemats

I love the way this worked out.  I did measure out those triangles and mark the front with a chalk where the points of the triangles were to land.  I decided to do all the ones with this backing in the same manner, so they look like a set!  (I like them better than the ones I did the free motion quilting on…..)  Somebody (more than 1) will get placemats for Christmas, I just have know idea who that will be quite yet!  We use placemats everyday, throw them in the washer etc, but there are too many here to keep.  I just love making them.  

It’s a busy week with meetings, and I am off to the 3rd one of the week in a few minutes. Hoping for time to have a little fun later today!  Stay safe, stay dry!  

note – Embroidery is done on my Brother PE500, which has a 4×4 capability.  Quilting was done on my Janome 8900.