Scrap Happy Little Wishes FINISHED

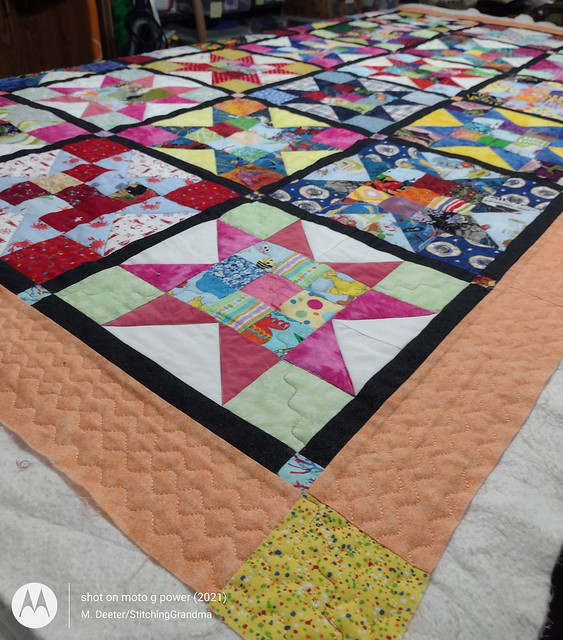
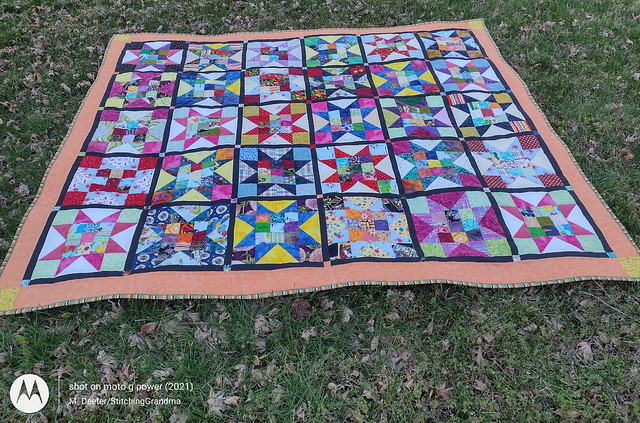
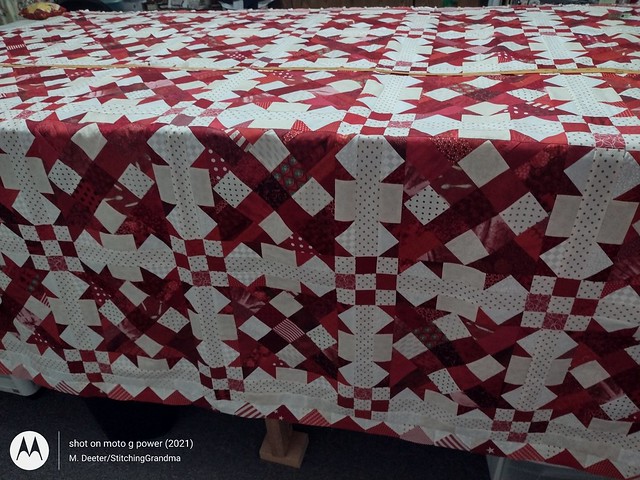
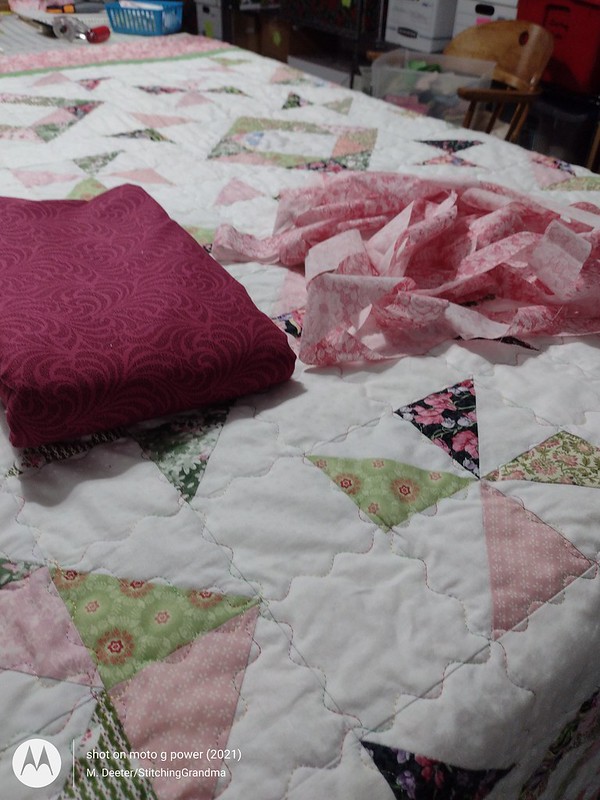
Circa 2015 quilt, finished in March 2024! My efforts to finish quilt tops that have been hanging around for YEARS continues.

I had a delightful time back in September, 2015 making blocks and turning them into stars, and eventually setting them with narrow black sashing. I wrote about it here – https://stitchinggrandma.wordpress.com/2015/09/11/scrap-happy-little-wishes-30-blocks/

and here – https://stitchinggrandma.wordpress.com/2015/09/14/just-a-border-or-2/

During the years in between, there was a point when I took the quilt top off the hanger and added orange borders. My grandaughter said her “MOMMY LIKES ORANGE”. With that in mind, I finished the quilt in the last week for her mommy’s birthday.

I knew my daughter would enjoy a “snuggle quilt” that was cozy and cuddly and warm, so I used flannel on the back. She is a woman who is not afraid of color, and with that in mind I thought she would enjoy this quilt.

I opened my bin of flannel, and pulled out the “leftovers” from the pajama projects I have made for the grandkids. My hope is when she snuggles on the sofa she will feel the hugs of all those kids.

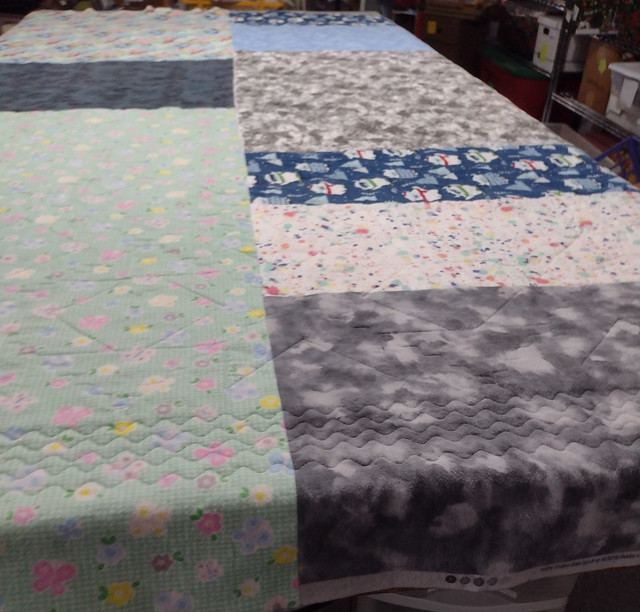
flannel backing

I think the quilting shows up well on the back. I used Superior Bottom Line SILVER in the bobbin. I quilted with my walking foot. I used the serpentine stitch on my Janome 8900, and adjusted the length and width for this project. I always snap a photo, so I can replicate the setting if I want to come back to it later.

Stitch settings for quilting
Serpentine settings on Janome 8900. Widened and lengthened from preset settings
Quilting Scrap Happy Little Wishes
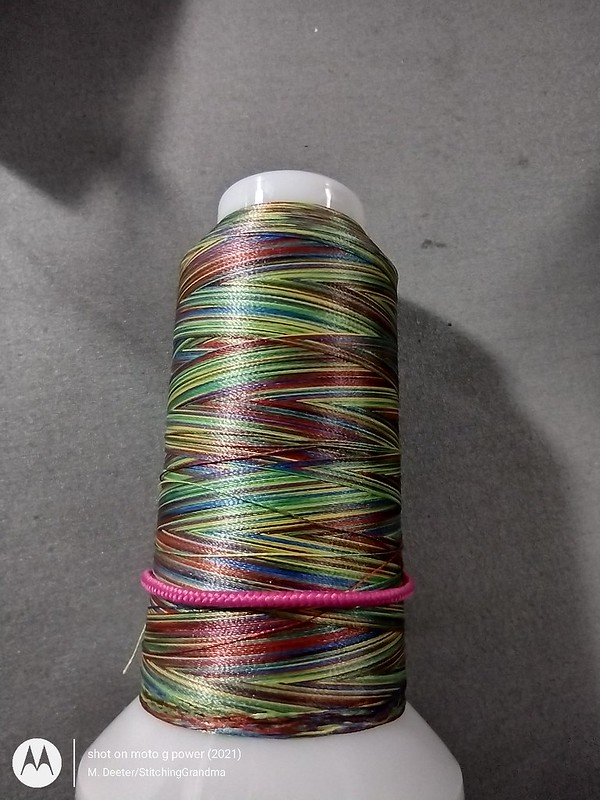
Orange embroidery thread for the borders Variegated for the main quilting

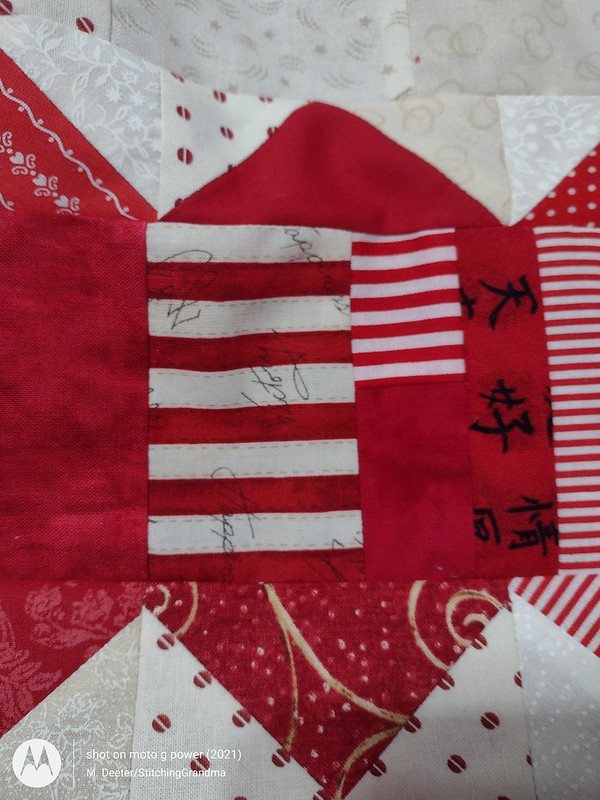
I used the serpentine stitch across the blocks in both directions and on the border. Around the stars I used a straight stitch. I was hoping that stitching around the stars would make them pop a bit once the quilt was washed. I used orange embroidery thread for the borders, and for the rest of the quilt I used Superior Fantastico # 5114. It’s name is PLAYHOUSE, and is variegated green, yellow, red and blue. It almost disappears on the wide variety of colors in the quilt.

Fantastico 5114

When it came time to trim and make binding, I had to really find something that would work against that orange border. I made 318 inches of Susie’s Magic Binding for the quilt.

Susie's Magic Binding
Susie’s Magic Binding.

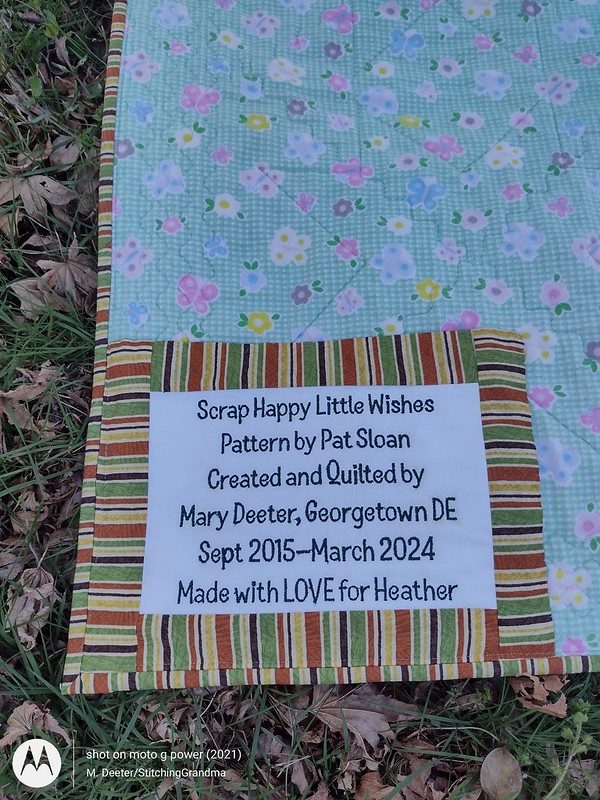
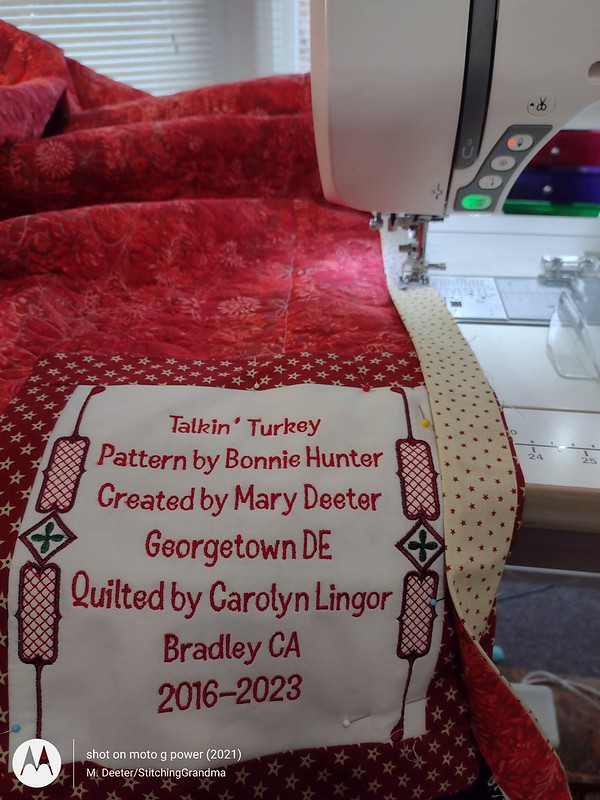
Of course, a label needs to go on the back of the quilt!

Label for the back of the quilt
label made on my Janome 11000 embroidery machine
Scrap Happy Little Wishes
Scrap Happy Little Wishes 2015

I think the stripe binding worked well and I love how it finished the quilt.

Flannel back of Scrap Happy Little Wishes
Flannel back for a cozy quilt.

I always like to “WASH” my quilts before gifting, especially when the top has been hanging around a while! I have a top loader, with no agitator, and threw in some color catchers for good measure. I took a peek at the water after a couple of minutes and could immediately tell I was going to have a problem. I threw in a total of 5 color catchers, and 1/4 cup of DAWN, and a beach towel with white stripes. I crossed my fingers and hoped for the best.

Check out the results –

The quilt came out just fine, with only a tiny amount of pink showing around the quilting in one area. I think there were hand dyed fabrics used for star points. They are scattered around the quilt and the color catchers did their job. My daughter is well versed in the benefit of color catchers in the laundry.

Quilt details – Before washing the quilt was 70 x 84. Shrinkage happens, and even though all the flannel was previously washed, the quilt top /batting did shrink, and the finished washed quilt is 67″ x 80″. All scraps except for the inner & outer border and the binding.

Scrap Happy Little Wishes is a free pattern from Pat Sloan. You can find it here – https://blog.patsloan.com/2015/09/pat-sloan-quilt-show-scrap-happy-little-wishes-free-pattern.html

It feels good to know that gifting a scrappy project will be well used and enjoyed. It is big enough to snuggle under on the sofa, or in my daughter’s case, in her hammock on the porch! She LOVED the flannel back. And, because she enjoys color, I think she will have fun with her fingers wandering over the blocks looking at all the random fabrics.

Lessons learnt – Since I made this quilt top in 2015 I know more about color and saturation. Some of the stars in this quilt disappear because I made poor choices in the contrast fabric. At the time I was making the blocks, I was just sewing “whatever came to the top of the scrap heap”.

These days, if I were to make this pattern again I would ensure more contrast. I would even break out YARDAGE (gasp….) to ensure a better distinction in the stars and surrounding pieces.

I’ve been making a lot of STRING BLOCKS in the last few weeks and working in very specific color groupings. They are still very scrappy, using up the bits and pieces, but very pleasing to the eye. I cleaned up all my green scraps yesterday and put everything away nice and tidy. Watch for my next post on Green String Blocks!

What are YOU working on this month? Have you cleared out any old quilt tops?

Sharing this post with OH SCRAP today! Go take a look at what is happening in the world of scraps.

Small Projects in 2024

My plan for 2024 is to not start any large projects, and continue to “finish” up those that are still “hanging around”. In between I will enjoy working on some small projects, and things that are somewhat “quick finishes”.

I started January off with an apron to wear when I am “running trains” at DelMarVa Model Railroad Club. Yes, I like to play with trains occasionally. My husband is the leader of the HO group, and sometimes I tag along when they need an operator during their annual open house season. I would much rather run trains than sell raffle tickets at the front counter.

Two sided apron
Reverse side of apron

The apron is two sided with LOTS of great pockets, on both sides. They are big enough to hold my phone, some information on the digital controller I am using to run the trains, and one pocket holds my coffee cup or bottle of water. The pattern is a bit of a “mash up”. One of the other members shared her pattern with me, and then I also used some elements from a couple of other patterns used in the past. I went double sided because I was using quilters cotton and I wanted the apron to have more body or heft to it. I had an entire bolt of the track fabric and just a yard and a half of the other print with the train lines names. I was able to get it made in a couple of afternoons, and use it for the following two weekends. It worked well for me, and I am pleased with how it turned out.

Our quilt guild, Ocean Waves Quilt Guild, Lewes DE had a community service “scrap sewing day” in January during our regular meeting time. I was assigned to a table that was making string blocks and was in my element.

OWQG String block quilt

There were 3 of us sewing and we got 48 blocks made , and partially assembled on the sewing day. I brought home the 2 halves and finished the last seam and quilted and bound the project.

String Charity Quilt - OWQG

I brought home a kit for our bee, the Queen Bees to work on at our next gathering. Two of us worked on this funky 4 patch project together. (We didn’t pick the colors!!) We only got about half way thru the project before our time ran out.

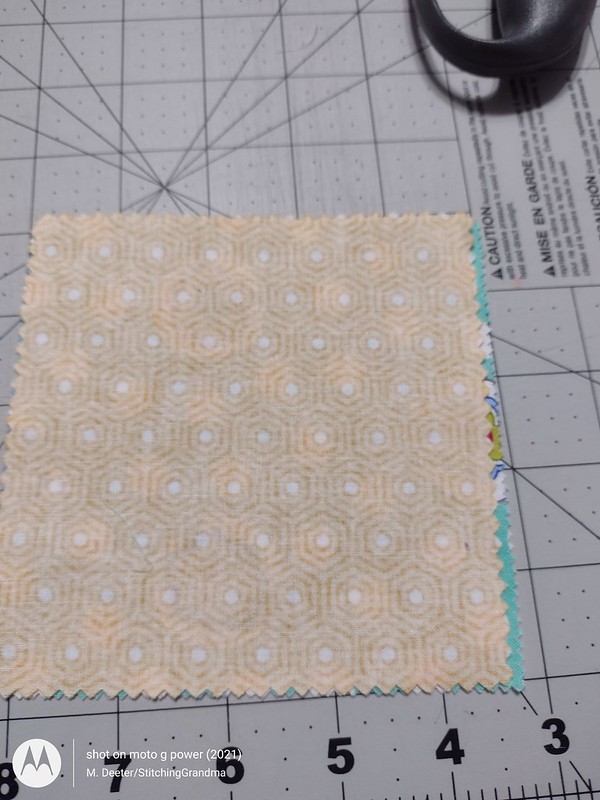
The kit had 40 charm squares and 80 of those orange check pieces, along with the white. They gave us instructions on a method to make a 4 patch using the charms. I have to report that those 5″ charms were terribly cut. PRE-CUT by Moda and they were 4 7/8 x 5. Not square. We ended up trimming every block.

Charm pack, not so square
Not quite square Charm Squares
NOT Square
4 7/8 x 5 inches does not make a square
Trimming to 4 3/4

After trimming all the bits and pieces to 4 3/4″ I was able to get the blocks assembled and quilted.

Quilting on OWQG charity quilt
Quilted and bound charity quilt – Quilted with Superior Fantastico “CASHMERE” thread on top, Silver bottom line on the back.

I used some pieces of leftover wide backing that I pieced together for the quilt backing, and the same for the binding.

Backing for the 4 patch quilt
Quilted on my Janome 8900 with walking foot.

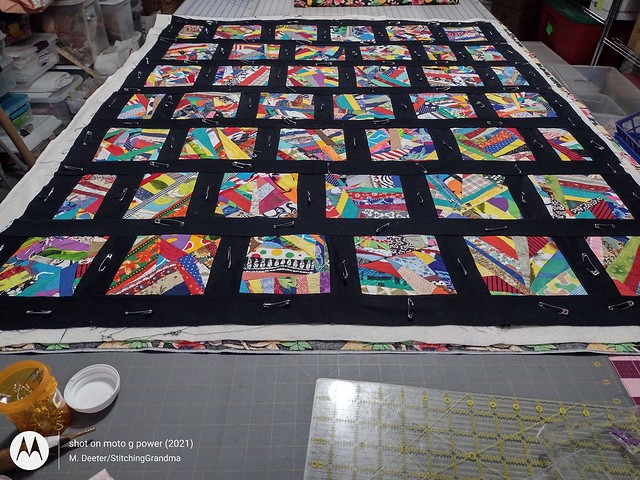
Next up was another quilt top from the Charity quilt sew in that I took to quilt and bind. The blocks had all been donated and someone else had set them with black sashing. There was a lot of poof in those blocks, but I spent some time with my steam iron and managed to get the top flattened out.

Pinned and ready to quilt
Scrappy quilt for the guild
Ready for final stitching
quilted with Superior SILVER bottom line thread (top and bottom) on my Janome 8900
Guild Scrap quilt
FUN backing fabric for this super scrappy quilt

Our next OWQG meeting is March 4th and it will be fun to hand off these 3 projects.

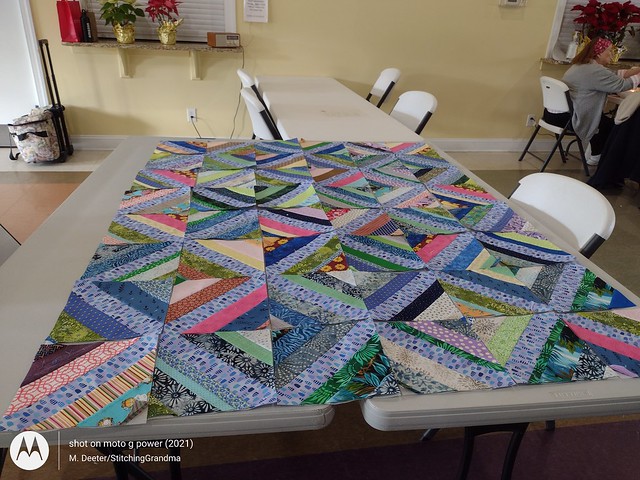
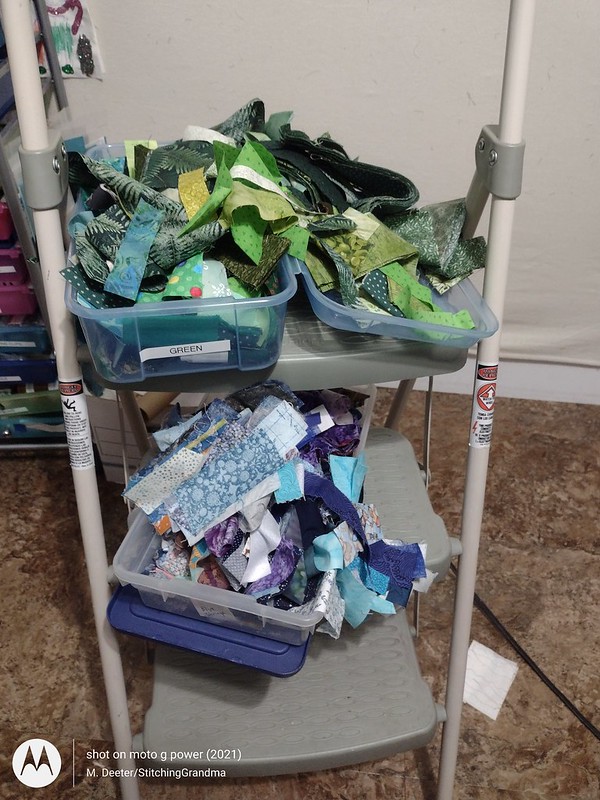
When I cleaned up after finishing those 3 quilts, I still had a lot of “leftovers” hanging around the sewing room, and I put as much as I could fit in my own string block boxes. Well, the blue and green were over flowing, and I didn’t want to dig into anything too serious, so I made a bunch more string blocks, trying to empty the green and blue bin. Truth be told, it didn’t make a dent in the volume! I work on 6″ string blocks, using old phone book pages. At our bee in February we were doing 8″ blocks, using paper from kids tablets at the Dollar tree store. Here is a peak at the fun!

Green and Blue shoe boxes
My shoeboxes for strings fit nicely on the stepstool, close at hand!
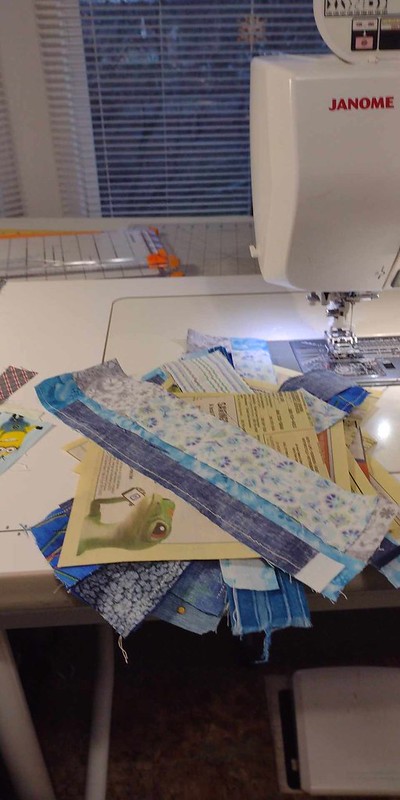
making string blocks
Working on about 6 blocks at a time, chain sewing
String blocks
Greens and blue string blocks 6″

After a couple of days of sewing string blocks, pressing and removing papers, I laid them out for a final photo and then put them all away. String block sewing are what I call “mindless sewing” and I had enough for the time being. I cleaned the sewing desk and table and machine and vacuumed up all the debris that eventually falls, paper bits, threads etc. I needed to pack up for my next gathering of the Queen Bees, where we were going to use Blues, Greens and black and grey for string blocks. We worked on them on Tuesday this past week, and I brought home more things to finish! I think we will sew string blocks at our next bee gathering too.

That’s it for me, all the small projects. Truth be told I haven’t been to my sewing room at all this week, other than to pack up and to unload my gear for going to the bee.

If you like string blocks, you can use paper or a pellon product for stabilizer. If using paper, I recommend you switch to a new needle when you are finished sewing the blocks. It’s easy to remove the paper from the blocks, where pellon stabilizer remains in the quilt, and the seams.

Bonnie Hunter has great information on her blog and in her books on sewing with strings. One of her books is called String Fling, and she may have a better explanation than me. I think of a string as anything from 1/2 inch to about 3″. I sort mine by color into shoeboxes. I like the look of varying widths on my blocks.

If you are tidy, you can get a lot into a shoe box. I like to “straighten them out” when I put them in the box, and after I am finished working in a set of boxes. To take strings with me to the bee, it was easier to transport them in big ziplock style bags.

What’s happening in your sewing room?

The Best finish of 2023 ! Talkin’ Turkey -2016

note – PHOTO intense ! Warning!

When writing about my finishes in 2023, the greatest finish of all (in my opinion at least) is my Bonnie Hunter Quilt, Talkin’ Turkey. The pattern is available in Bonnie’s book – STRING FLING .

I started this quilt in a class at Helping Hands Quilt Guild in Dover DE in the fall of 2016. (Lots of great chatter about that class here – https://stitchinggrandma.wordpress.com/2016/09/29/fun-with-bonnie-hunter/ )

I’ve been a “Bonnie” fan since I first came across her in 2012. She ( Bonnie Hunter ) has a very prolific blog and has fed my addition to scraps. Check out her blog posts at https://Quiltville.blogspot.com// . When I heard Bonnie was coming to Dover,Delaware, I joined the guild there 2 years beforehand so I didn’t miss out!
When the time came, Bonnie gave a lecture and taught 2 days of classes. It was during that class that I learned the 1/4″ setting on my Janome 8900 was NOT accurate. I remember the frustration and the rippin’ of stitches; and buying a little measuring tool (https://quiltville.com/shop.html#!/Seam-Guide-3-Pack/p/57454042/category=13129325 ) on the spot from Bonnie. I used her trick of building up a tape line or using a hotel key card to ensure my fabric was lined up properly. Over the years I have used that little tool countless time, at quilt bees, helping others find the true quarter inch. It is so important to have your blocks “measure up”.

Now, back to the story…..I made that fantastic quilt, all but borders, as is my norm. Then I got busy, as usual, with some other wonderful project, and Talkin’ Turkey hung, front and center on a hanger, on my fabric shelves, along with ALL the pieces of the border hanging there too. I remember taking it to a retreat in 2018 or 19, but it was so big, there wasn’t enough room to lay it out and get those pieced borders attached.

So, Talkin’ Turkey waited, and was the FIRST of my UFO quilts I worked on finishing in 2023. On April 10th, I finished attaching the 3 pieced borders. (Remember, they were all made, just hanging on the hanger.)

Border 1 is flying geese
Border #1 – flying geese
pieced border #2 is string blocks
Border # 2 was made from String Blocks
Pieced borders Talkin' Turkey
Border 3 – another round of flying geese
Attaching border 3
Border 3 going on

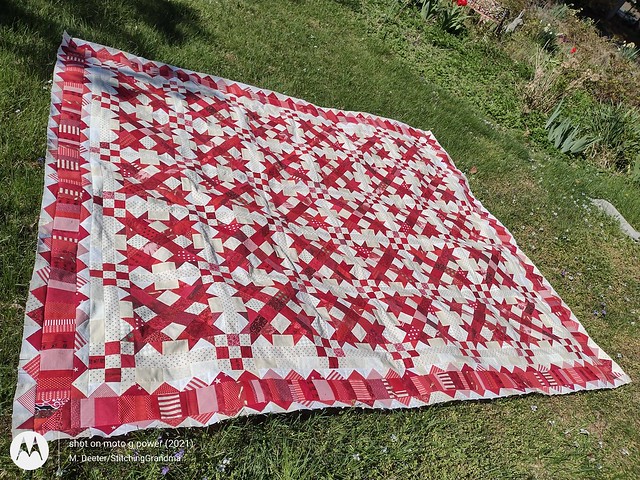
And finally – it made it outside to the sunshine for a photo !

Pieced borders attached to Talkin' Turkey
Pieced borders attached…after 7 years!

After I took that picture I knew the quilt “needed” to have just one more border to finish it off; and I took a strip of those string block shopping, and found the “right” red fabric for the final border.

I shared this photo on social media and my wonderful sister in law, Carolyn, (also known as the https://www.oneblockwonderwoman.com//) offered to quilt it for me in exchange for some machine embroidery work . What a deal! (I wrote about the embroidery project here – https://stitchinggrandma.wordpress.com/2023/06/21/fun-embroidery-machine-projects/ .)

The final border Talkin Turkey
I think the final border fabric really worked with all the shades of red and anchor the quilt.
ready for quilting
Ready for quilting

Once I got the embroidery project done, I packed up my quilt top, with the backing fabric and shipped it out to California; where it got in Long Arm Line with my sister in law’s quilts. I ordered wool batting for this quilt and had it shipped out to California too.

While the quilt was away to be quilted, I got busy and made the binding (408″ of Susie’s Magic Binding) and the label, so I would be ready to go when it came back to Delaware. And, then I started focusing on all those Scrap Dance Quilts that needed finishing.

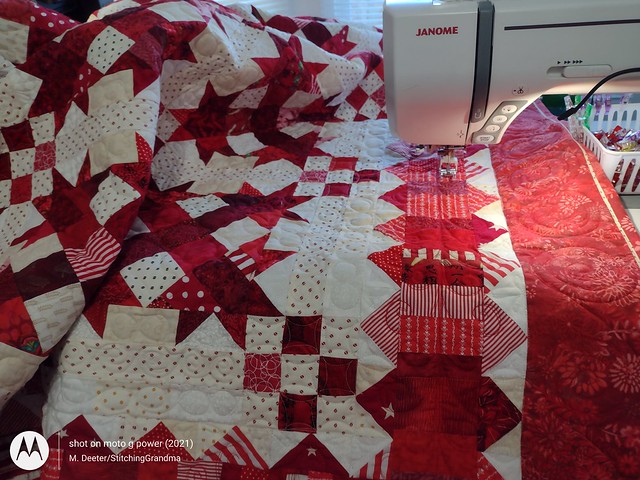
I got some “sneak peeks” of Talkin’ Turkey as it was being quilted. Greta, the Gammill long arm quilting machine, guided by Carolyn’s skilled hands does lovely work.

Talkin Turkey quilting
Hand Guided custom quilting
Stitches on my Talkin Turkey Quilt
Talkin’ Turkey took 390,468 stitches of custom quilting; all hand guided

I could hardly wait to see it, and when it came home, I was over the moon. Carolyn did such a beautiful job with the quilting and deserves a ribbon in my humble opinion. Of course, Talkin’ Turkey got in line with two Scrap Dance Quilts for binding, and had to wait until I was recovered enough to manhandle the quilt, the clips etc. Thankfully Carolyn had offered to trim and square it up for me, and that was a big blessing with my hand recovering from surgery still.

STITCHING BINDING ON THE BACK
Putting the binding on the last week of 2023

And yes, the binding was finished on Dec 31, 2023. Only 7 years for this quilt!

BINDING IS FINISHED
If you click on the photo you can zoom in and see some of the amazing quilting

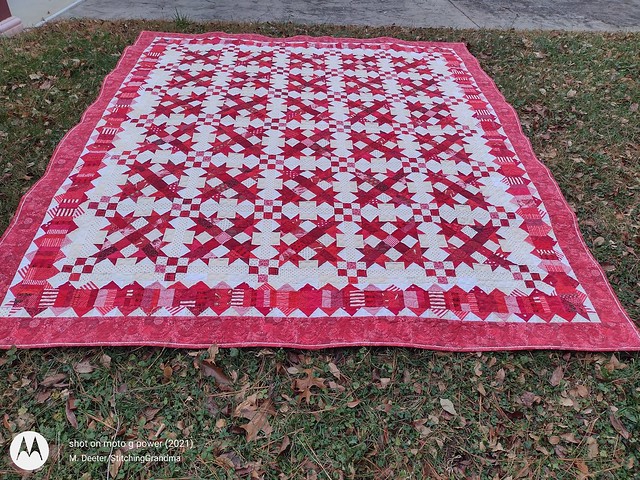
Outside for the final “beauty shot”

Talkin' Turkey 2016
Talkin’ Turkey 2016

I absolutely loved making this quilt, and have several friend whom have made it in a much “timelier” manner than me. The quilting by Carolyn, is just outstanding. She is so generous with her talent and kindness to me. Her quilting really sets the block elements off. Making the quilt reinforced my love of string blocks. The final size finished was 90 x 102.

So, that’s my final quilt report for 2023. Finishes of UFO’s included – Scrap Dance Minuet 2019; Scrap Dance 2 Step 2017, Scrap Dance Twist 2020, Scrap Dance Tango 2016, Scrap Dance Quadrille 2023, Talking Turkey 2016. Of course, if you have followed along you know there were lots of embroidery projects and smaller quilt projects and other sewing project over the course of 2023. Take a look back over 2023 for blog posts about all of these projects.

Now, time to move on to those “small quilts” that are still on hangers. Watch this space…there are several in the line up waiting for borders and quilting. One or two might be from classes I took about the time I started this blog in 2012 or 2013! More to come, but nothing that has to go out for long arm quilting.

How is your “backlog of quilts” ? Are you keeping up with a UFO Challenge? (Not me, just my own personal goals, as the “list thing” intimidates me!)

Happy quilting!

Another Long Term Project Completed

Greetings readers. I’d like to share another of my “long term” projects that has been completed.

I started this at a quilting retreat in February 2014. The pattern is called Summer in the Park and was something that Missouri Star Quilt Company shared. The video linked shows them using jelly roll strips.
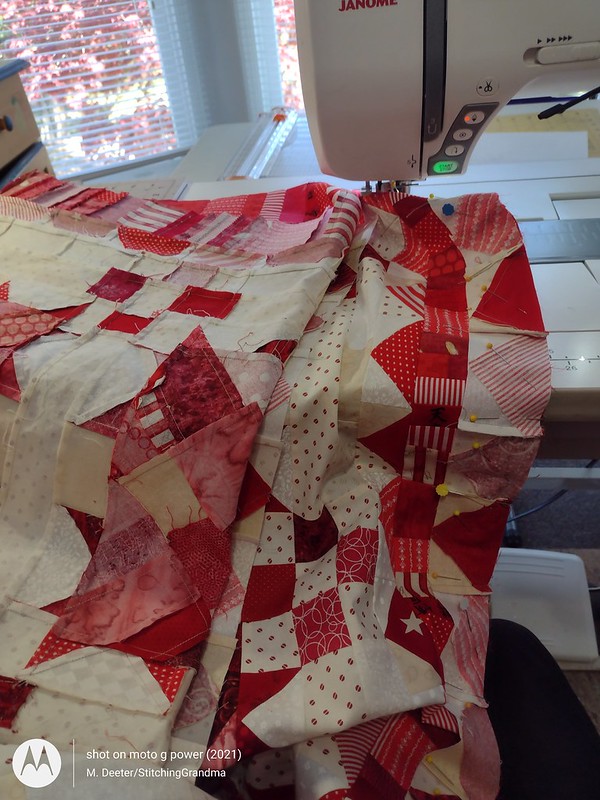
I had fun picking out the fabrics, using yardage. A guild member got us started, and it was nice to have some guidance, as I was still fairly new at making quilts. In the month following our retreat, I made a BUNCH of blocks. You might have seen my posts about the project here. I got the top put together in a reasonable amount of time, all but borders, which is my normal situation. I had put borders on, but the fabric I used was HORRIBLE, and I ripped them off. Then, as normal, I got busy with a bunch more projects and Summer in the Park spent the last 9 years in a tote, on the shelf, in my sewing room. 
Part of my efforts to “finish what I started” over 2023 was to pull the project out, and take another hard look at it, and decide how to move it forward. Around August of 2023, while I was “racing the clock” before surgery, I pulled the quilt top out of the afore mentioned tote, and surveyed what “else” was in there with the quilt top. I looked at all the fabrics safely stored with the quilt and quickly decided on a white 2″ border and a 6″ border using some of the fabric included in the blocks. (That was my original problem with the border I put on back in 2014…the fabric, though in the same colors was not in the quilt and CLASHED terribly).

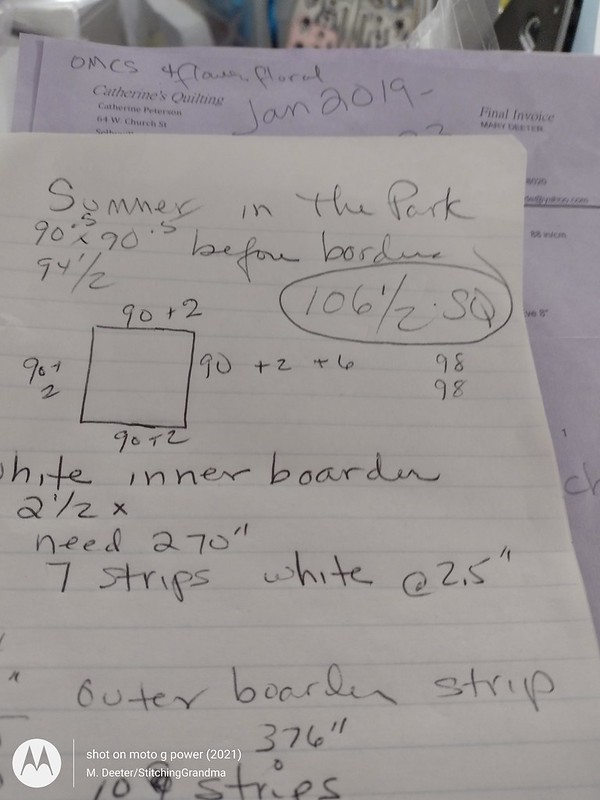
Of course, there is always some math when it comes to borders. 

Summer in the Park math
Quilt Math — do you keep notes?? 

 I had some “leftover” “not quite perfect” blocks left too, and I decided to use them as cornerstones. I don’t know why this quilt hung over my head for so long! I had everything I needed for it, right there in the container. I guess aging is part of the process, or maybe it was simply I didn’t have the skill in 2014 that I have today. 

Summer in the Park
Summer in the Park – with borders – August 2023

I went through the bin of fabrics again and decided to make a pieced backing! I measured everything I had, then reached for fabrics from the stash as well to make the backing. I took some of those “leftover blocks” and added them in to the pieced backing. The leftover blocks were what I would call “oops blocks”. Something was wrong with them when I put the top together and they got tossed in the box. Now they are out of the box, and “a feature” of the backing! (Hey – my quilt – my story – giggle)

Off to the quilter at the end of August, 2024; just a little over 9 years from the time I made the quilt top.

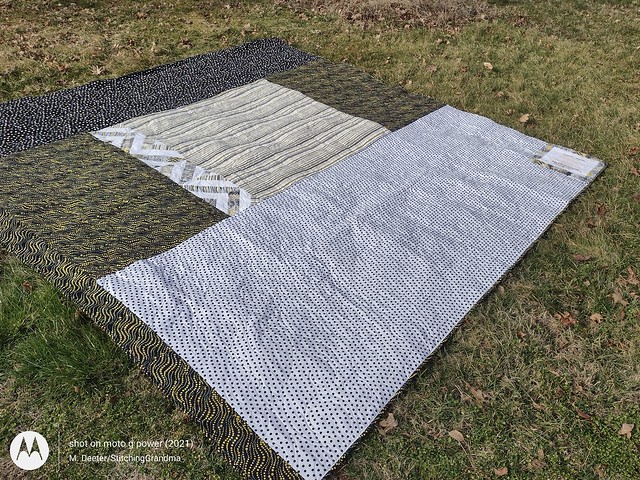
backing Summer in the Park
Pieced backing – the silver thread works perfectly on the front and back

I remember picking this quilt top up in October from the quilter, but there was NO way I was able to consider binding it with my hand in a splint. So, it went on the pile of 3 large quilts to be bound. 

Pieced backing Summer in the Park

I finally got a chance the week of New Years to sort out the binding and get it on the quilt, and get a label made. I also made a hanging sleeve for the quilt out of some of the “left over” fabric. 

I needed 440 inches of binding. I made my usual “Susie’s Magic Binding”, but this time I made the flange just a “little bit wider”. My husband is always my go to for fabric decisions when I can’t “make up my mind”. I show him all the choices and of course, he always picks just the right one! It was his idea to make a bigger flange to put a bit of separation between the main fabric of the binding and the border. In order to do this the flange was cut at 2″, while the main fabric was still cut at 1.5″.

440 inches of binding
Susie’s Magic Binding, modified version. 
Summer in the Park label
Quilt Label for Summer in the Park. Stitched on my Janome 11000

I consider the quilt DONE BEFORE the 10 year mark, because the binding was on by the 31st of January. Spent a few hours in the last week, hand stitching the edges of the label and the hanging sleeve. Then I had to wait to get the final round of photos for a “dry” day. Not warm, just dry!

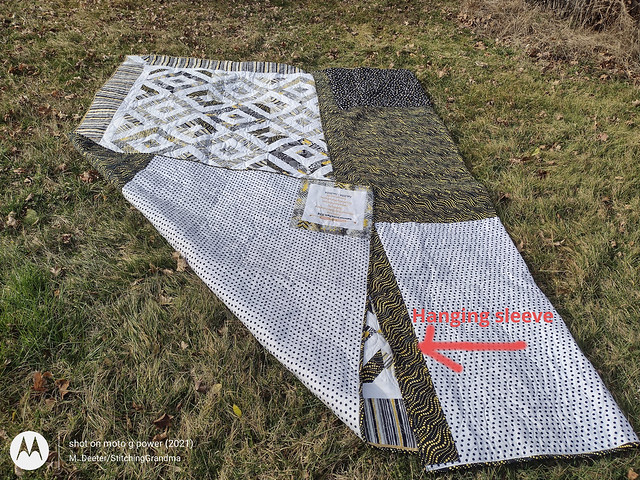
Pieced back Summer in the park.
This is the pieced back. Hanging sleeve on the left side of the photo. Final dimension 104″ x 105″ It was “supposed to be square” but something happened in the trimming. Hmmmm….In the future, I will do my own trimming.
Summer in the Park 2014
Front of Summer in the Park 2014
Quilting pattern Summer in the park
Close up of the quilting pattern done by Catherine, the long arm quilter I used (Yes I see those points not matching up!!)
Front and back of Summer in the park
A quick peek of the front and back. The polka dot fabric (white with black and black with multi) were not in the quilt front anywhere. It works on the back I think .

I have one more OLD project that is finished to share on the next blog post! It is a real relief to me to finally get these quilts across the finish line and put to use. Of course, this black & gold and white matches nothing in my house, but hey, I like it !

Are you finishing up old projects or doing a UFO list at your guild?
I still have lots more UFO’s but I am biting them off one chunk at a time!

Scrap Dance Tango 2016 is FINISHED

I’m still wrapping up “finishes” on the blog from 2023. I got busy over the holidays and didn’t post about this one. Scrap Dance Tango was started in 2016, as a mystery quilt. The pattern was created by Carole Carter, on her blog From My Carolina Home. The pattern is still available for sale on Carole’s blog. Here is a link. https://frommycarolinahome.com/my-patterns/

During 2016 I wrote several “progress posts” about this quilt, and the very first post in the series is here – https://stitchinggrandma.wordpress.com/2016/01/24/scrap-dance-tango-mystery-quilt/ . If you happen to read it, you will see that there were “other” big quilts happening that year. I’ll be updating on those “other” big quilts later this month. (Yes, I was crazy with multiple KING SIZE quilts going on at the same time!)

Now, given it is January of 2024, and I started it in January of 2016, I don’t want that to scare someone from buying the pattern. It is a GREAT pattern, and can be made in various sizes. I made the top in 2016, all but borders, which is what I do. Scrap Dance Tango went on a hanger in my sewing room because another mystery quilt by another blogger caught my interest. And as time and more mystery quilts came and went, it got deeper in the hanging stack. 

I committed myself in mid spring of 2023 to getting some of those quilts FINISHED, and this is the LAST of the Scrap Dance quilts to cross the finish line. 

When I got ready to work on it, I took it off the hanger, measured it, then made a narrow white border to frame the piece work, and measured again. I wanted to add that “last border”, and I opened my cabinet and pulled out a very long “already pieced” string border. 

String borders are a favorite of mine to sew when I just can’t focus on sewing anything else. I bet that stack of borders was sewn at least 2 years ago. I had several stacks and this was the “least” pastel group of the bunch. By July 29th, 2023, the borders were on and the wide backing had arrived, and I had delivered it to the long arm quilter, Catherine. This was one of the biggest quilts I had taken to her at 100 x 116. (Those extra borders I had to have….well…sigh….it all worked out).

Ready to be quilted Scrap Dance Tango

I picked the quilt up a month later, and it went into the queue to be trimmed and bound. My surgery and recovery kept me from taking it “out of the stack” until December.

After trimming and binding it measured 98 x 114. I made 455″ of binding, using my favorite technique – “Susie’s Magic Binding” creates a flange. I use the method here – http://www.52quilts.com/2012/05/tuesday-tutorial-susies-magic-binding.html

I made the label on my Janome 11000 machine. I enjoy making “big labels” that credit the designer and the quilter too.

Scrap Dance Tango 2016 label
Label and binding complete

Usually I wash my quilts before I photograph them, but this one makes me nervous. There are some hand dyed fabrics I used in this quilt and I am so afraid they will bleed like crazy. With all that white in the background, that purple hand dye scares me. So; might be one of those quilts that “doesn’t” get the lovely crinkly look. 

As usual, I took it outside for a photo shoot when the light was “just right”.

Scrap Dance Tango 2016 FINISHED

It feels great to have ANOTHER finish for 2023, even though I am late blogging about it. I love looking at this quilt from different angles and seeing the secondary patterns.

Scrap Dance Tango 2016  quilting in border
Zoom in on the above photo to see some of the quilting in the border

It really is a 2 block pattern, but it looks very complex. My favorite part about making it was all those half square triangles. :) They have become my favorite unit in quilting to make. Everyone has their “favorite method” and in that post from 2016 I show mine!

Have you got any big projects hanging around? I have a lot of friends who are “start to finish” quilters. I admire that trait. I have to say, it takes a big weight off of me having these projects finally finished. I know I have reached my “big quilt” limit, and will be working much smaller projects in the future.

I’ll be posting about another “vintage” top next time. I’ve got 2 more to tell you about! Until next time, may your bobbin last until you are finished!  

Safelight Project 2024 needs your help

My friend Carole, From My Carolina Home is in need of help with the Safelight Project 2024. This is a project that she undertook for at least the last 8 years. Safelight is a place for women in desperate situations, a safe harbor so to speak, as they leave abusive situations and start life on their own again. 

You can read all about how you might be able to help in some small way, and what a monumental task Carole is taking on AGAIN, this year. 

blog address – https://frommycarolinahome.com/2024/01/07/safelight-project-2024/

There are LOTS of different ways you can help, financially, making cards of encouragement, sewing. Please visit Carole’s blog today, and do subscribe for updates.

December Projects in the Sewing Room

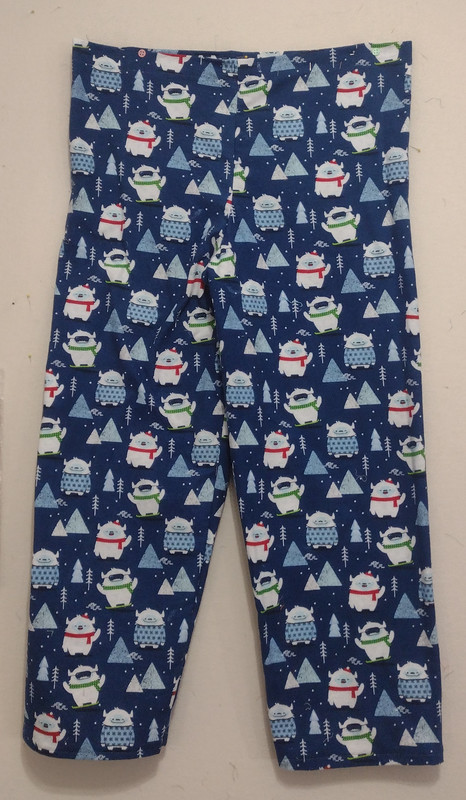
I couldn’t talk about any of these projects until after the gifting in December. When I finally determined I was able to get back to sewing, I surveyed the grandkids and asked if they would be interested in the annual Christmas flannel pajamas. I made a road trip to the nearest JoAnn Fabrics to make my flannel selections. ( I really have a hard time ordering on line from JoAnn’s because I need to “feel the softness” of the fabric.)

Purchases made, and flannel home to be “pre washed/pre shrunk” before sewing! The “cuddle flannel” at JoAnn’s is very soft on both sides of the fabric.

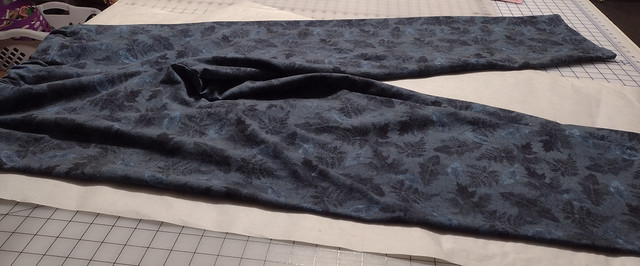
The first pair of PJ bottoms I made a mens size small. These were intended for my teenage grandson. But when his 2023 measurements were given, I determined they would be too small for him. Turns out, he had shot up several inches in the last year. I had to make a quick decision on purchasing replacement fabric, on-line from JoAnn’s and proceeded with the remaining items.

Size Small pajama bottoms
Yeti fabric, Men’s size small ((without the elastic/waiting on measurement)

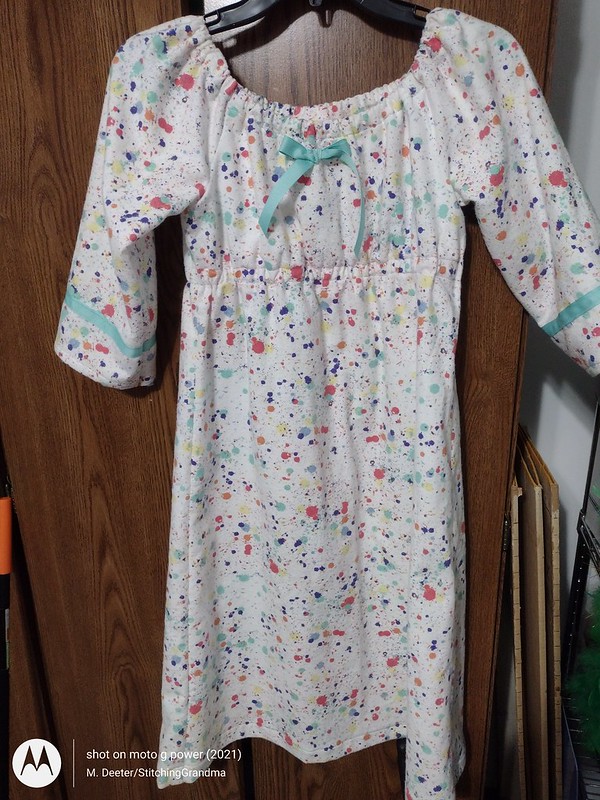
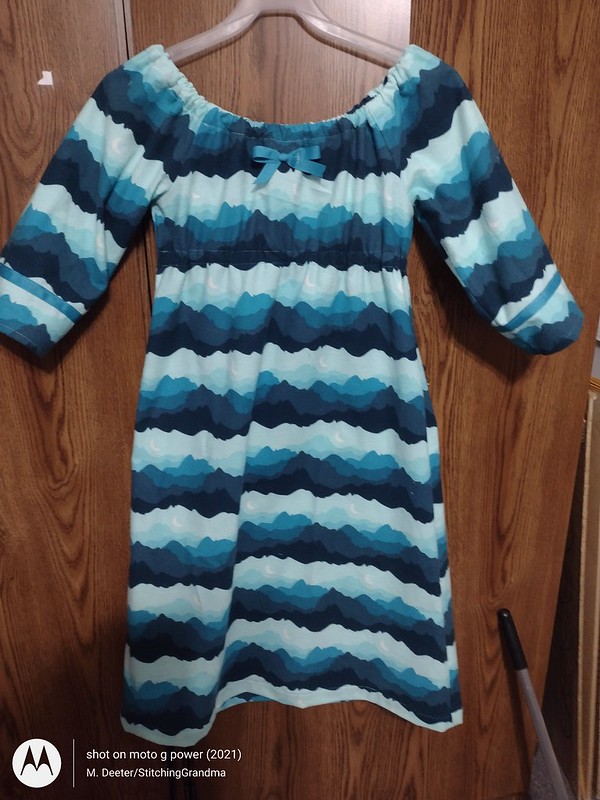
Next on my list were 3 nightgowns, 2 size 10 and one size 14. Because it was a pattern I had made previously, they only took me a few days to make.

size 10 nightgown
Size 10
size 10 nightgown
Size 10
Size 14 nightgown
size 14

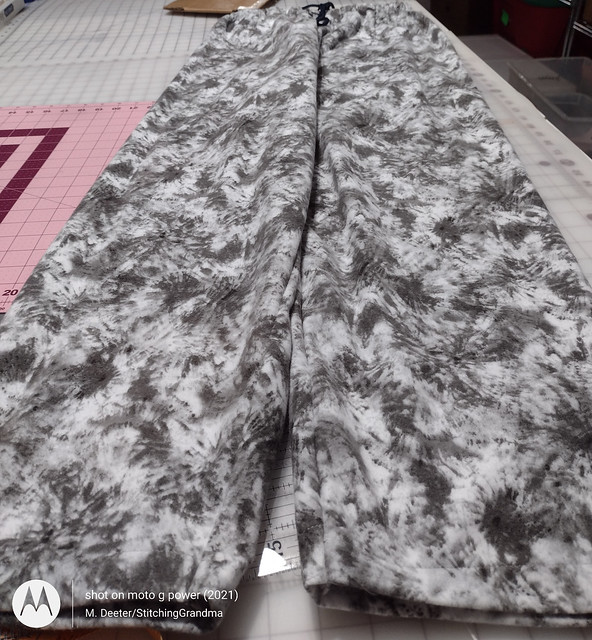
My on-line re-order of flannel became a cause for concern after several days, while the computer just kept telling me it was “processing” . After about 6 days, I made another road trip (50 miles each way) to JoAnn’s for a back up purchase. Once that fabric was in hand, home & pre washed and pre shrunk it didn’t take terribly long to get the remaining PJ bottoms made. In fact, I made 1 extra pair for a visiting college student who had once been a foreign exchange student with my daughter’s family.

Christmas PJ's for student
Men’s size Medium
Christmas PJ's for Grandson
Men’s size Medium

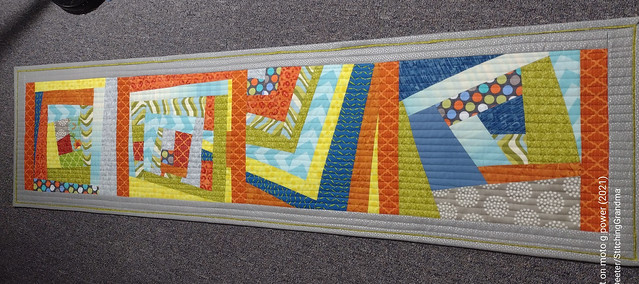
In between nightgowns and pajamas, I worked on a couple of table runners for my two daughters. The one below is comprised of blocks made in a class almost 10 years ago. The class was taught by Heather Kojan, Baltimore Modern Quilt Guild. I added a bit to each block, trimming to size and set with orange sashing that worked well with the other fabrics in the Modern Log Cabin blocks. I was so pleased to find in the project box plenty of fabrics to work with, including the silver fabric for borders and backing and “just enough” of that green to use for my favorite binding with a flange (aka Susie’s Magic Binding). I had enough in the project box to make 8 coasters to go along with the table runner.

Table runner pattern by Heather Kojan
Modern table runner aproximately 16×60″
Wine bottle table runner
Wine bottle table runner 16 x 88″

The wine bottle runner is from a pattern in a Mc Calls magazine several years ago. A friend of mine made several last Christmas I decided I needed to give it a try. I started collecting the batik fabrics in early spring and in June cutting out the wine bottles during a quilt bee. I was only able to work on it during our quilt bees and it took me some time to cut them out and put together. This project was also a case of going to Joann’s for just the right fabric for the back and binding.

All the gifts finished in time for wrapping and Christmas. And that “spare” pair of pajamas, I made a wild guess on the waist size and gave them to my daughter for “appropriate distribution” to one of the smaller kids. (I call it the spare pj’s – if it fits you, it’s yours, if not…pass along to your sibling.)

Oh, and that online order from Joann’s……finally showed up right before New Years. It’s now all washed & dried and up in the sewing room for Christmas madness sewing 2024! I usually start a lot earlier gift sewing, but I was out of commission from September to the end of November.

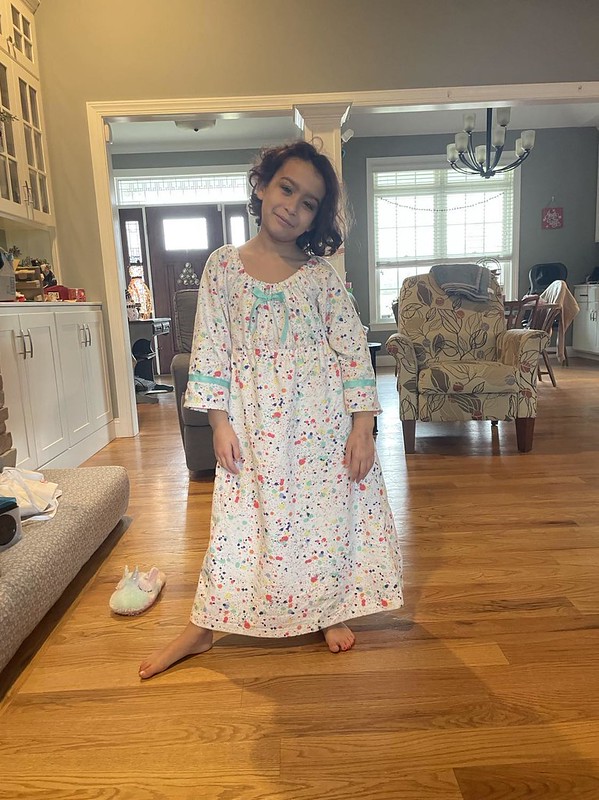
I keep wondering how many more years I can sew for the grands, but when I see this child enjoying her “cozy” nightgown, it makes it all worthwhile! 

In her new nightgown

When do you plan your holiday gift sewing? 

Back to the Sewing Room with Scrap Dance Quadrille 2023 – A FINISH~!!~

What a great ending to 2023 and a good start to 2024. Those of you who have followed me for a while know that a lot of times I leave off when the top is completed. In early 2023, I made it a goal to take all my Scrap Dance quilt tops off of hangers and move them to the finish line! I finished Scrap Dance Quadrille – 2023 in the SAME year I started it, which was a great thing in my opinion. 

If you have been following along, I had surgery on my dominant hand in September, and have been pretty much laying low in the sewing room. I had Occupational Therapy 3 times a week starting just 4 days post op.  My personal goal with therapy was to get back to rotary cutting. 

I had quilted 90% of my Scrap Dance Quadrille before surgery in September, and because it was a small top, (throw size), I first worked on finished the quilting. I needed to be able to lift and carry the bulk of the quilt and rotate at the machine

stitching the borders on Scrap Dance Quadrille 2023
Getting the border stitched

Trimming the quilt really took all the strength I had in my wrist and hand, and my dear husband helped me greatly. What would normally take 45 minutes took a couple of hours, but I got it trimmed. I tried two methods of cutting. One was using the Fiskars ruler with cutter built in, and the other was with the Martelli rotary cutter. My strength in my wrist had diminished while being confined to a brace. Once the size of the brace was reduced and I could bend at the wrist, I gradually gained some strength.

Once that was done, I was ready to give cutting binding a go. Letting my hand rest for a couple of days, I moved on and used the Martelli rotary cutter for the binding. 

binding fabric and piping fabric Scrap Dance Quadrille

At the end of November I was released by my surgeon from therapy and to start getting back to normal, no brace! My number one goal was to be able to rotary cut. I worked really hard to gain strength back in my hand and wrist and can report now that I had success rotary cutting. It wasn’t pretty at first, but gradually I gained strength and control. 

Binding the Scrap Dance Quadrille 2024
Scrap Dance Quadrille 2023 – Susie’s Magic Binding

Taking things slowly I stitched the binding to the back of the quilt, along with the hanging sleeve and label. 

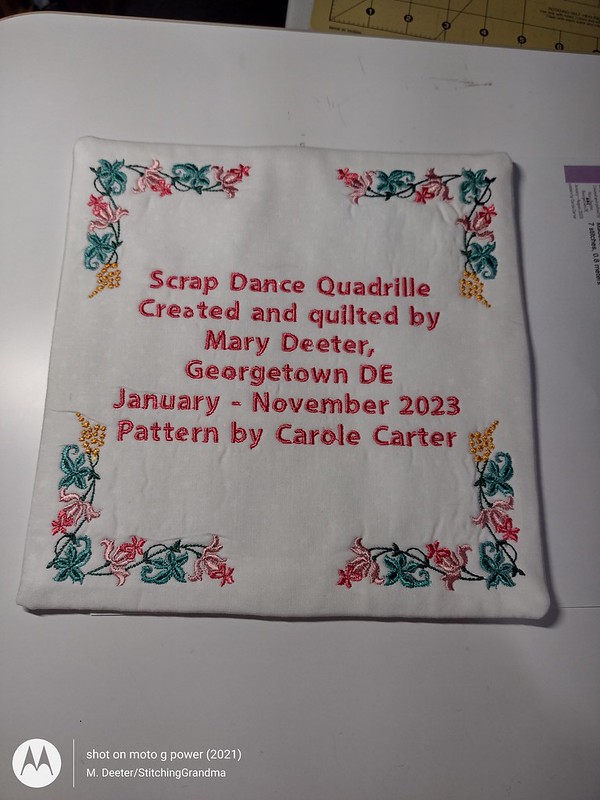
Quadrille label
Label made on my Janome 11000 sewing/embroidery machine

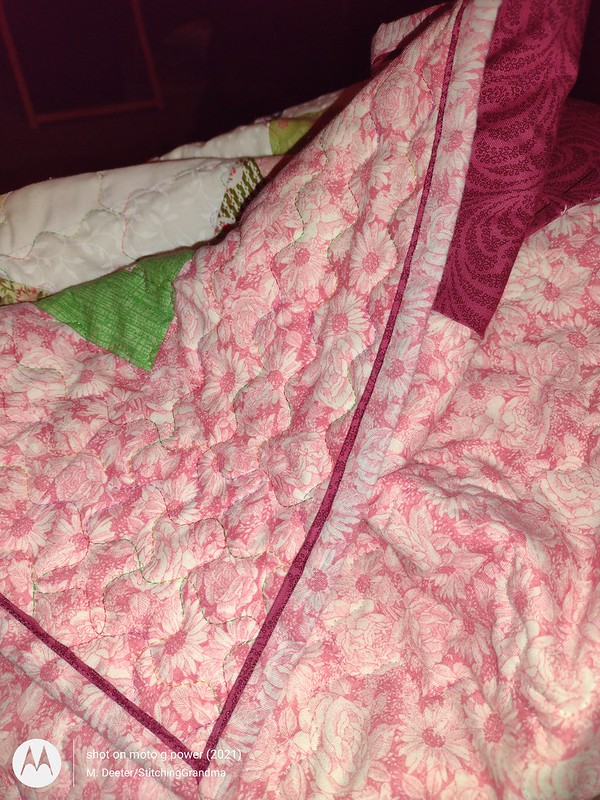
The next day I pressed the binding toward the edge of the quilt, and turned it for top stitching. I like to fully clip the binding before going to the machine for the final stitching. Squeezing those clips, with my thumb and forefinger was a lot of work, and I knew it would take me another day of rest before doing all the stitching. The burgundy flange and hanging sleeve were caught in the top stitching process. Only a little bit of hand stitching on the label and the bottom of the hanging sleeve was needed. Once that was all done I popped the quilt in the washer and dryer. I love how it crinkles after the wash. Luckily no color bleed! 

Hanging sleeve matches the flange QUADRILLE
Flange of the binding matches the hanging sleeve on the back of the quilt

Of course, I love to take the quilt outside for a photo. 

Scrap Dance Twist and Quadrille
Scrap Dance Twist and Scrap Dance Quadrille
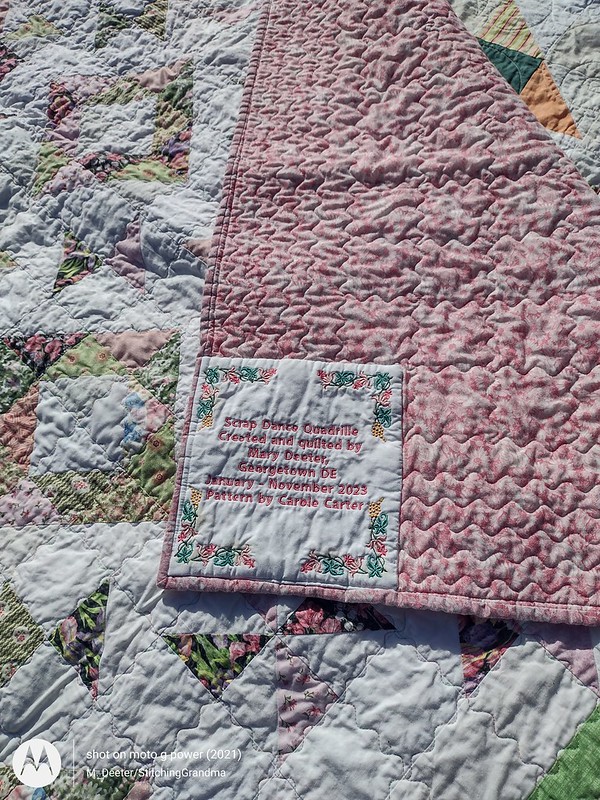
label for the Scrap Dance Quadrille
The quilting really crinkles after washing

Washed and dried, and out in the sunshine. The sunshine when I took the photo was just too bright, but you have seen plenty of this quilt with the pretty colors while it was under construction .

As a final wrap up on this quilt, here are some of the “details” – The pattern was a mystery quilt sew along with Carole Carter on her blog From My Carolina Home. The mystery ran from January 2023 to July 2023. I made the throw size quilt, measuring 66×78 with borders. It had 308″ of binding, and I quilted it on my domestic Janome 8900 sewing machine using the much loved serpentine stitch, slightly adjusted in width and length. Quadrille was finished on November 29, 2023, all but stitching down the sleeve and the label, which took me until Dec 6, 2023.

I have another Scrap Dance “FINISH” for 2023, and will feature it in my next post, so stay tuned! 

Did you have any big “finishes” for 2023? How about big “starts” for 2024? Do you do a UFO challenge every year? Do you count projects as UFO’s if you have all the fabric set aside for, but nothing is cut yet? 

My goal for 2024 is to continue working through my “hanger quilts” and get them across the finish line. Then I will delve into those projects in bins that are still just blocks, including class projects from prior years. I do like to sneak in a small project in between these older quilts, so I feel like I’m also creating something new along the way. I’ll share some of those I did in December in a future post. Lot’s of content coming as I have made my way back to the sewing room at the end of 2023.

 Happy New Year. May 2024 bring you unexpected enthusiasm for your favorite hobby, and may your creativity get a kick start this winter as well. I wish you joy as you spend time with your hobby, and peace in the rest of your life. Good health requires you to take care of yourself, so get those check ups and get your walk in too! Be well.

Some Machine Fun in the Sewing Room

Still recovering from surgery, but finding there are some things I can do. I can thread my sewing machine! I can thread my embroidery machine! So, I thought I would show you a couple of my projects done on the embroidery machine in October.

Machine Embroidery – little dresses

My friend Nancy came by and hooped some cut-away stabilizer for me in mid-October. This allowed me to do some fun stitching on dresses for my 7 year old granddaughter.

Sugar Skulls by Kreative Kiwi

There were 3 thread changes with this design. I used the 8×8 hoop. You can see in the video where I used the basting box to anchor the dress. I chose to stitch on the skirt of the dress, as it was much easier to work with than the neckline or front bodice.

Dress with sugar skull
Sugar Skulls dress

I think it was a great stitch out. I color match my bobbins, so it looked great on the inside as well.

Next up was a single color design – Scary Halloween Pumpkin.

machine embroidery pumpkin
Red work Halloween Pumpkin 6 by Sew Sweetly 8×8

I did end up with one little pucker, but I don’t think it spoiled the dress.

Machine Embroidery Dish towels

This past weekend I did a few dish towels. They are nice cotton / linen towels (pre-washed). This first design was from my ATW collection of “multi-line vintage coffee and tea”, design # ATWKMC0431. I used my small hoop for all of these, with two layers of cutaway stabilizer, and color matched the bobbin.

ATW design freebie
Vintage coffee

The next two designs were built into my Janome 11000 design files.

design built into Janome 11000
kitchen garden

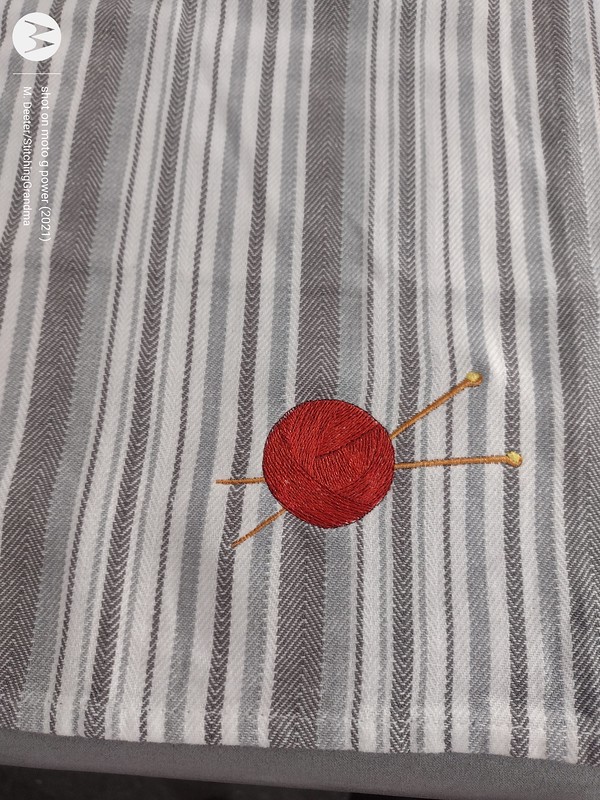
Dishtowel
Knitting motif

When I do dishtowels, I trim the cutaway stabilizer on the back of the design very closely. I chose small designs because I know these towels will get used by the recipient quite heavily. I wrapped the towels up with a nice bottle of wine for my daughter as a birthday gift. I was quite pleased with the results.

Trying to rotary cut…..

Just over a week ago, I tried my hand at rotary cutting….sigh….not quite ready yet to use any of the “stick style” rotary cutters or even the “loop” style. It was to much downward pressure on the thumb joint still. I remembered I had the red Martelli cutter and gave it a try. I successfully cut two fabric strips and some batting. The other cutting tool I am going to try is the Fiskars cutter with attached ruler. Both seem like they are worth trying if you have thumb trouble. Both cutters use your palm for the pressure you need to cut.

I made a little pouch for my husband to keep one of his accessories for model railroad operations in. That snap was tough to install, using the “wrong hand”. I knew better than to try and grip the tool to set the snap with my right hand! But, I got it done!

4 x 9 snap pouch, lined

Still not quite ready to cut binding for the 3 quilts that are waiting, but I am ready to work on labels! October hasn’t been a total washout!

With my recovery into the 7th week from surgery, I am working on strengthening exercises, and am allowed “out” of the hand brace for periods of time when I am sitting still, watching television (or the embroidery machine). Up and walking around I keep the brace on and while riding in the car. Still not allowed to drive, sigh. But, it is good to venture into the sewing room and play around a little!

The last warm day
Maple tree in it’s blaze of color

We enjoyed 80 degrees this week, and Monday was our last warm weather I think for the fall. Our grandkids are looking forward to Halloween costumes and trick or treating tonight. Hopefully, no rain!

How are your projects coming along? What is your favorite rotary cutter? Do you use embroidered towels or are they just decorative? How are the fall colors where you live?

Cuisinart TOA-95 Digital Air Fryer Cooking – One Handed

As soon as I was able, during my recovery from surgery (see previous post), I started cooking again. One handed with the non-dominate hand is tricky, but with the help of family it is possible!!

While recovering, I had to order a replacement air fryer. I’ve worn out two of the cheap ones, (both Emeril 360’s). I’ve done most of my cooking in the last two years using the oven style air fryer and when I had go back to the regularbig wall oven, I had to “rethink” how to cook. Not easy with post op brain fog.

When the Emeril 360 broke for the 3rd and final time, my daughter said “buy a quality product MOM”! I went cheap in the beginning because I didn’t know if I would like it.

Now, I know just how much and often I used it , and I took her advice. I did my research, multiple trusted testing websites and chose to buy “Cuisinart TOA-95 Digital AirFryer Toaster Oven, Premium 1800-Watt Oven with Digital Display and Controls – Extra-Large Capacity, Intuitive Programming and Adjustable Temperature, Stainless Steel“.

I picked the Cuisinart because it had a 3 year warranty, not a 90 day one like the Emeril 360! I also added an extended warranty through Amazon’s website partner. I’ve had good luck with the extended warranty process with their partner, and felt like given my track record with air fryers, I needed a longer no hassle warranty!

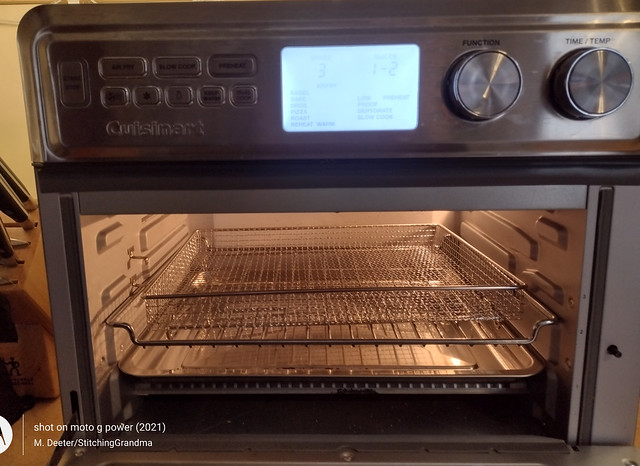
The new Cuisinart is bigger, taller and deeper, but not as wide. The fan is at the top instead of the side. That accounts for the extra height. I can get a typical 9×12 baking pan, a 12 x 12 pan or a standard muffin pan in this new Cuisinart oven. It is a good design. It sat on the for a few days until I was able to do a few things on my own.

Cuisinart air fryer
Cuisinart TOA-95 Digital AirFryer Toaster Oven

The first thing I did, on my own, was work at cracking an egg. It wasn’t pretty, but I got it done, and then managed to mix up a package of Krusteaz Cinnamon Streusel muffins.

Cinnamon Streusel muffins
They taste better than they look!

It was fairly easy and my goodness they were delicious. Hubby purchased a big box of this mix at the warehouse store by mistake. I can just verify it was a happy mistake. Since the first batch, I have made two more batches of these muffins!

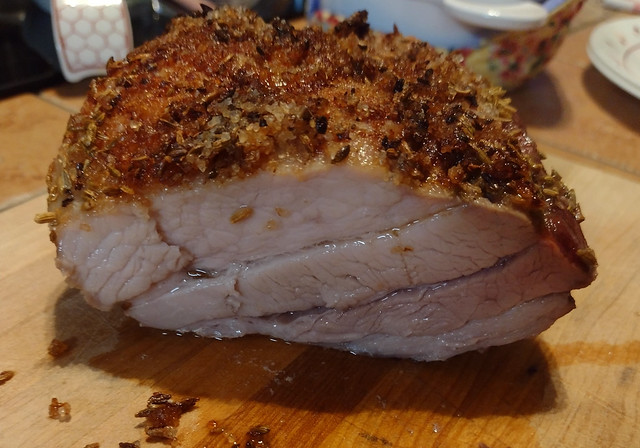
Another thing I made in the last couple of days was a “pork belly roast”. My younger sister always squinches her nose when I order pork belly on a cruise….but she has never tried it. I mastered cooking it by using the “low and slow” method, and the new air fryer does it perfectly. Lots of ways to cook it, but I used the recipe here – Slow roasted pork belly and the slow cook settings on the air fryer.

Pork belly roast
Moist and tender pork belly roast

I have started also cooking things like toasted English muffins, chicken, French fries and other routine dinner items. I do have to “adjust” slightly my temperatures and times, as this new Cuisinart runs a little hotter than the old Emeril 360’s. When cooking ANYTHING in one of these air fryer ovens, I find that I reduce the temperature by 25 degrees and the time by 25% compared to using my bigger wall oven.

There are a lot of differences in this Cuisinart air fryer from the Emeril 360. First, that top fan. Second, the heating coils have a stainless steel cover over them to prevent damaging. Third, you can decide if you want the fan on or off in a particular mode. Lastly, there is a cooling fan that runs for up to 10 minutes after cooking concludes. There is no PAUSE button, but there is a start / stop button. The timer does pause when you open the glass door, so your timing isn’t affected. There is no rotisserie with this air fryer, which I never used on either of the two Emeril 360’s. My husband is impressed with the quality of this one. I also am impressed by the ease of cleaning the inside, and the crumb tray at the bottom.

Cuisinart  TOA-95
13 Cooking modes

There are lots of cooking modes, and so far I have used the Toast setting (It is right above the bagel setting, but was flashing when I took the photo.). There are lots of adjustments in each mode as well.

It’s been a month since it arrived, and definitely a keeper.

Have you purchased or received an air fryer as a gift? Which do you have, bucket or oven style? What are your favorite things to cook in it?