Small Projects in 2024

My plan for 2024 is to not start any large projects, and continue to “finish” up those that are still “hanging around”. In between I will enjoy working on some small projects, and things that are somewhat “quick finishes”.

I started January off with an apron to wear when I am “running trains” at DelMarVa Model Railroad Club. Yes, I like to play with trains occasionally. My husband is the leader of the HO group, and sometimes I tag along when they need an operator during their annual open house season. I would much rather run trains than sell raffle tickets at the front counter.

Two sided apron
Reverse side of apron

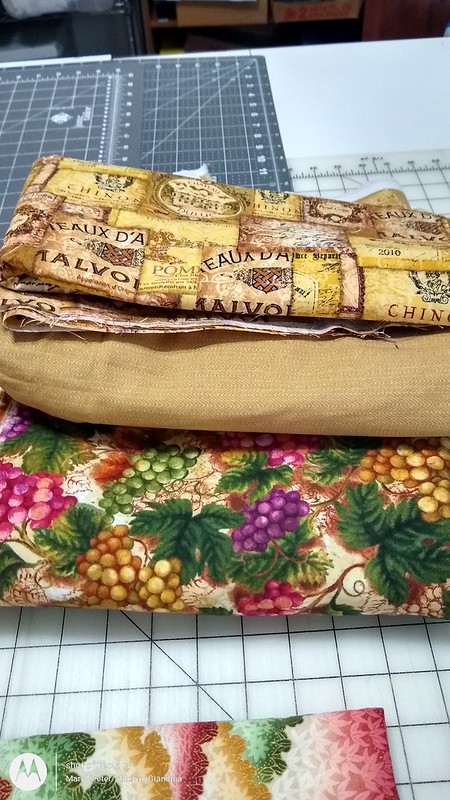
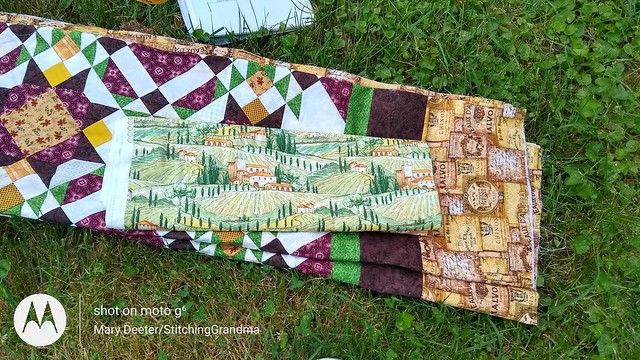
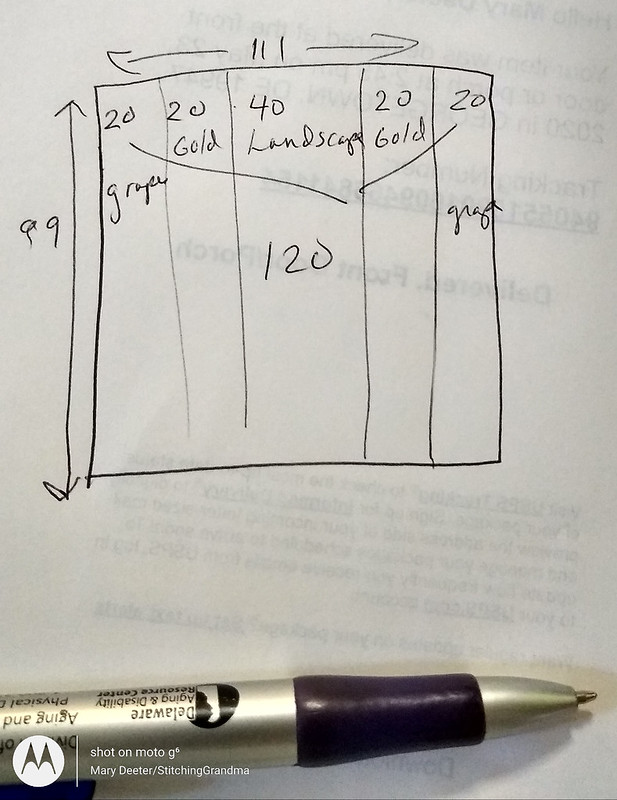
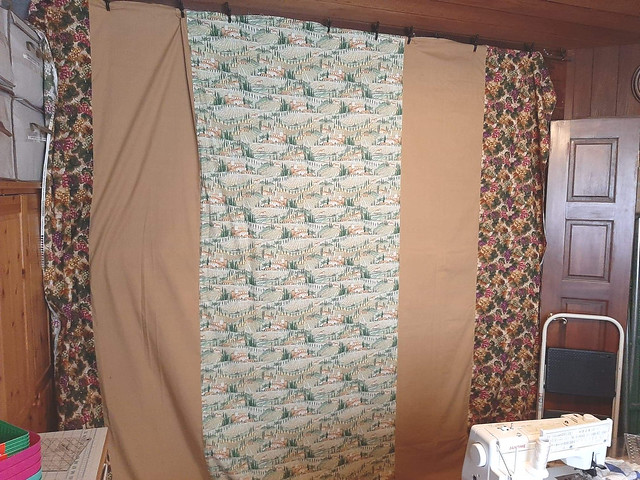
The apron is two sided with LOTS of great pockets, on both sides. They are big enough to hold my phone, some information on the digital controller I am using to run the trains, and one pocket holds my coffee cup or bottle of water. The pattern is a bit of a “mash up”. One of the other members shared her pattern with me, and then I also used some elements from a couple of other patterns used in the past. I went double sided because I was using quilters cotton and I wanted the apron to have more body or heft to it. I had an entire bolt of the track fabric and just a yard and a half of the other print with the train lines names. I was able to get it made in a couple of afternoons, and use it for the following two weekends. It worked well for me, and I am pleased with how it turned out.

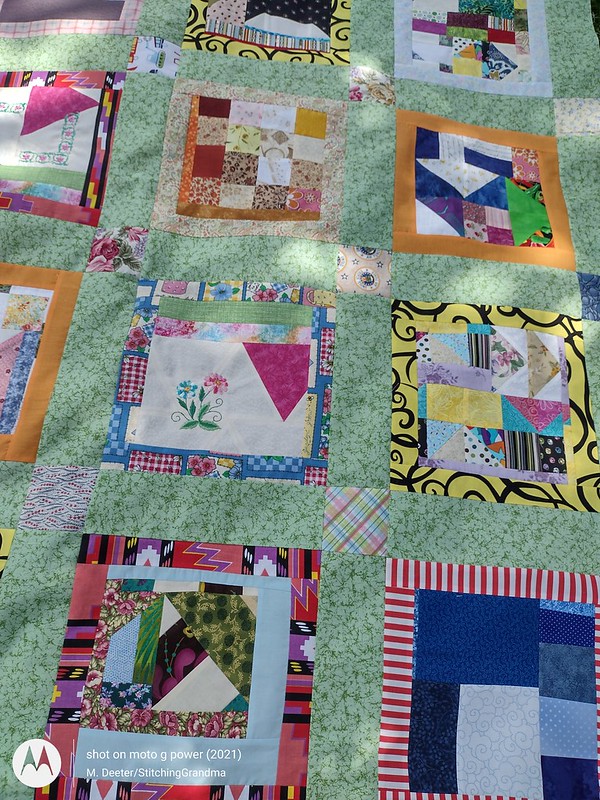
Our quilt guild, Ocean Waves Quilt Guild, Lewes DE had a community service “scrap sewing day” in January during our regular meeting time. I was assigned to a table that was making string blocks and was in my element.

OWQG String block quilt

There were 3 of us sewing and we got 48 blocks made , and partially assembled on the sewing day. I brought home the 2 halves and finished the last seam and quilted and bound the project.

String Charity Quilt - OWQG

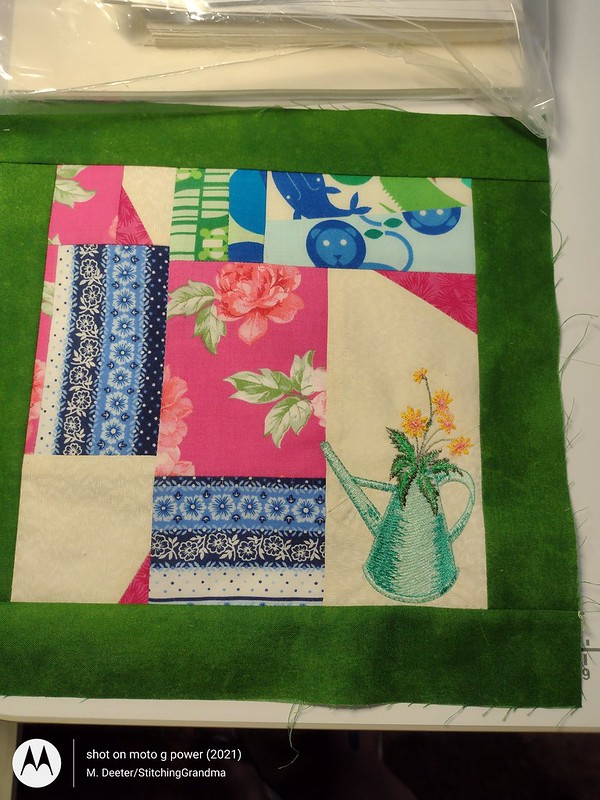
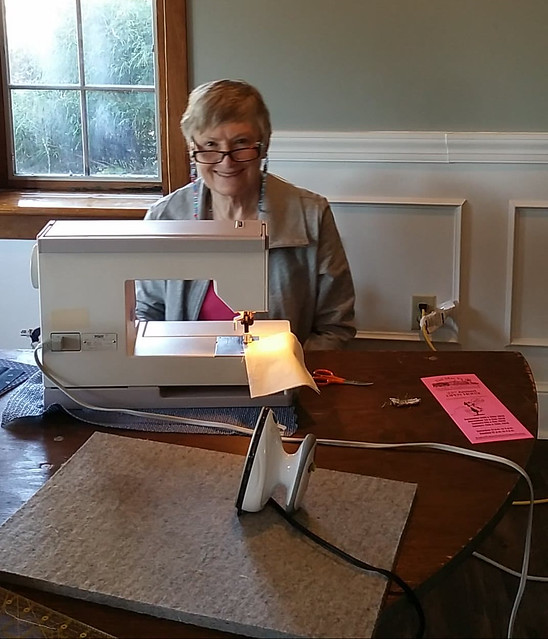
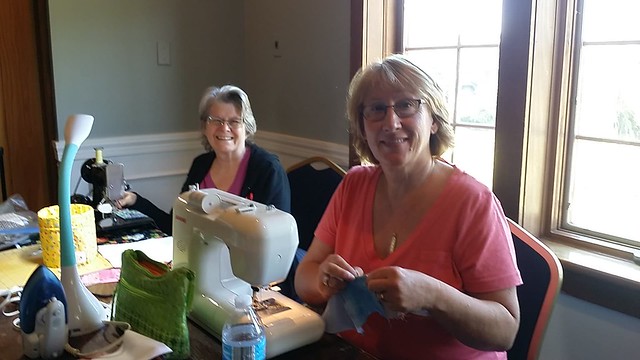
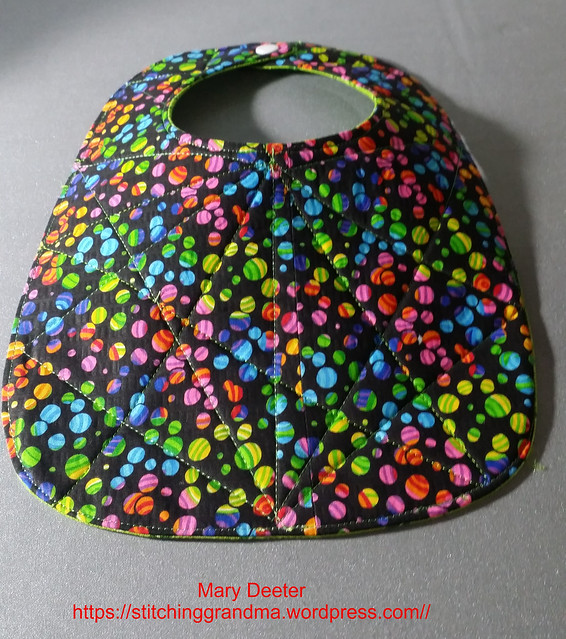
I brought home a kit for our bee, the Queen Bees to work on at our next gathering. Two of us worked on this funky 4 patch project together. (We didn’t pick the colors!!) We only got about half way thru the project before our time ran out.

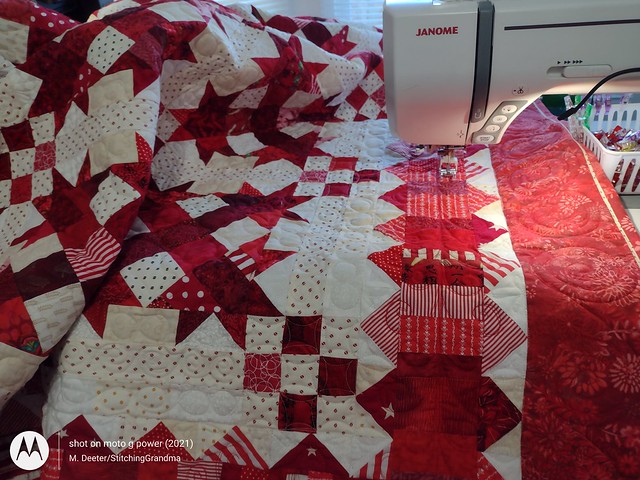
The kit had 40 charm squares and 80 of those orange check pieces, along with the white. They gave us instructions on a method to make a 4 patch using the charms. I have to report that those 5″ charms were terribly cut. PRE-CUT by Moda and they were 4 7/8 x 5. Not square. We ended up trimming every block.

Charm pack, not so square
Not quite square Charm Squares
NOT Square
4 7/8 x 5 inches does not make a square
Trimming to 4 3/4

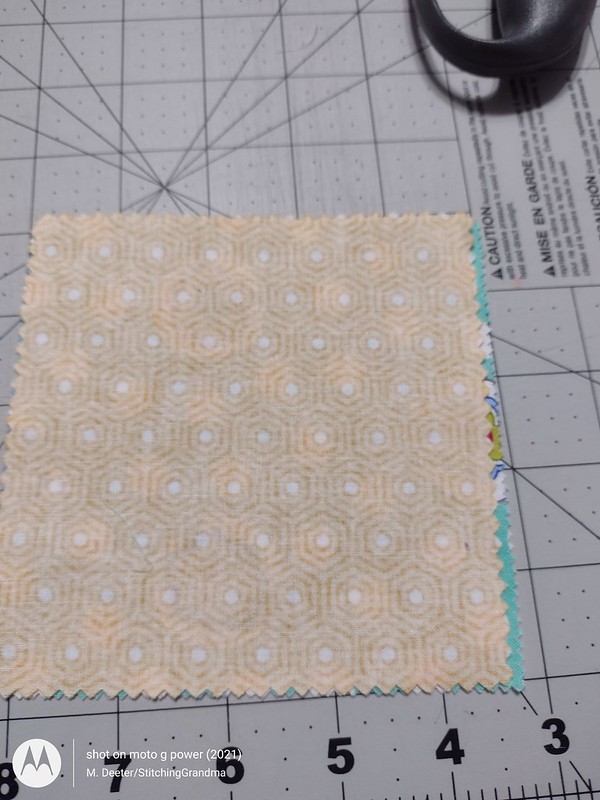
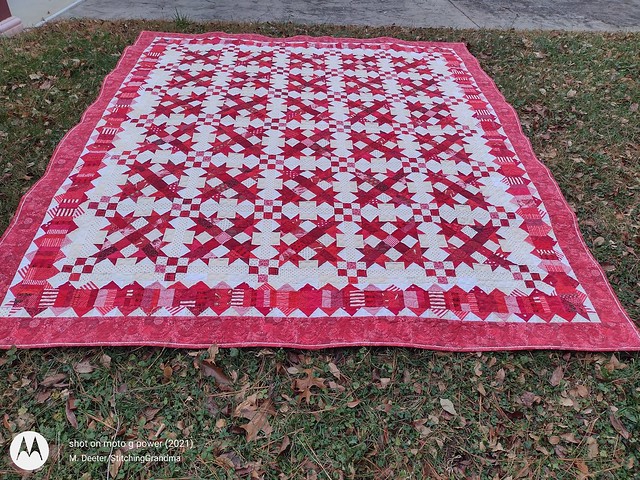
After trimming all the bits and pieces to 4 3/4″ I was able to get the blocks assembled and quilted.

Quilting on OWQG charity quilt
Quilted and bound charity quilt – Quilted with Superior Fantastico “CASHMERE” thread on top, Silver bottom line on the back.

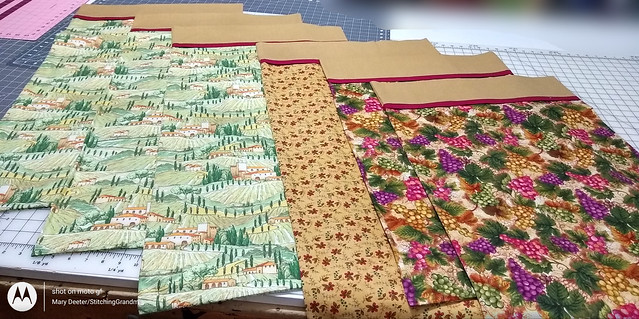
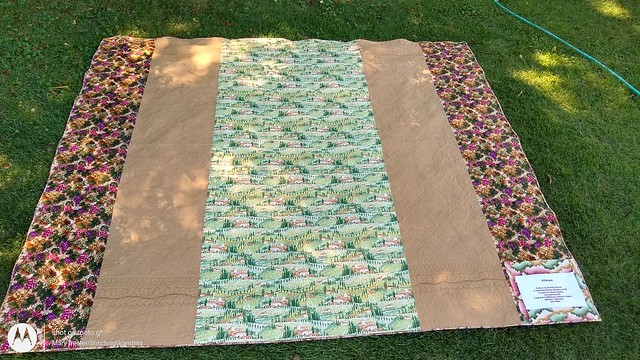
I used some pieces of leftover wide backing that I pieced together for the quilt backing, and the same for the binding.

Backing for the 4 patch quilt
Quilted on my Janome 8900 with walking foot.

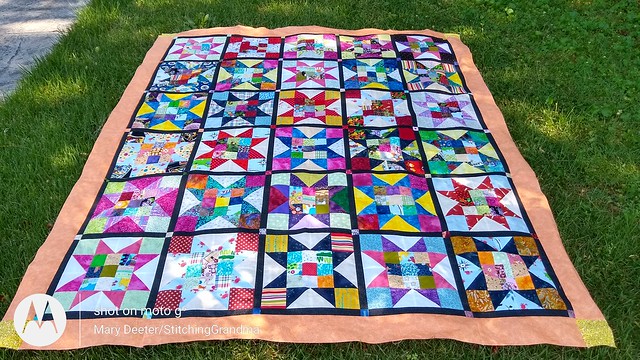
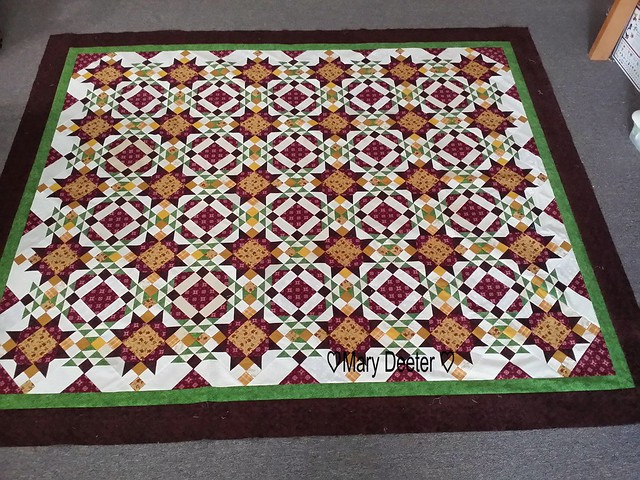
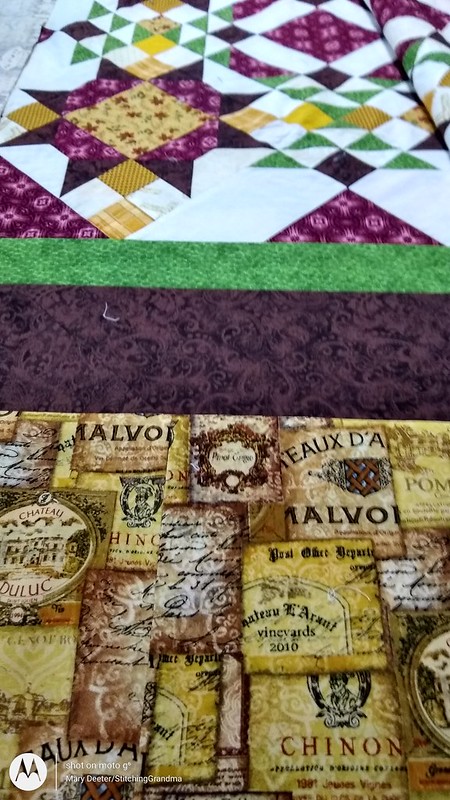
Next up was another quilt top from the Charity quilt sew in that I took to quilt and bind. The blocks had all been donated and someone else had set them with black sashing. There was a lot of poof in those blocks, but I spent some time with my steam iron and managed to get the top flattened out.

Pinned and ready to quilt
Scrappy quilt for the guild
Ready for final stitching
quilted with Superior SILVER bottom line thread (top and bottom) on my Janome 8900
Guild Scrap quilt
FUN backing fabric for this super scrappy quilt

Our next OWQG meeting is March 4th and it will be fun to hand off these 3 projects.

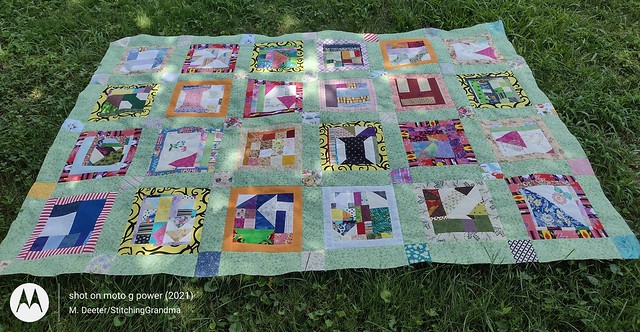
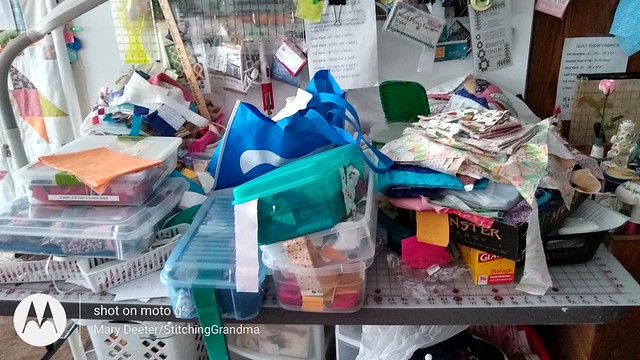
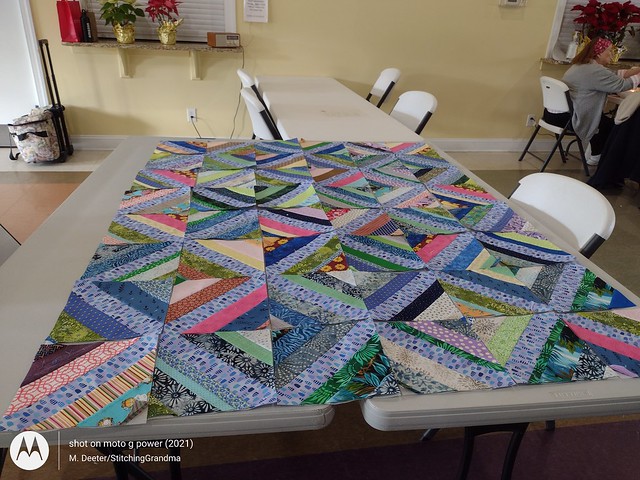
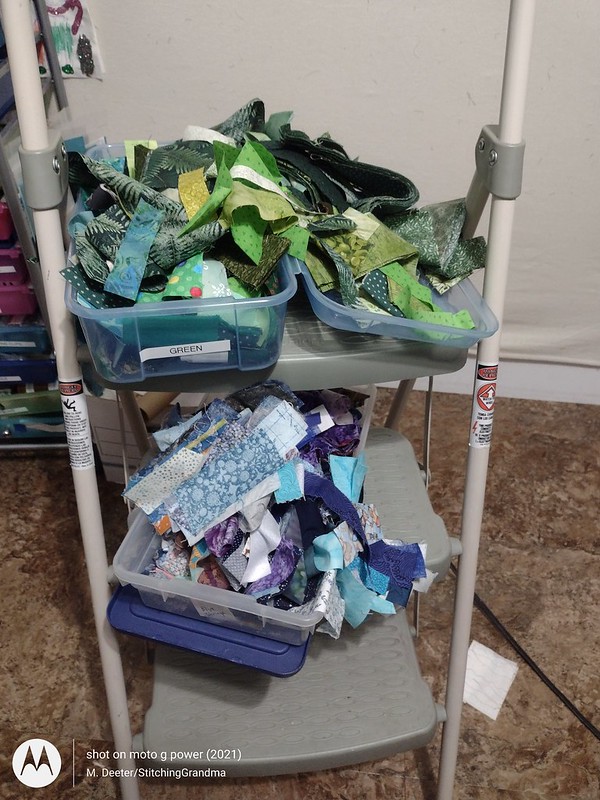
When I cleaned up after finishing those 3 quilts, I still had a lot of “leftovers” hanging around the sewing room, and I put as much as I could fit in my own string block boxes. Well, the blue and green were over flowing, and I didn’t want to dig into anything too serious, so I made a bunch more string blocks, trying to empty the green and blue bin. Truth be told, it didn’t make a dent in the volume! I work on 6″ string blocks, using old phone book pages. At our bee in February we were doing 8″ blocks, using paper from kids tablets at the Dollar tree store. Here is a peak at the fun!

Green and Blue shoe boxes
My shoeboxes for strings fit nicely on the stepstool, close at hand!
making string blocks
Working on about 6 blocks at a time, chain sewing
String blocks
Greens and blue string blocks 6″

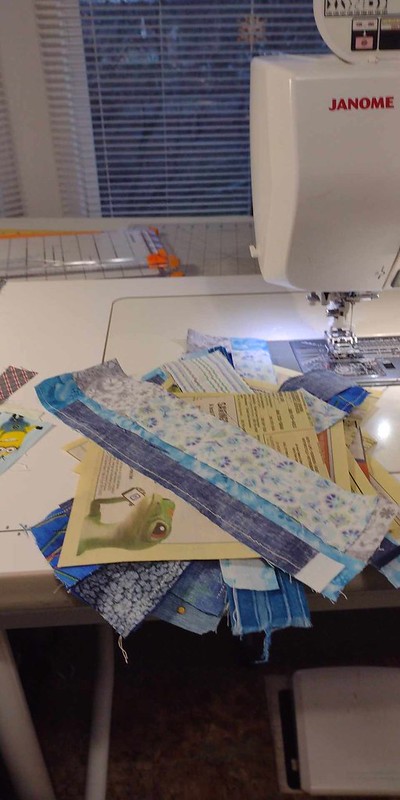
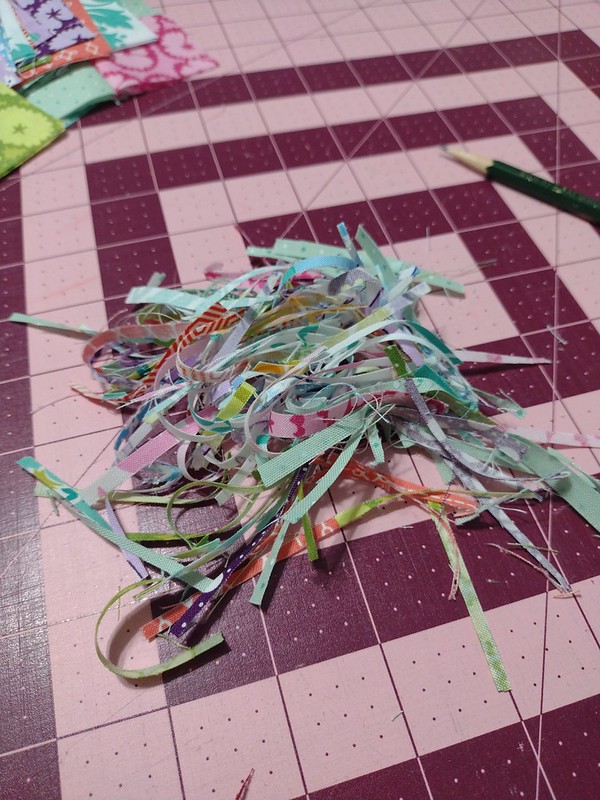
After a couple of days of sewing string blocks, pressing and removing papers, I laid them out for a final photo and then put them all away. String block sewing are what I call “mindless sewing” and I had enough for the time being. I cleaned the sewing desk and table and machine and vacuumed up all the debris that eventually falls, paper bits, threads etc. I needed to pack up for my next gathering of the Queen Bees, where we were going to use Blues, Greens and black and grey for string blocks. We worked on them on Tuesday this past week, and I brought home more things to finish! I think we will sew string blocks at our next bee gathering too.

That’s it for me, all the small projects. Truth be told I haven’t been to my sewing room at all this week, other than to pack up and to unload my gear for going to the bee.

If you like string blocks, you can use paper or a pellon product for stabilizer. If using paper, I recommend you switch to a new needle when you are finished sewing the blocks. It’s easy to remove the paper from the blocks, where pellon stabilizer remains in the quilt, and the seams.

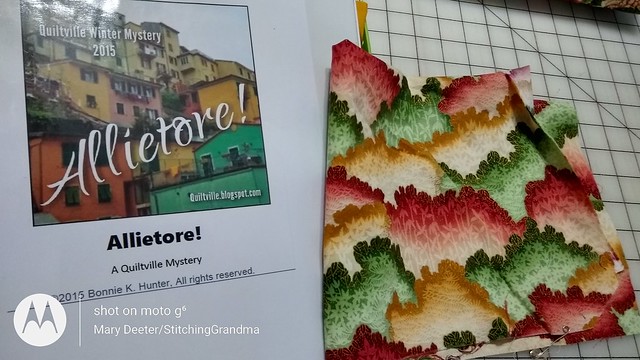
Bonnie Hunter has great information on her blog and in her books on sewing with strings. One of her books is called String Fling, and she may have a better explanation than me. I think of a string as anything from 1/2 inch to about 3″. I sort mine by color into shoeboxes. I like the look of varying widths on my blocks.

If you are tidy, you can get a lot into a shoe box. I like to “straighten them out” when I put them in the box, and after I am finished working in a set of boxes. To take strings with me to the bee, it was easier to transport them in big ziplock style bags.

What’s happening in your sewing room?

The Best finish of 2023 ! Talkin’ Turkey -2016

note – PHOTO intense ! Warning!

When writing about my finishes in 2023, the greatest finish of all (in my opinion at least) is my Bonnie Hunter Quilt, Talkin’ Turkey. The pattern is available in Bonnie’s book – STRING FLING .

I started this quilt in a class at Helping Hands Quilt Guild in Dover DE in the fall of 2016. (Lots of great chatter about that class here – https://stitchinggrandma.wordpress.com/2016/09/29/fun-with-bonnie-hunter/ )

I’ve been a “Bonnie” fan since I first came across her in 2012. She ( Bonnie Hunter ) has a very prolific blog and has fed my addition to scraps. Check out her blog posts at https://Quiltville.blogspot.com// . When I heard Bonnie was coming to Dover,Delaware, I joined the guild there 2 years beforehand so I didn’t miss out!

When the time came, Bonnie gave a lecture and taught 2 days of classes. It was during that class that I learned the 1/4″ setting on my Janome 8900 was NOT accurate. I remember the frustration and the rippin’ of stitches; and buying a little measuring tool (https://quiltville.com/shop.html#!/Seam-Guide-3-Pack/p/57454042/category=13129325 ) on the spot from Bonnie. I used her trick of building up a tape line or using a hotel key card to ensure my fabric was lined up properly. Over the years I have used that little tool countless time, at quilt bees, helping others find the true quarter inch. It is so important to have your blocks “measure up”.

Now, back to the story…..I made that fantastic quilt, all but borders, as is my norm. Then I got busy, as usual, with some other wonderful project, and Talkin’ Turkey hung, front and center on a hanger, on my fabric shelves, along with ALL the pieces of the border hanging there too. I remember taking it to a retreat in 2018 or 19, but it was so big, there wasn’t enough room to lay it out and get those pieced borders attached.

So, Talkin’ Turkey waited, and was the FIRST of my UFO quilts I worked on finishing in 2023. On April 10th, I finished attaching the 3 pieced borders. (Remember, they were all made, just hanging on the hanger.)

Border 1 is flying geese
Border #1 – flying geese
pieced border #2 is string blocks
Border # 2 was made from String Blocks
Pieced borders Talkin' Turkey
Border 3 – another round of flying geese
Attaching border 3
Border 3 going on

And finally – it made it outside to the sunshine for a photo !

Pieced borders attached to Talkin' Turkey
Pieced borders attached…after 7 years!

After I took that picture I knew the quilt “needed” to have just one more border to finish it off; and I took a strip of those string block shopping, and found the “right” red fabric for the final border.

I shared this photo on social media and my wonderful sister in law, Carolyn, (also known as the https://www.oneblockwonderwoman.com//) offered to quilt it for me in exchange for some machine embroidery work . What a deal! (I wrote about the embroidery project here – https://stitchinggrandma.wordpress.com/2023/06/21/fun-embroidery-machine-projects/ .)

The final border Talkin Turkey
I think the final border fabric really worked with all the shades of red and anchor the quilt.
ready for quilting
Ready for quilting

Once I got the embroidery project done, I packed up my quilt top, with the backing fabric and shipped it out to California; where it got in Long Arm Line with my sister in law’s quilts. I ordered wool batting for this quilt and had it shipped out to California too.

While the quilt was away to be quilted, I got busy and made the binding (408″ of Susie’s Magic Binding) and the label, so I would be ready to go when it came back to Delaware. And, then I started focusing on all those Scrap Dance Quilts that needed finishing.

I got some “sneak peeks” of Talkin’ Turkey as it was being quilted. Greta, the Gammill long arm quilting machine, guided by Carolyn’s skilled hands does lovely work.

Talkin Turkey quilting
Hand Guided custom quilting
Stitches on my Talkin Turkey Quilt
Talkin’ Turkey took 390,468 stitches of custom quilting; all hand guided

I could hardly wait to see it, and when it came home, I was over the moon. Carolyn did such a beautiful job with the quilting and deserves a ribbon in my humble opinion. Of course, Talkin’ Turkey got in line with two Scrap Dance Quilts for binding, and had to wait until I was recovered enough to manhandle the quilt, the clips etc. Thankfully Carolyn had offered to trim and square it up for me, and that was a big blessing with my hand recovering from surgery still.

STITCHING BINDING ON THE BACK
Putting the binding on the last week of 2023

And yes, the binding was finished on Dec 31, 2023. Only 7 years for this quilt!

BINDING IS FINISHED
If you click on the photo you can zoom in and see some of the amazing quilting

Outside for the final “beauty shot”

Talkin' Turkey 2016
Talkin’ Turkey 2016

I absolutely loved making this quilt, and have several friend whom have made it in a much “timelier” manner than me. The quilting by Carolyn, is just outstanding. She is so generous with her talent and kindness to me. Her quilting really sets the block elements off. Making the quilt reinforced my love of string blocks. The final size finished was 90 x 102.

So, that’s my final quilt report for 2023. Finishes of UFO’s included – Scrap Dance Minuet 2019; Scrap Dance 2 Step 2017, Scrap Dance Twist 2020, Scrap Dance Tango 2016, Scrap Dance Quadrille 2023, Talking Turkey 2016. Of course, if you have followed along you know there were lots of embroidery projects and smaller quilt projects and other sewing project over the course of 2023. Take a look back over 2023 for blog posts about all of these projects.

Now, time to move on to those “small quilts” that are still on hangers. Watch this space…there are several in the line up waiting for borders and quilting. One or two might be from classes I took about the time I started this blog in 2012 or 2013! More to come, but nothing that has to go out for long arm quilting.

How is your “backlog of quilts” ? Are you keeping up with a UFO Challenge? (Not me, just my own personal goals, as the “list thing” intimidates me!)

Happy quilting!

Crumb quilt #1

Last month I shared some of my scrap quilting efforts. Primarily, I play with scraps because I can’t bear to waste anything. In the last year or two Pat Sloan was talking about scraps and “crumb quilt blocks”. She was SO organized and orderly, making blocks from the leftover bits and pieces of the current project; storing in her baskets and roll around cart. Oh if only I had that tidy mindset! Working with scraps seems to generate MORE scraps. If you missed out on that whole conversation it might be fun to look back at her blog – https://blog.patsloan.com/2021/03/what-is-your-scrap-quilt-iq.html . Pat does a daily you-tube video along with writing a blog post daily….again I say…if only I had that mindset.

Anyway, I dug into one of my scrap baskets and started sewing crumb blocks with no apparent rhyme or reason. Just grab the next piece out of the bin, and sew. Most of what I grabbed out of the bin were leftover blocks, the reject blocks that didn’t measure up, odd bits and pieces cut away from the borders and sashing of quilts and stuff that came into the donation boxes that I couldn’t figure out how to clean up and sell back at the guild meetings. Anything that was just “too big” to put in the dog bed filling bin went into these blocks. You will see some bow tie blocks and spool blocks that went back and forth to multiple guild meetings before I gave up and determined nobody would buy them. I’m sure some of what I had collected were test blocks from projects and other peoples “oops” blocks. Some of these crumb blocks have a color family, others are not. Random piecing…stitch, press, square, stitch, press etc. Working with scraps seems to generate MORE scraps. I just sewed hunks and chunks together to make these blocks. When I got to around 9″ I stopped and squared the block to 8.5″.

Last blog post I think I showed you this –

crumb block sashing

I managed to sash all 100+ blocks that were in my crumb blocks container. Too many for my design wall all at once.

While I was going through all the blocks trying to find the right balance, I noticed I had a series of blocks with a pink triangle and a lot of white space. I decided to do a little “machine embroidery” embellishment on those blank spaces. Here are a few –

a favorite machine embroidery Crumb block
Crumb block Opportunity to embroider

Those two blocks will probably appear in Crumb Quilt # 2 or #3.

Meanwhile….. Since I had over 100 of these blocks, I did a bit of sorting and pulled out all the ones with the red sashing and all the ones with the darker green and blue sashing. They went back into the box. I had to put my thinking cap on for how to put these very different blocks together and I went “SHOPPING” for just the right fabric. I bought enough fabric (6 yards) to sash at least 2 Crumb quilts. I bought 3 yards of two different fabrics. One for the darker blocks and one for the brighter blocks.

Once I sorted out which blocks I wanted, I had to decide on how wide to make the sashing with the blocks I had chosen. I wanted the blocks to float a little, so I went with a wider sashing. It also meant that I needed to remove a bunch of blocks or I would have a massive quilt. I put about 10 more blocks back in the box. Here is the result – a great size for a picnic or a twin bed!

Crumb quilt  # 1

This nice tone on tone green did the job. I think it helps unify the quilt with so many funny blocks. I used 24 of the 100+ crumb blocks for this project.

Can you spot all the blocks with machine embroidery? Here are a couple of close ups —

Flowers for the fun of it  Crumb Quilt #1
Line art machine embroidery Crumb quilt #1
Embroidery embellishment crumb quilt #1

Notes about this quilt – the crumb blocks were 8.5″ before I added a round of sashing (various colors). All that sashing came from my 2, 2 1/2 and 3″ strip bin. I needed width of fabric to go around the blocks. Once they were sashed, I trimmed all the blocks down to 11″. (Weird number but it was working). Green sashing and cornerstone blocks are all 3 1/2″. The corner stone blocks all came from my “Bonnie Hunter Scrap Storage” bins. Bonnie refers to her system as “Scrap User’s System” . I have to rethink how I refer to my bins…..Stop Storing and Start USING!

What do you do with your scraps?? Time to start using, not storing I think! I have to say, I’ve never met a scrap I didn’t like!

347,514 stitches

Do you gasp at that number? I did!! My wonderful sister-in-law, Carolyn, (AKA https://OneBlockWonderWoman.wordpress.com//) did the custom long arm quilting on my Allietare quilt.  She messaged me after the quilting was complete and told me how many stitches went into the quilting, 347,514.  That is overwhelming really. The quilt is 111″ wide by 99″ long.   I wanted the extra width for the sides of the bed. Those thick mattresses add to that width. 

I’ve posted about this quilt project in the past, but I would like to report now that the quilt is finished, ready for show & tell and for the bedroom!  To catch up, here is what has been going on this summer.

I mailed the quilt top and the backing fabric to her in July and I got it back last week.  I ordered  Quilters Dream Natural Cotton Select Mid Loft batting from the Fat Quarter Shop, and that took a while to arrive.  I usually use Warm & Natural, but I do like the feel of this mid-loft batting.  Quilters Dream is the batting that Carolyn prefers. She knows what her machine likes best!

Carolyn did an amazing job on the quilting and you can see some little peaks of it here and there in the photos that accompany this post. 

While I was waiting for the quilt to come back to me from California, I made the binding and some pillow cases from left over fabric.

Ready to use

4 queens and 2 standard

I had enough fabric to make 4 queen size and 2 standard pillow cases.  

Want a peek at the quilting?

Back of the quilt

The texture of the quilting really shows on the gold on the back of the quilt.

Carolyn did a beautiful job quilting, free motion on her long arm, Greta the Gammill.  Each area of the quilt was custom quilted freehand.  I think she did an amazing job.  

a peak at the back

Custom quilting freehand

I spent one afternoon trimming the quilt.  Then I made a hanging sleeve from the leftover backing fabric.  I attached the hanging sleeve at the same time as I put the binding on the quilt.

Ripping the stitching

For some reason, I put the hanging sleeve too low, and it didn’t get caught in the first round of binding stitches, so I did a second run…..and those stitches were too wide, so out came my trusty seam ripper.   Took the binding off, moved the sleeve all the way up and reattached it to the back of the quilt. I got in too big of a hurry I think.  I needed to take a break and try again.

Stitching the binding on the back

The burgundy is “flange/piping” part of the binding, and gets stitched to the back of the quilt first.  

Over 400 inches of binding going on.  I love those handy little clips.  I had enough clips to go 3/4 of the way around a king size quilt, which is fantastic.  That meant I didn’t have to stop stitching very often, and drag it all back to my big table very often.   

attaching the binding

This binding is what I call “Susie’s Magic Binding” and is my GO – TO style of binding.  I love the pop of color you get when you have that little flange showing. I also love that you can stitch it down entirely by machine.  Check out the tutorial at the link above.  I use my walking foot when attaching the binding and on this machine, I have an extra help with a special “ditch” foot for the walking foot, that keeps my stitching “in the ditch” of the burgundy fabric.

Manhandling a big quilt to put the binding on is no easy job. The “shipping weight” was 10 pounds, and I can attest to that fact that it is heavy! I had to set up my ironing board next to me to help hold the weight of the quilt.  I also had a table behind my machine table to support the weight.  I am so glad my machine is set in the table and I didn’t have to ‘lift’ the quilt. 

manhandling a large quilt

Stitching the binding

I did the “final” hand stitching yesterday, making certain the label was stitched down and that the sides and bottom of the hanging sleeve were attached.  I put some fusible behind the label to make it extra tough for someone to “remove it”.  Two edges are encased in the binding too.  

Ready to see it?  Here is the back — where you can really see the texture. (Note – those pillowcases were made using some of these backing fabrics)

Can you “see” my hanging sleeve at the top??  It matches the backing and pretty much disappears.  

back of the quilt

And this is what I told Carolyn was the “beauty shot”…..

king size allietare

Five years in the making and finally finished!!!  This is a Bonnie Hunter /Quiltville mystery quilt pattern and was presented in 2015.  The pattern is currently available at Bonnie’s store as a digital pattern – https://quiltville.com/shop.html#!/Allietare-Digital-Pattern/p/59334161/category=13038426

Want more details on my version?  Just use the search function for “ALLIETARE”  on my blog, and you will find all the previous posts. Be sure and check out this post and see why I chose the colors I did.  You will see a hint if you take a closer look at the label on the back of the quilt too. https://stitchinggrandma.wordpress.com/2020/06/03/progress-on-a-ufo-allietare-mystery-quilt-circa-2015-16/ 

What’s going on in your stitching life?  Any random acts of  quilting? 

Scrap Happy and Allietare Updates

Fair warning – lots of photos!  

Just a few years ago, I dug in the scrap storage boxes and put together about 30 blocks using Pat Sloan’s pattern Scrap Happy Little Wishes Star Challenge. (See Pat’s post – Scrap Happy Stars for the free pattern)

I wrote about the project once or twice at the time and showed off my blocks, joined together with black sashing here – Just a border or two.

Well, if you have been following me for any time at all, you know you sometimes never see the end result…or maybe I left you wondering “what did she decide?”…..

Well, let me tell you….NOTHING for almost 5 years!  Honestly, I have told others that I am a “top maker’ not a quilter at times.  I have a LOT of tops made, hanging on hangers on my storage shelves that get forgotten because something ‘new and exciting’ comes along.  In fact, some are hanging so long I had to put them on NEW hangers because the hook of the hanger was stretched out due to the weight.

I get tempted by shiny new fun patters.  Why, just the other day, Pat Sloan started another “new sew along” and I was really feeling tempted.   And then, our local quilt shop, Serendipity Quilt Shop in Dagsboro Delaware announced a new sew along.  The pattern, Serendipity House in the Pumpkin patch, calls to me. Check it out here – House in the Pumpkin Patch.  You know if you follow me that I always have a container of “autumn colors” just waiting on another opportunity! Now I have TWO fun sew alongs to think about.

Before I could l do anything else though, I needed to fold up the massive (111″ x 120″) backing  for my Allietare quilt and get the backing and top in the mail to California for quilting by my wonderful sister in law, the One Block Wonder Woman .

Remember the fabrics I was using?  (Some of this may be a repeat of a previous post/photos…but I just love this fabric group!)

Border fabric choices

Top fabric (wine labels) is the border fabric. The herringbone gold and the grape fabric are on the back, along with this wonderful Bella Toscana fabric I was inspired by last month –

Bella Toscana by Windham Fabrics

My plan was pretty simple for the backing – scribbled out quickly.  (The quilt will be WIDE because of the drop on our king size bed. I like a quilt to hang over the sides and get to the bottom of the thick top  mattress.)  My quilt top is 111″ wide by 99 ” long.

Planning the backing

Careful planning…no, what I call “quilt math”, but careful measurements of the actual project, careful cutting etc and I fairly quickly had a quilt back ready. What really slowed me down was ironing those massive pieces before cutting, and after stitching.

Backing ready to stitch Allietare

Carolyn was kind enough to advise me she needed 4 inches on the sides for the long arm clamps; and to remember to do 1/2″ seams, pressed open. I did leave the selvedge on the edges of the final pieces, as they will be where the clamps are and they will get trimmed off after the quilting. I’d forgotten to take a photo of the backing before I shipped it, but Carolyn, the One Block Wonder Woman was kind enough to snap a picture of it on her design wall.  She said it was so big it took over her sewing room! The backing is about 120″ wide by 110″ long.

Quilt backing for Allietare

Remember the front?

Alllietare Winter Mystery Quilt outside

I’m so glad it arrived by mail without TOO many wrinkles.  Hanging up for a bit will help them to shake out I hope.  I hate to see her have to iron that beast, enough that she is loading it on the long arm and doing all the quilting.  If you quilt for others and they mail you tops/backings, how do you manage the inevitable winkling from the shipping?  Does a steamer work or do you have to iron the whole thing??   Allietare is a pattern by the queen of scraps, Bonnie Hunter and the pattern is available on her online store.

Anyway; now that Allietare is ‘under control’ and OFF my table, back to my Pat Sloan  Scrap Happy Little Wishes story!  I went to the sewing room and looked at one of my cutting tables, buried in STUFF.  A disaster zone for sure!  I went up with the intent of “cleaning it up” but to be honest, it looks like this 4 days later STILL.

Disaster zone

Last week I was making “string blocks” for borders, so there are bins of stings, baskets of scraps and so much more on that table.  I had one basket of string blocks made, and decided to join them together into a “string border”.  (I wanted to sew, not clean….at least, that is what I told myself when I picked up the baskets).  Sewing string blocks uses scraps, which I needed to clear up, right?  I use phone book paper as a foundation for my string blocks.  At one time, I had my strings sorted by width, then as I was digging for the right color, I resorted by color. Sometimes I have to get in the scrap aver boxes to find the perfect strip.  Anyway, working on string blocks is what I do when I have no sewing “plan”, and I hadn’t quite gotten to the Scrap Happy Little Wishes quilt.  (I’ve had vertigo for a week now, so mindless sewing of string blocks was about all I could manage) . Honestly, cleaning up from multiple projects was more than my wobbly head could manage last week.

Since my BIG cutting table was cleared off, I could lay out all the string blocks and arrange them so there were not similar fabrics too close together.

More string border blocks

Anyway, at some point I measured what I had sewn together and discovered I had enough to go around something that was hanging on a hanger waiting on borders.  I had made 268″ of a 6″ wide border, and while getting down my Scrap Happy Quilt, I found 336″ of  4″ borders all done too.

String borders

I laid out my Scrap Happy Stars on the table and immediately decided I didn’t want to put either of those string borders “next to the black sashing”.

Scrap Happy Stars on the table

There JUST wasn’t enough space between the busy scrappy stars and the scrap borders.  So, I executed plan B.  I got out a bin of reds and oranges and yellows, did some more quilt math, and decided a 4″ border was what would work.  I have a tone on tone ORANGE (shown at the top of the photo above) that was also used in the sashing stones, and I decided it was perfect.  At this point, the quilt top was feeling rather “dark” to me, but the orange really brightened  it up.  I cut the sashing into 4″ strips, sewed it all together and then sub cut to length for the sizes I needed.  I added some cornerstones from my 4″ scrap storage, and in no time at all I had the borders attached.

Scrap Happy Little Wishes Challenge

At this point, I think I am going to leave “well enough alone” and figure out a backing and start quilting it.  My brain this morning was running along the line of putting it on my quilting machine frame (the one with the 9″ throat and the Janome 1500).  I need to learn how to use that machine, loading etc, and it is high time.  I am glad I bought some wide backing last winter from Marshall’s Dry Goods, but not sure if grey paisley is what I want to use.  I have some purple wide backing, but have to check and see if there is “enough”.  If not, I may order something else.  Did you know they sell 108″ wide back for $7.99 a yard, and you can get a 15 yard BOLT for under $80.  Great choices and I am thinking I have some shopping to do.

Sidenote Serendipity Quilt Shop is a small business in a very small town, and since the onset of the COVID-19 lockdowns, they have converted to totally online sales until it is safe for everyone to shop in person in their store. If you need something, new fabric is arriving daily, and they have $5 flat rate shipping or porch pick-up. Their amazing online shopping website is running well and this week (through July 12) there is 20% off on Moda Grunge.  So, if you need some fabric or notions, try to support the small business so they will be there after COVID-19 is history.  Serendipity is where I ordered that fabulous Bella Toscana fabric, catching it on sale.  I think I bought 7 or 8 yards, so I have enough for matching pillowcases.  The facebook post by Serendipity inspired me to get my Bonnie Hunter Allietare off the hanger!!  

It is a very nice feeling to move two projects forward that have been “hanging around” for so long.  No worries though, I have lots more UFO’s to tackle.  All but one of the series of Scrap Dance Mystery Quilts I have done over the years are still “on hangers” . Well, except the last one, it is still on the design wall.  Carole is publishing the TWIST soon.  When I was looking through photos yesterday I realised I had ONE of the Scrap Dance series finished.  I had to go back to my blog and find the post about it.  Turns out, I finished it around September 2015, about the same time I was making the blocks for the Scrap Happy Stars!

Scrap Dance Quilt Along Finish!

Seems I like those scrappy projects!!!I was busy that year.  (You may see some of the same fabrics in BOTH projects!)

If you made it this far, thanks for reading.  I appreciate all of your comments when you take the time to post them.  I often say I am slow to blog anymore because I don’t have much to say, or I don’t have any photos to support the post. Today it seems like I might be overwhelming you with photos and narrative.   So, I am glad you took the time to get this far, and hope you enjoyed the post.

What are you doing on this hot July day for fun???

Making Labels for Quilts

In the last couple of weeks I got motivated to make labels for projects that are “nearing” completion or are completed.  If you have been reading my blog in the last month or so, you know that I finished TWO of my Pat Sloan projects (Get to the Point and Mama’s Garden) that were started in classes several years ago.  I am also working toward completion of my Bonnie Hunter mystery quilt, Allietare.

I like to make a label for my quilt as the “final step” in the project. I use my embroidery machine to make a simple label, and fuse & stitch it on.  (More about the embroidery machine in a minute.) Often times I will use part of the backing fabric as a border on the label so it kind of “floats” on the backing. I learned a trick years ago for “making perfect circles for applique” and use the method when I add the fusing product to my label.  Basically, I lay the fusible product on top of my label with the fusing facing the wording and stitch all the way around, then I slit the fusing in the middle with my snips, and turn the whole thing “right side out” . This way there is a nice neat “edge” on the label turned under, and I have the added benefit of a “hard to remove” label. I do stitch around the label by hand, avoiding going into the front of the quilt, much the way you stitch binding. I will put a link to a video at the bottom of the page that gives you a better “visual” than my explanation.

If I am “efficient” I have the label ready, so when the binding goes on, two edges of the label are stitched down by machine. Like I said, “IF I AM EFFICIENT“.  That means in my life that I better make the label BEFORE I bind the quilt, and that doesn’t always happen, so SOME have to be hand stitched on all 4 sides.  When I hand stitch, I use a matching thread so my sloppy hand sewing doesn’t show.  

Let’s talk about making machine embroidery labels.  If you followed me for anytime you know that I have two embroidery machines. I have the Brother PE500 with the 4×4 hoop and the Janome 11000 with lots of hoops, including an adjustable hoop up to 6×12 or so.  For years I made my labels on the Brother machine, using the available fonts in the machine, typing one line at a time on the tiny screen.   The example below is one done on the Brother machine, one line at a time.  Around 2017 I was given a hoop that can be repositioned on the machine, so making a bigger label could be done with out “re-hooping”. Using it for the label below I could get a longer label, and still keep everything lined up straight.  I got “pretty good” at the alignment thing and figuring out where to start the next line using the plastic grid that came with the hoops.  

Banner label

The yellow label was applied on the back of this project BEFORE the binding went on.  The beauty of using fusible on the back is that it will stay in place while you are working on the binding. 

When I made my label for the Mama’s Garden quilt, I was using a fabric piece that Pat Sloan had signed for me several years ago, either when I took her class or went to a guild lecture she gave.  I had to try to line up the wording on my Janome 11000 (again one line at a time), using built in fonts.  I had fun with this label as it is the first attempt at making a label on my Janome, and I got to use some larger fonts.  I wish I had pushed the words pattern by a little farther to the left, but, I can live with the final result.

Quilt label with signature

This label was stitched on after the binding went on. I used green of the backing fabric for the edge of the label, but set it opposite of the backing so it does not completely disappear.

I have a couple of “free software” programs for embroidery, and decided I would try one of them to make my next label, using the software on the computer.  The program I chose to use was called Embrilliance Express and I used the fonts in the program.  I was really pleased with the result on the screen and with the stitch out.

Get to the Point label

I haven’t figured out how to tell the software to cut the jump stitches between letters, but I can live with them.  If you use Embrilliance Express and know the secret, do share!

  I hooped this fabric in my 8×8 hoop and got a nice size label.  I did the fusible trick and got nice edges and corners when I turned the label out right. I fused it on and hand stitched it down on all four sides.

I had such good success with the creation of the label in the Embrilliance Express software on the computer that I got busy and made another label and stitched it out for my Allietare quilt.

Allietare label

For this label I used my inspiration fabric on the edges of the top and bottom.  I will add the fusible after I get the quilt ready to bind.  I still need to get busy and make that backing and ship it all off to my favorite sister-in-law, One Block Wonder Woman

She has graciously offered to quilt it for me on her big long arm machine, Greta the Gammill.  Go take a look at her blog I linked and check out her adventures. 

So, that is my adventure in making quilt labels this month, and over the years. I need to learn how to import fonts into the Embrilliance program, and hope I can do that without buying something else.  I am so tickled with how the last two worked out and am writing about it to encourage you to use your embroidery machines if you have them.  Even if you just have a 4×4 hoop, you can make a multi line label!  Embrilliance is free in the “express mode”, and it is not to hard to navigate, which is perfect in my life!

Do you label your quilts?  What information do you like to include on the label?  How do you make your labels and apply them?  Love to hear what your methods are, as I like to continue to learn new tricks.

Here is the link Making perfect circles for applique  for the method I use for adding the fusible to my label and getting a nice clean edge.  The not only works for circles, it also is useful for rectangles or squares.  I tend to get a more “rounded” corner instead of a sharp 90 degree turn, which is fine for a quilt label in my life.


Progress on a UFO – Allietare Mystery Quilt Circa 2015-16

This month seems to have motivated me a little bit to work on some projects that have been “fermenting” on the shelf or on hangers! Last blog post I talked a little about getting stalled when it came to putting borders on quilts.

One project that has been quietly hanging in my quilting room is a Bonnie Hunter pattern. It was the Winter 2015/16 mystery quilt she called Allietare. The pattern was inspired by one of Bonnie’s trips to Europe and the Tuscan countryside.

My quilt top has been assembled since about March, 2016, all but the last border. Apparently, I had shopped for border fabric, because I had a box, with 4 different fabrics.

Looking back through my project notebook, I had receipts from Hancock Fabrics (RIP) and Hobby Lobby for various pieces in the quilt. I also had the “color chips” from the original pattern, where Bonnie recommended, 5 color groups for the project. I remember when I started to shop for fabric that the colors on Bonnie’s graphic were not the same colors in the “suggested” colors. I had a scrap of fabric that really “matched” the graphic.

Colors

(Note…the “spelling changed from Allietore to Allietare” about the 2nd week of the project. I never made a new book cover.)

I really felt like the choice of black was too harsh for these colors, so I opted for a brown. And Bonnie suggested just one constant color and that was a GREY. Again, I felt like I need to use the green, like in my inspiration fabric.

Bits and pieces from the project
Inspiration fabric
inspiration fabric with “leftover blocks”

I was really happy with my fabric choices for the quilt top, but when it came to the border fabric, I stopped. I have to say I had 4 & 5 yard pieces of three different fabrics, and at the time, they just didn’t click with me for the project.

One more round if borders to go

Early this week, my local quilt shop posted a sale and some photos of fabric and one of them caught my eye. In fact, I got so excited, I had to go out to my quilt room, get the quilt top off the hanger and spread it out on the table to measure for borders.

Bella Toscana by Windham Fabrics

I debated and debated ordering this fabric for the borders. Because we still can’t enter the store, I didn’t have a good feel for it and how the width and the height of the repeat (12″) would work for my border. And in the long run, I thought it might be to light alongside that chocolate brown border.

So, I decided against ordering it for the border. What made my decision easier was pulling the box of fabric that I had originally purchased.

Border fabric choices
border fabric choices

As I set out the 3 fabrics on top of the quilt top, I knew why the grapes wouldn’t work, and why the gold wouldn’t work. But, I didn’t know why that top fabric had been previously thought “unworthy”. It was perfect.

So, I did my measuring and decided to cut 8.5″ strips of the wine label fabric for the borders. Lots of discussion with my husband about how to best show the labels. Yesterday after lunch I got busy, did the cutting and got the borders on, and the quilt top is now READY to be quilted.

on the work table
on the work table
border fabric choices

Now that the borders are on, the quilt top is 99 x 111″, perfect for our king size bed.

Borders are finally on
99″ long x 111″ wide King Size Allietare
Alllietare Winter Mystery Quilt outside

So, now, what about that Bella Toscana? I think it is going on the back of the quilt. I just loved that fabric, and have to do some quilt math in order to use it. The quilt is 99″ long. So, I think I will order 4 yards, and build the backing with that piece of Bella Toscana down the center. Because the quilt is very wide (111″), I need to build it up with something else. I initially thought to use the GRAPES fabric, but there is not enough to get the width I need on both sides of the center. I think that gold herringbone will come into play in the process, so, yes, a pieced back, with several sections. It will be fantastic, and I can’t wait to place my order today!

The big debate then is the quilting. As soon as my sister-in-law, Carolyn (aka OneBlockWonderWoman.wordpress.com) saw the photo, she volunteered to quilt it for me. We had lots of fun discussion about mailing it to her, or arriving with my suitcases full of quilts to long arm at her house on Greta the Gammil. That debate is still underway. In any event, I am really pleased with the outcome of the border.

If you are interested in the pattern, you can find it on Bonnie Hunter’s digital store https://quiltville.com/shop.html#!/Allietare-Digital-Pattern/p/59334161/category=13038426

For more about my adventures making this quilt top, just put Allietare in the search block on this page.

Are you catching up on anything this week?

Traveling sewing kit

I am leaving in less than 36 hours for a trip to California, and a cruise to Alaska. My bags are packed, twice now…and I think I have the essentials.

One thing I enjoy while traveling is working on English Paper Piecing. Bonnie Hunter, Quiltville.blogspot.com, does this when she travels to teaching locations around the world. I started the year I went to Nevada when my Lil sister was recovering from knee surgery. The only time I sit and hand stitch is when I travel. (🐈 in lap at home preventing hand stitching).

Anyway, I sorted out my never ending Double Diamonds project, and got things kitted and organized and all set to travel…..or so I thought. Today I attended a lovely gathering of the Material Girls Quilt bee, and Irene, our hostess, shared a hand sewing kit given to her as a gift by a dear friend.

Her friend used some wonderful Tula Link fabric.

There is a place to keep needles stored on the green wool, pockets for scissors and the awesome Vivilux light, and even a zip pocket and a holder for her Aurifil thread. I loved the idea and got permission to to get a couple of pictures.

After dinner tonight I decided to go PLAY for a bit in my sewing room. I got out 2 fat quarters and a scrap of contrasting fabric and some batting and got busy cutting, sewing, quilting and creating.

I made my travel sewing kit with 3 pockets, and also used a bit of wool for the needles and pins.

Travel fabric for the outside.

Transportation (blue) fabric inside. I fussy cut the fabric for the pockets.

Wide open it is about 8″x 20″.

On the left I have a spool of thread being held on with a tab and a button with elastic. Below is a pocket with 3 sections. In the center is the wool pin holder (with a bit of batting behind it). Below the pins is a larger pocket. On the right is another pocket with the opening on the side towards the center.

I managed to load an Altoid tin with bobbins (for lots of thread variety), another spool of Aurifil thread and my new lighted Needle threader in the pocket sections.

The center pocket has those clover clips that are like spare hands, my Vivilux LED light and a floss container. ( I fly with this, and use the cutter on the floss for my thread.)

This side opening pocket has my Double Diamonds directions along with a 1qt zip bag full of pieces and parts for 1 Double Diamond EPP block.

Now I am really packed and ready to go! Thanks Irene for sharing your kit and inspiring me to make one for myself.

Carolina Hurricane Quilts and Scraps

I mentioned in a post in late September ( Carolina Hurricane Quilts )  about the Carolina Hurricane Quilts project being spearheaded by Carole  Carter on her blog – From My Carolina Home  

I made a few blocks right after that post, and gathered up supplies and made up “kits” to make more blocks.  I have a few scraps and squares and leftover half-square triangles, so it was quick to assemble those kits.  I usually don’t “save’ 4.5″ blocks, but I had LOTS of 5” squares in my Scrap storage system.  More about that in a minute…..

My wonderful bee – the Queen Bee’s took on the challenge of making blocks during our bee gathering last Tuesday.  They came armed with scraps and sewed for about 3 hours.

Queen Bees Carolina Hurricane Blocks

During the bee gathering I snapped some photos and sent them off to Carole!  It was fun to get a group photo.  Here are a couple of pictures of the members, hard at work.

Sharon Oct 2018

Marta and Nancy Oct 2018

(Sorry for the blur ladies….)

Tracy and Mary Oct 2018

(Imagine…I am actually there in a photo….that usually never happens.  Thanks Marta!)

I came home from the bee with a stack of blocks, and still a handful of the kits I made for myself.  I didn’t seem to get as much sewing done there as I had planned, so I spent the week working on more blocks.  My method for working on these has been to make “2 at a time”.  I use those  great little foam core design boards to lay out 2 blocks and move them to the iron and back to the machine, and I can “keep the angles” right fairly easily.  Look back at my blog here – Foam Core Design Boards to get info on the boards and how to construct them.

I keep making blocks, as my hand is continuing to improve following surgery.  Carole asked me if I wanted to put the blocks together into a top, and at the time, I wasn’t sure if I could manage. I think I have about 20  blocks done, and the bee had about 15 done, with more promised.  I planned to “send” them to Carole the 2nd week of November. My Queen Bees who are still making blocks are planning to bring them to me the first Monday of November.  We have such a great variety of fabrics in these blocks.  This afternoon, when the light is better I will put them all up on the design wall for a photo.  Now I am wondering if I am “able” to assemble them.  I will have to get specifics from Carole on size if I decide to do the assembly. (She reads my blog, so I am sure she will write! )

During this bee, it was fun to chat with my “bee mates”, and to learn which ones are following along with Carole on her “Autumn Jubilee 2018”, and who have enjoyed making her mystery quilts. I love that they found her through my blog posts.  I also love that Carole linked to my blog post last week.  The day she did that, I had 82 new visitors.  So, if you are a new reader, and came to find my blog because of Carole, I thank you for reading and coming back for another visit. Be sure to “follow” in your favorite method.  I love reading everyone’s comments too.

At my “next Queen Bee” gathering, I plan to work with one member  and help her come up with a plan for controlling & managing her scraps.  Bonnie Hunter   is one of my FAVORITE well known quilters and in her blog post today she talks about having “variety” in your scrappy quilts and about how to achieve that variety.  (Every January I tend to “clean up” my sewing room and cut my scraps into predetermined sizes. )  Thanks to the lessons I have learned from other bloggers, like Bonnie, and others, such as Joan Ford who has written books about working with scraps too.  I attribute my “scrap storage system” to the inspiration I have found on Bonnie’s blog.  My sizes I save, and my method for storage are unique to me, as it must be for everyone.  I will, no doubt, write about my methods in a future post.  If your curious, you can check out this post- Scrap Storage Containment System

My sister-in-law, Carolyn, wrote about her method on her blog here  One Block Wonder Woman and Scrap Overload .  If you are a “scrappy quilter” how do you “contain” the chaos of scraps?

Summer winding down

I can’t believe August has left us and summer has wound down so quickly!  August has been a hot humid month, and September is much the same.

Our local kids went back to school on Tuesday, the day after Labor Day in the US.  Some areas of the country school has been in session for several weeks.  We live in an area that is a summer tourist destination.  A few years ago, citizens complained to the state government about schools starting in the middle of the August and not long after the legislators set a “state-wide” start date for schools.

So, as the children started back for their “First day” in Delaware, my youngest daughter, my youngest granddaughter and I ventured over to the formerly busy beach area for a bike ride! What a change a week makes in the volume of people on the trail, walking and running.  All summer it has been filled with families and young children and yesterday, it was the older crowd. A few moms with strollers around the library and right in town, but once out on the longer trail, my granddaughter in her trailer, was the only child around!  We rode a surprising 12.24 miles !

12.24 mile bike ride

I was stunned to realize how far we had gone. Up to this point, my longest ride has been about 8.5 miles.  I started riding with my daughter in early July, sometimes 2-3 times in one week. I need exercise and this is certainly a fun way to get it.  Haven’t lost one pound, but I have found my calves!  Now, I am finding myself scheduling bike rides on my calendar into October. I want to make sure I schedule the time so other things don’t get in the way of an opportunity to ride together.  I haven’t done much in the way of exercise since I retired six years ago, unless you count climbing the stairs to my sewing room multiple times a day as exercise!  So, this is GOOD.  As I approach my mid 60’s, those looming health issues we all face demand I do something, and I love to ride.

My bike is a TREX, era 1990’s, with good tires, though heavy and a bit squeaky and with it’s quirks.  My oldest daughter rode this bike in middle school and high school during that decade, and I rode it off & on in the years following. I put a “new bike” on my Christmas / Spring birthday wish list for myself, determined not to buy one until I have at least 6 months of riding  regularly. I really love the local bike shop, LifeCycle in Milford DE. My daughter introduced me to the owners, Ben and Jenn, during a community ride they organize.  I’ve done several with a big group, 40 or more riders, and some with smaller groups that my daughter has organized and I am having fun!   All in all, a positive direction to move in.

Yes, I am still sewing, and I managed to get a few projects done last week.  Those batik placemats are coming along. I found a nice 3 yard piece of batik in my “blues” bin and think I can get just about all of my placemats backed with it.  I layered and pin basted them and started quilting them over the last week.

half way done with placemats

I have 9 quilted, trimmed and ready to bind.  If you click the photo, it will take you to my FLICKR album. Give the picture a second to focus, then you can zoom in and see the free motion quilting (FMQ) on the placemats.  It has been good practice.  The quilting has been done on my domestic sewing machine using Superior Fantastico # 5021, a variegated blue turquoise and purple 40 weight on top and in the bobbin. Thankfully you can’t really “see” the quilting on those busy batiks on the front of the placemats, but boy can you see it on the back.  I will show a photo of the backs ‘next time’.   Let’s just leave it as “good practice” for my FMQ and I am getting better bit by bit.

Next up for projects is a quick one I did on Labor Day afternoon.  I made two bibs to include in a “baby basket” that will be raffled off at our spring quilt show.  Since I made so many for my youngest granddaughter, I feel comfortable making these for that event. I tried to pick fabrics that looked modern and might appeal to a young parent.

Bandana bib

I love this bandana style.  I did minimal quilting in a graphic manner, just enough to hold the batting firmly in place that is between the layers.  I made a second bib in a more traditional shape with 2 contrasting fabrics.  I just love this bright green leaf print.

Flip side of the black bib

I think it makes a nice reversible to this dot fabric in bright colors.

Traditional bib

I did a bit more quilting on this bib in a wide graphic shape. They are bagged up and ready for delivery!

While I had my “bib making supply box” out, I sorted out all the fabrics I had stored in it, and returned most to my stash, leaving just the basics in the box, like patterns and PUL laminated fabric for waterproofing.

I found a great pattern and instructions for a free “in the hoop” zip bag last week through a group on Facebook.  I was happy to find one that would work with the 4×4 hoop on my Brother PE500.

Pattern Paw Print Zipper bag

The instructions are so well written, and it was worth the 12-14 pages I had to print out, to follow along.  I downloaded the design and got busy!

Paw Print zipper bag

This little pouch finished at 3.5″ square.  I did use some 505 spray, for temporary adhesive while construction was underway, along with my narrow masking tape.  The instructions have you pinning fabric edges, but I found that I liked the masking tape. I am now on the hunt for short zippers that I can use on some future projects!  I have a bunch of 18″ ones I purchased at a quilt shop a couple of years ago, but they are really too big for this project and would be wasteful.  I’ve dug in my sewing box and come up with a few short ones.  I have a similar in the hoop pattern from another designer that puts the loop on the left side of the zipper, and I am going to try it next. Bother patterns use the same size pieces for the pouch.  I have 3 pouches “cut out” and kitted up for my next embroidery club gathering.

I do like these quick projects that I can finish in a day or two.  I keep working on my placemats, in between, some of these other fun projects.  It’s nice to have some “finishes” once in a while.

I had to laugh with my husband about all of my quilt tops that are on hangers, patiently waiting for me to finish them.  I have to go in search for a heavy duty hanger for one, which was too weighty for the hanger and broke it this week.  It is a queen size that is in a state of “limbo”, just hanging around waiting for my next move.  I believe it is my Scrap Dance Tango in king size. (Pattern is from Carole – From My Carolina Home.  (Follow the above link for pattern information). The one with 1400 or so half square triangles.  It is a beauty, and one that I must get busy and quilt.  I seem to remember I wanted to add a 2.5″ border all around. Must be time to spread it out on the bed and see if the size is as I wanted it to be and move forward from it’s status.  Our quilt show registration is opening next week, and I think I want to show this one, so I must get busy.  I need to make a “finish it list” to move it along!  Carole – From My Carolina Home always has fun projects and great posts.

I also follow some rather “famous in the quilt world” people.  Bonnie Hunter has been a favorite for a long time, and I have done a couple of her mystery quilts and taken 2 of her classes.  .   Those that have followed my blog know that I love her scrappy style and I have written about her scrap storage system, string piecing and linked to her blog many times.  This week she is mourning the loss of her brother and I know that the tens of thousands that are her fans feel her grief and offer their sympathy.  She has a worldwide following and I hope she can find strength from the “quilty hugs” many of us are sending her way.  I pray for peace in her heart and comfort for her entire family.  

Many quilters find peace during their sewing time, and comfort in the quiet time they spend in their sewing rooms.  I’ve read about quilters who work through their grief while stitching in the wee hours of the night. I enjoy the solitude sometimes in my sewing room, and yet, I find great joy in the times I can sew with my friends at a bee.  I hope you have a wonderful day working on your special projects.