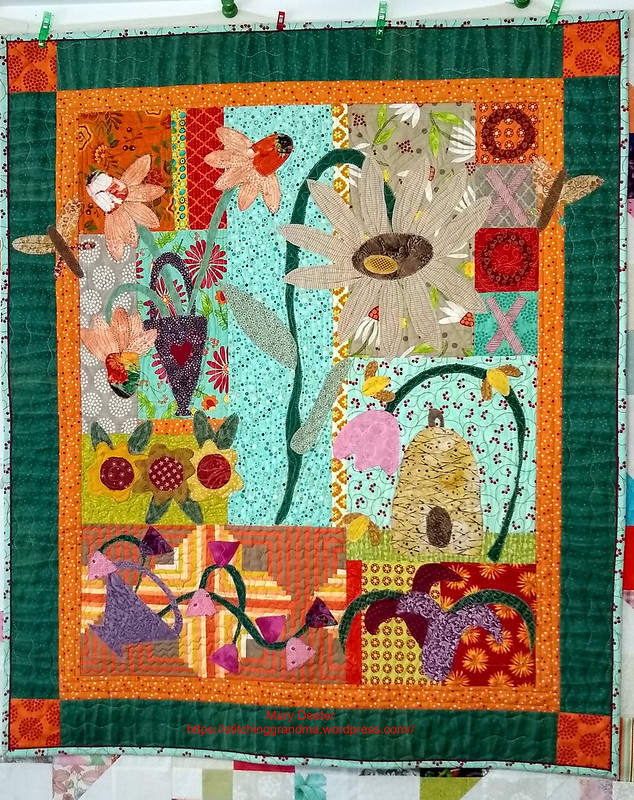
Scrap Happy Little Wishes FINISHED

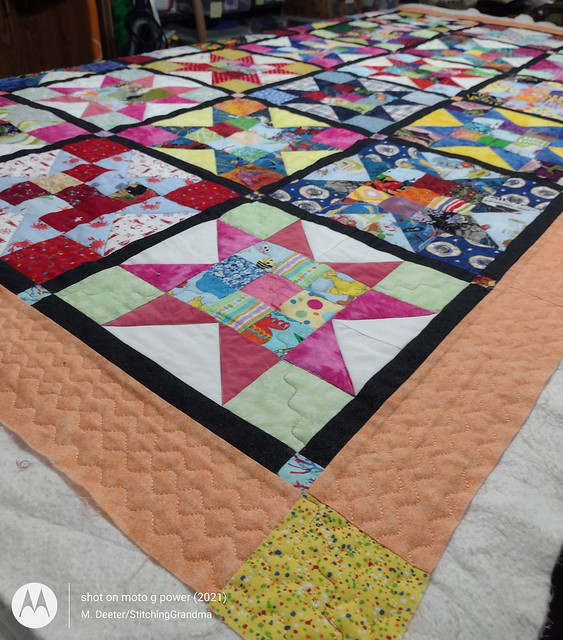
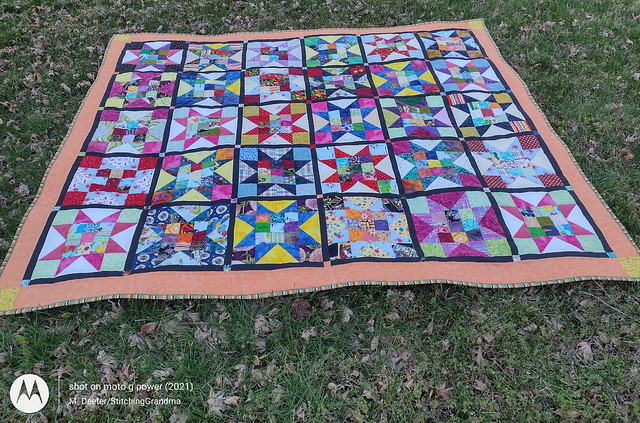
Circa 2015 quilt, finished in March 2024! My efforts to finish quilt tops that have been hanging around for YEARS continues.

I had a delightful time back in September, 2015 making blocks and turning them into stars, and eventually setting them with narrow black sashing. I wrote about it here – https://stitchinggrandma.wordpress.com/2015/09/11/scrap-happy-little-wishes-30-blocks/

and here – https://stitchinggrandma.wordpress.com/2015/09/14/just-a-border-or-2/

During the years in between, there was a point when I took the quilt top off the hanger and added orange borders. My grandaughter said her “MOMMY LIKES ORANGE”. With that in mind, I finished the quilt in the last week for her mommy’s birthday.

I knew my daughter would enjoy a “snuggle quilt” that was cozy and cuddly and warm, so I used flannel on the back. She is a woman who is not afraid of color, and with that in mind I thought she would enjoy this quilt.

I opened my bin of flannel, and pulled out the “leftovers” from the pajama projects I have made for the grandkids. My hope is when she snuggles on the sofa she will feel the hugs of all those kids.

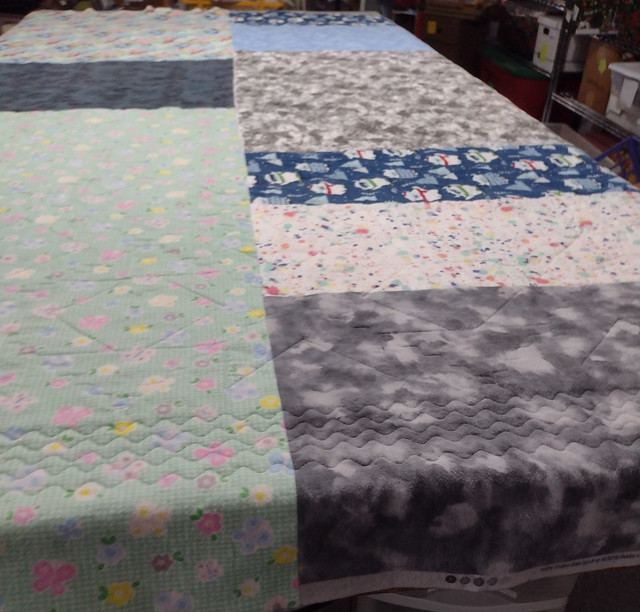
flannel backing

I think the quilting shows up well on the back. I used Superior Bottom Line SILVER in the bobbin. I quilted with my walking foot. I used the serpentine stitch on my Janome 8900, and adjusted the length and width for this project. I always snap a photo, so I can replicate the setting if I want to come back to it later.

Stitch settings for quilting
Serpentine settings on Janome 8900. Widened and lengthened from preset settings
Quilting Scrap Happy Little Wishes
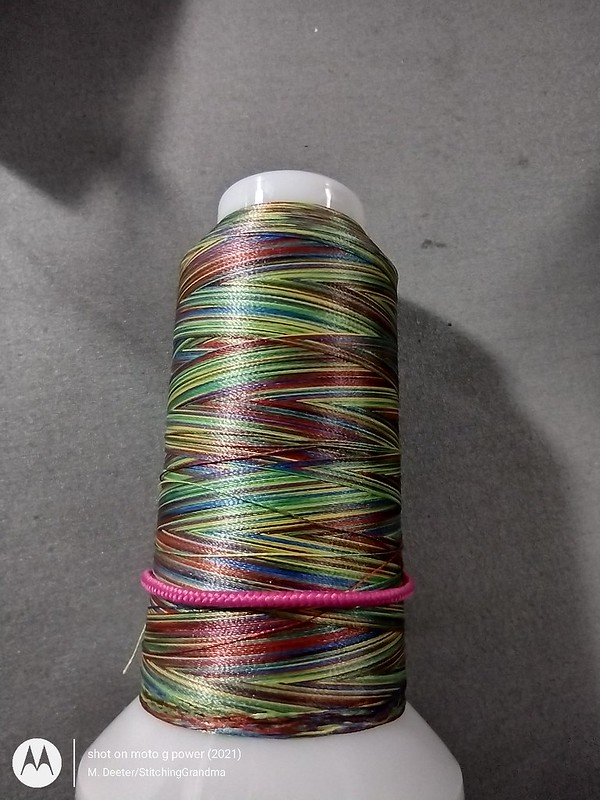
Orange embroidery thread for the borders Variegated for the main quilting

I used the serpentine stitch across the blocks in both directions and on the border. Around the stars I used a straight stitch. I was hoping that stitching around the stars would make them pop a bit once the quilt was washed. I used orange embroidery thread for the borders, and for the rest of the quilt I used Superior Fantastico # 5114. It’s name is PLAYHOUSE, and is variegated green, yellow, red and blue. It almost disappears on the wide variety of colors in the quilt.

Fantastico 5114

When it came time to trim and make binding, I had to really find something that would work against that orange border. I made 318 inches of Susie’s Magic Binding for the quilt.

Susie's Magic Binding
Susie’s Magic Binding.

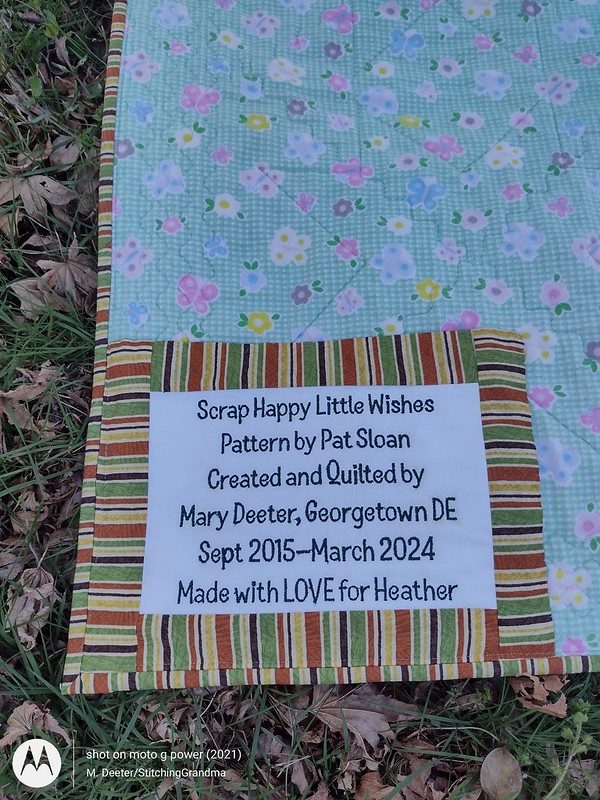
Of course, a label needs to go on the back of the quilt!

Label for the back of the quilt
label made on my Janome 11000 embroidery machine
Scrap Happy Little Wishes
Scrap Happy Little Wishes 2015

I think the stripe binding worked well and I love how it finished the quilt.

Flannel back of Scrap Happy Little Wishes
Flannel back for a cozy quilt.

I always like to “WASH” my quilts before gifting, especially when the top has been hanging around a while! I have a top loader, with no agitator, and threw in some color catchers for good measure. I took a peek at the water after a couple of minutes and could immediately tell I was going to have a problem. I threw in a total of 5 color catchers, and 1/4 cup of DAWN, and a beach towel with white stripes. I crossed my fingers and hoped for the best.

Check out the results –

The quilt came out just fine, with only a tiny amount of pink showing around the quilting in one area. I think there were hand dyed fabrics used for star points. They are scattered around the quilt and the color catchers did their job. My daughter is well versed in the benefit of color catchers in the laundry.

Quilt details – Before washing the quilt was 70 x 84. Shrinkage happens, and even though all the flannel was previously washed, the quilt top /batting did shrink, and the finished washed quilt is 67″ x 80″. All scraps except for the inner & outer border and the binding.

Scrap Happy Little Wishes is a free pattern from Pat Sloan. You can find it here – https://blog.patsloan.com/2015/09/pat-sloan-quilt-show-scrap-happy-little-wishes-free-pattern.html

It feels good to know that gifting a scrappy project will be well used and enjoyed. It is big enough to snuggle under on the sofa, or in my daughter’s case, in her hammock on the porch! She LOVED the flannel back. And, because she enjoys color, I think she will have fun with her fingers wandering over the blocks looking at all the random fabrics.

Lessons learnt – Since I made this quilt top in 2015 I know more about color and saturation. Some of the stars in this quilt disappear because I made poor choices in the contrast fabric. At the time I was making the blocks, I was just sewing “whatever came to the top of the scrap heap”.

These days, if I were to make this pattern again I would ensure more contrast. I would even break out YARDAGE (gasp….) to ensure a better distinction in the stars and surrounding pieces.

I’ve been making a lot of STRING BLOCKS in the last few weeks and working in very specific color groupings. They are still very scrappy, using up the bits and pieces, but very pleasing to the eye. I cleaned up all my green scraps yesterday and put everything away nice and tidy. Watch for my next post on Green String Blocks!

What are YOU working on this month? Have you cleared out any old quilt tops?

Sharing this post with OH SCRAP today! Go take a look at what is happening in the world of scraps.

Small Projects in 2024

My plan for 2024 is to not start any large projects, and continue to “finish” up those that are still “hanging around”. In between I will enjoy working on some small projects, and things that are somewhat “quick finishes”.

I started January off with an apron to wear when I am “running trains” at DelMarVa Model Railroad Club. Yes, I like to play with trains occasionally. My husband is the leader of the HO group, and sometimes I tag along when they need an operator during their annual open house season. I would much rather run trains than sell raffle tickets at the front counter.

Two sided apron
Reverse side of apron

The apron is two sided with LOTS of great pockets, on both sides. They are big enough to hold my phone, some information on the digital controller I am using to run the trains, and one pocket holds my coffee cup or bottle of water. The pattern is a bit of a “mash up”. One of the other members shared her pattern with me, and then I also used some elements from a couple of other patterns used in the past. I went double sided because I was using quilters cotton and I wanted the apron to have more body or heft to it. I had an entire bolt of the track fabric and just a yard and a half of the other print with the train lines names. I was able to get it made in a couple of afternoons, and use it for the following two weekends. It worked well for me, and I am pleased with how it turned out.

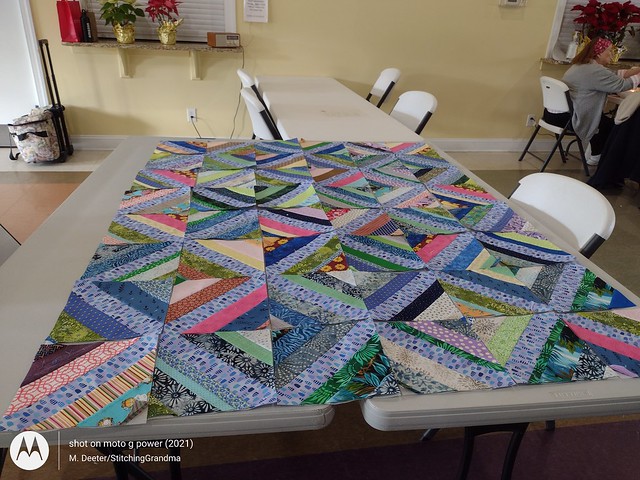
Our quilt guild, Ocean Waves Quilt Guild, Lewes DE had a community service “scrap sewing day” in January during our regular meeting time. I was assigned to a table that was making string blocks and was in my element.

OWQG String block quilt

There were 3 of us sewing and we got 48 blocks made , and partially assembled on the sewing day. I brought home the 2 halves and finished the last seam and quilted and bound the project.

String Charity Quilt - OWQG

I brought home a kit for our bee, the Queen Bees to work on at our next gathering. Two of us worked on this funky 4 patch project together. (We didn’t pick the colors!!) We only got about half way thru the project before our time ran out.

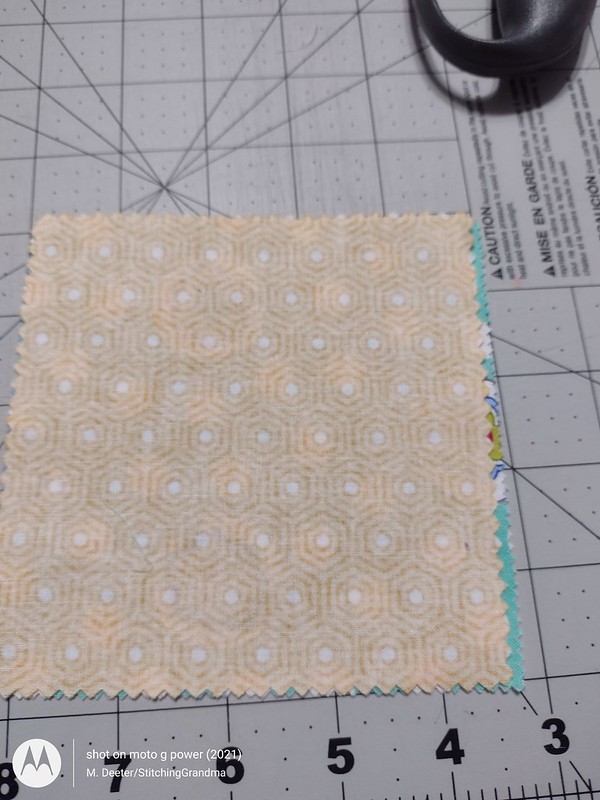
The kit had 40 charm squares and 80 of those orange check pieces, along with the white. They gave us instructions on a method to make a 4 patch using the charms. I have to report that those 5″ charms were terribly cut. PRE-CUT by Moda and they were 4 7/8 x 5. Not square. We ended up trimming every block.

Charm pack, not so square
Not quite square Charm Squares
NOT Square
4 7/8 x 5 inches does not make a square
Trimming to 4 3/4

After trimming all the bits and pieces to 4 3/4″ I was able to get the blocks assembled and quilted.

Quilting on OWQG charity quilt
Quilted and bound charity quilt – Quilted with Superior Fantastico “CASHMERE” thread on top, Silver bottom line on the back.

I used some pieces of leftover wide backing that I pieced together for the quilt backing, and the same for the binding.

Backing for the 4 patch quilt
Quilted on my Janome 8900 with walking foot.

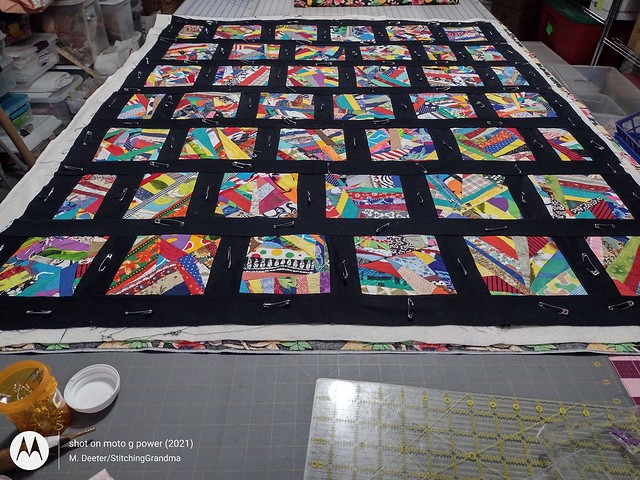
Next up was another quilt top from the Charity quilt sew in that I took to quilt and bind. The blocks had all been donated and someone else had set them with black sashing. There was a lot of poof in those blocks, but I spent some time with my steam iron and managed to get the top flattened out.

Pinned and ready to quilt
Scrappy quilt for the guild
Ready for final stitching
quilted with Superior SILVER bottom line thread (top and bottom) on my Janome 8900
Guild Scrap quilt
FUN backing fabric for this super scrappy quilt

Our next OWQG meeting is March 4th and it will be fun to hand off these 3 projects.

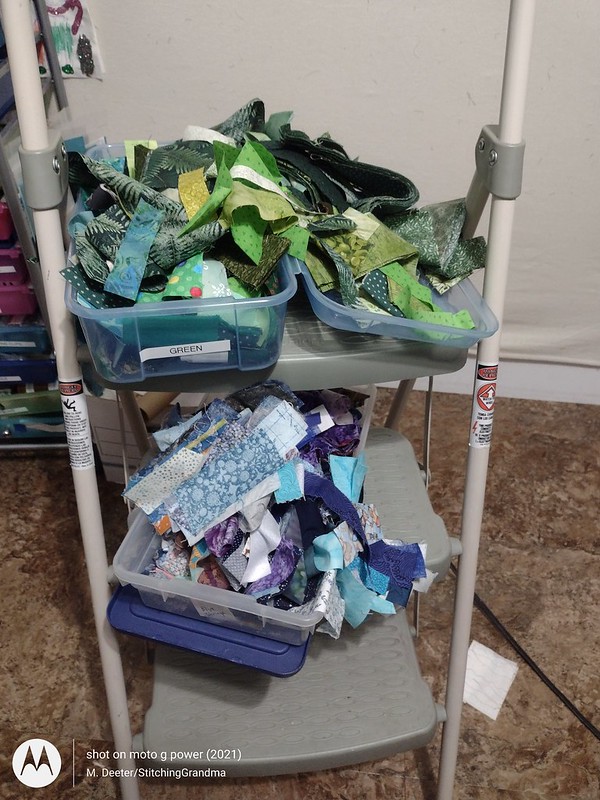
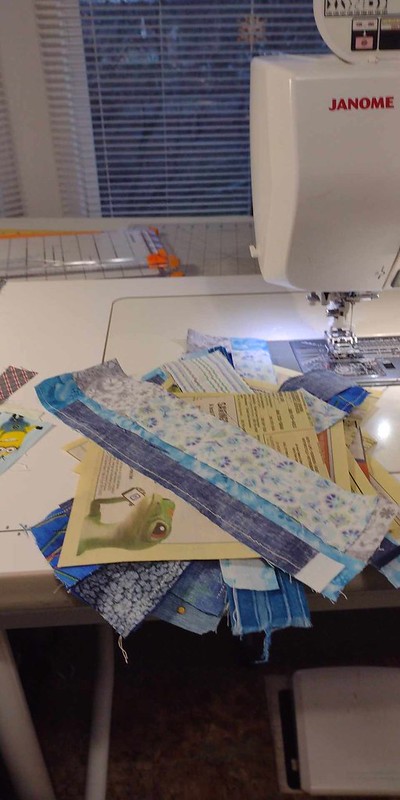
When I cleaned up after finishing those 3 quilts, I still had a lot of “leftovers” hanging around the sewing room, and I put as much as I could fit in my own string block boxes. Well, the blue and green were over flowing, and I didn’t want to dig into anything too serious, so I made a bunch more string blocks, trying to empty the green and blue bin. Truth be told, it didn’t make a dent in the volume! I work on 6″ string blocks, using old phone book pages. At our bee in February we were doing 8″ blocks, using paper from kids tablets at the Dollar tree store. Here is a peak at the fun!

Green and Blue shoe boxes
My shoeboxes for strings fit nicely on the stepstool, close at hand!
making string blocks
Working on about 6 blocks at a time, chain sewing
String blocks
Greens and blue string blocks 6″

After a couple of days of sewing string blocks, pressing and removing papers, I laid them out for a final photo and then put them all away. String block sewing are what I call “mindless sewing” and I had enough for the time being. I cleaned the sewing desk and table and machine and vacuumed up all the debris that eventually falls, paper bits, threads etc. I needed to pack up for my next gathering of the Queen Bees, where we were going to use Blues, Greens and black and grey for string blocks. We worked on them on Tuesday this past week, and I brought home more things to finish! I think we will sew string blocks at our next bee gathering too.

That’s it for me, all the small projects. Truth be told I haven’t been to my sewing room at all this week, other than to pack up and to unload my gear for going to the bee.

If you like string blocks, you can use paper or a pellon product for stabilizer. If using paper, I recommend you switch to a new needle when you are finished sewing the blocks. It’s easy to remove the paper from the blocks, where pellon stabilizer remains in the quilt, and the seams.

Bonnie Hunter has great information on her blog and in her books on sewing with strings. One of her books is called String Fling, and she may have a better explanation than me. I think of a string as anything from 1/2 inch to about 3″. I sort mine by color into shoeboxes. I like the look of varying widths on my blocks.

If you are tidy, you can get a lot into a shoe box. I like to “straighten them out” when I put them in the box, and after I am finished working in a set of boxes. To take strings with me to the bee, it was easier to transport them in big ziplock style bags.

What’s happening in your sewing room?

Another Long Term Project Completed

Greetings readers. I’d like to share another of my “long term” projects that has been completed.

I started this at a quilting retreat in February 2014. The pattern is called Summer in the Park and was something that Missouri Star Quilt Company shared. The video linked shows them using jelly roll strips.

I had fun picking out the fabrics, using yardage. A guild member got us started, and it was nice to have some guidance, as I was still fairly new at making quilts. In the month following our retreat, I made a BUNCH of blocks. You might have seen my posts about the project here. I got the top put together in a reasonable amount of time, all but borders, which is my normal situation. I had put borders on, but the fabric I used was HORRIBLE, and I ripped them off. Then, as normal, I got busy with a bunch more projects and Summer in the Park spent the last 9 years in a tote, on the shelf, in my sewing room. 

Part of my efforts to “finish what I started” over 2023 was to pull the project out, and take another hard look at it, and decide how to move it forward. Around August of 2023, while I was “racing the clock” before surgery, I pulled the quilt top out of the afore mentioned tote, and surveyed what “else” was in there with the quilt top. I looked at all the fabrics safely stored with the quilt and quickly decided on a white 2″ border and a 6″ border using some of the fabric included in the blocks. (That was my original problem with the border I put on back in 2014…the fabric, though in the same colors was not in the quilt and CLASHED terribly).

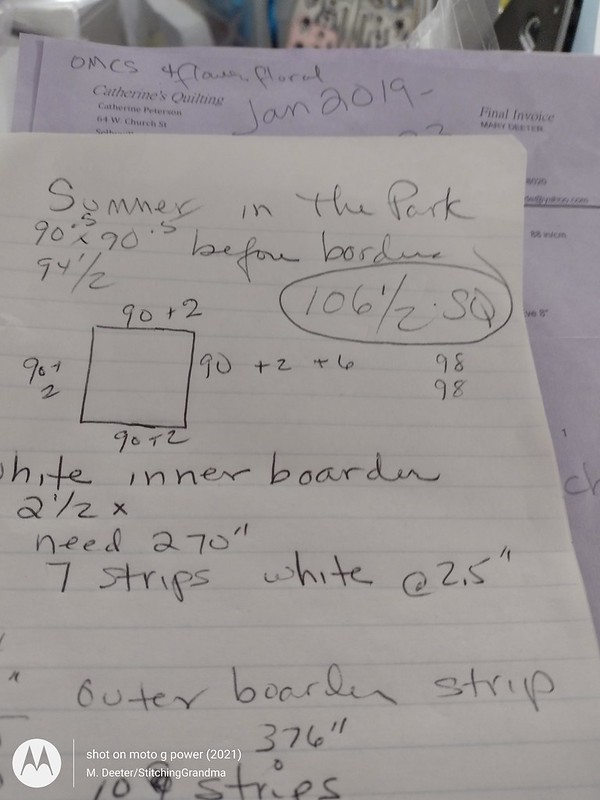
Of course, there is always some math when it comes to borders. 

Summer in the Park math
Quilt Math — do you keep notes?? 

 I had some “leftover” “not quite perfect” blocks left too, and I decided to use them as cornerstones. I don’t know why this quilt hung over my head for so long! I had everything I needed for it, right there in the container. I guess aging is part of the process, or maybe it was simply I didn’t have the skill in 2014 that I have today. 

Summer in the Park
Summer in the Park – with borders – August 2023

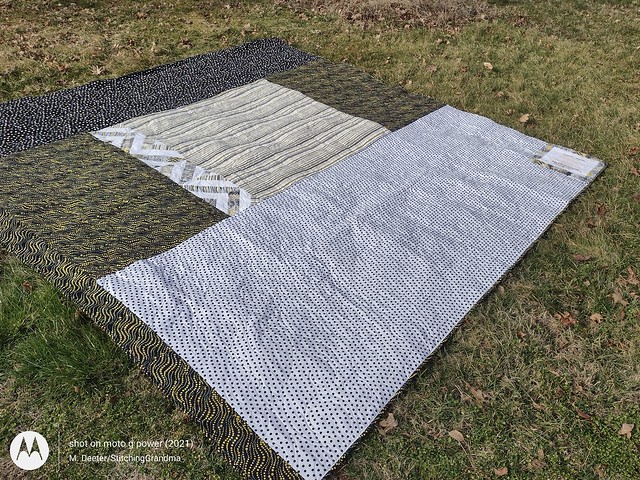
I went through the bin of fabrics again and decided to make a pieced backing! I measured everything I had, then reached for fabrics from the stash as well to make the backing. I took some of those “leftover blocks” and added them in to the pieced backing. The leftover blocks were what I would call “oops blocks”. Something was wrong with them when I put the top together and they got tossed in the box. Now they are out of the box, and “a feature” of the backing! (Hey – my quilt – my story – giggle)

Off to the quilter at the end of August, 2024; just a little over 9 years from the time I made the quilt top.

backing Summer in the Park
Pieced backing – the silver thread works perfectly on the front and back

I remember picking this quilt top up in October from the quilter, but there was NO way I was able to consider binding it with my hand in a splint. So, it went on the pile of 3 large quilts to be bound. 

Pieced backing Summer in the Park

I finally got a chance the week of New Years to sort out the binding and get it on the quilt, and get a label made. I also made a hanging sleeve for the quilt out of some of the “left over” fabric. 

I needed 440 inches of binding. I made my usual “Susie’s Magic Binding”, but this time I made the flange just a “little bit wider”. My husband is always my go to for fabric decisions when I can’t “make up my mind”. I show him all the choices and of course, he always picks just the right one! It was his idea to make a bigger flange to put a bit of separation between the main fabric of the binding and the border. In order to do this the flange was cut at 2″, while the main fabric was still cut at 1.5″.

440 inches of binding
Susie’s Magic Binding, modified version. 
Summer in the Park label
Quilt Label for Summer in the Park. Stitched on my Janome 11000

I consider the quilt DONE BEFORE the 10 year mark, because the binding was on by the 31st of January. Spent a few hours in the last week, hand stitching the edges of the label and the hanging sleeve. Then I had to wait to get the final round of photos for a “dry” day. Not warm, just dry!

Pieced back Summer in the park.
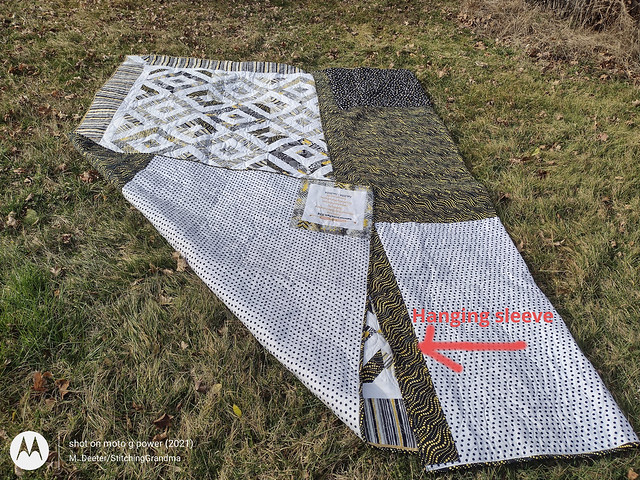
This is the pieced back. Hanging sleeve on the left side of the photo. Final dimension 104″ x 105″ It was “supposed to be square” but something happened in the trimming. Hmmmm….In the future, I will do my own trimming.
Summer in the Park 2014
Front of Summer in the Park 2014
Quilting pattern Summer in the park
Close up of the quilting pattern done by Catherine, the long arm quilter I used (Yes I see those points not matching up!!)
Front and back of Summer in the park
A quick peek of the front and back. The polka dot fabric (white with black and black with multi) were not in the quilt front anywhere. It works on the back I think .

I have one more OLD project that is finished to share on the next blog post! It is a real relief to me to finally get these quilts across the finish line and put to use. Of course, this black & gold and white matches nothing in my house, but hey, I like it !

Are you finishing up old projects or doing a UFO list at your guild?
I still have lots more UFO’s but I am biting them off one chunk at a time!

Virginia Star is COMPLETED

It is always fun to post about a finished quilt, but this one is EXTRA special. My grandaughter turned 11 this summer, in the middle of this project! She has worked all summer on this very large project!

The pattern, Virginia Star, was named for her by pattern designer Edyta Sitar of Laundry Basket Quilts this spring after the two met at the Ocean Waves Quilt Guild Quilt Show.

Virginia was fascinated by the lecture Edyta had given the evening prior, and wanted me to help with an introduction. Edyta and Virginia had a lovely conversation, with Virginia feeling very “star struck”. Edyta said she was looking for a name for her next pattern, and the next thing we knew, VIRGINIA STAR was named.

When the pattern and kit became available, I had my grandaughter choose which colors she wanted, and I ordered the kit. She chose the PRIMROSE collection for her kit. Work commenced the 2nd week of July, and the quilt was completed before she started back to school last week.

Once the top was assembled, we picked a nice chocolate brown for the border to “frame the quilt”. The brown fabric came from our local quilt shop, Church Street Fabrics in Selbyville DE.

Virginia Star borders are on
Borders on

I ordered 3 yards of 108″ wide backing from Marshall Dry Goods, in Batesville AR for the backing. They have some lovely backing fabrics for under $10 / yard.

We cut a large piece of backing, and the two of us set her quilt up to be pin basted on my large work table. With a lesson in pin basting with safety pins, how to use the Kwik Klip tool, the two of us spent an hour getting the top basted.

Once the quilt “sandwich” was ready, we set Virginia up to start quilting. I quickly realized that the quilt was way to big for her to handle. So, I would start the long line of quilting and she would finish the line.

We used Superior Thread, Fantastico, Cashmere color 5035 for the quilting of the body of the quilt, and for stitching in the ditch on the binding. A complementary brown thread from my many embroidery thread spools was chosen for the straight stitching in the border area.

Machine Quilting with walking foot

We elongated and widened the serpentine stitch built into my Janome 8900. Using the walking foot that has a guide, we followed along the seam line. I snap a photo to help me remember the settings in case I have to switch off and do another project before this is finished.

Saving our quilting settings
Snapping a photo to remember the settings

Once the quilting was completed with help from the StitchingGrandma, it was time for a label and binding and a hanging sleeve.

Virginia and I talked about various ways to do the binding, and using up some of the leftover strips from the project. The kit came with a stripe fabric that had a label on it indicating use for the binding. Virginia chose all the scrappy strips and put them together to make the “Susie’s Magic Binding“. This binding is attached to the back of the quilt, and rolled to the front and stitched in the flange.

Binding is ready
Susie’s Magic Binding

After the binding was made, it was time to design and make the label. Virginia chose the wording and the design element and thread colors. It was stitched on my Janome 11000 embroidery machine, and she chose the fabric pieces to frame the label, and worked thru the process of construction.

Virginia Star label
Virginia Star label on the back of the quilt

I finished up the attachment of the binding, hanging sleeve and label on Labor Day, while she enjoyed a family day out before starting back to school. She hasn’t seen the “finished quilt” in person yet, only photos. I will take it to her when we go for Sunday dinner with the family.

Virginia Star ready to hang
Virginia Star, by Virginia Westphal, age 11

With borders and binding, the quilt is 60 x 60. Her mom is ordering a curtain rod for hanging it at home. I can’t wait to take a photo of it, hanging with Virginia next to the quilt. An amazing accomplishment for a young girl, and her first quilt ever! She told me as we were finishing up that the next thing she wants to do is a tiny quilt. She loves tiny things!

Quilting with a child gave me an opportunity to share my love of fabric, and some of the skills I have developed in the last 15 years. I can’t wait to see what she decides to do next.

What is happening in your sewing room this month?

1st project for #AutumnJubilee2022

My friend, Carole Carter, runs Autumn Jubilee on her blog From My Carolina Home. I may have mentioned once or a hundred times. 🙂 HEY, it’s fun and I don’t want you to miss out! Anyway, the first project was posted on Monday and it was for a Wool Stitch Along. Kudo’s to Carole for rounding up sponsors for the posts. If you like wool…her sponsor,  One Of The Flock, has some beautiful things in their shop online.

I contemplated going out and making a purchase to participate in this first project, but as the day went along, I just could not justify in my mind making the trip and the buying wool for hand applique. I am just not loving hand work (note two hand surgeries in last 5 years and cortisone shot just a month ago); so I decided I would give the project a whirl with cotton, doing fusible applique (thank you Heat n’Bond light) and doing some machine stitching instead of hand stitching.

I got busy, printed out the pattern pieces and set to work with my reliable felt pen, tracing the pattern bits onto the Heat n’ Bond.

Heat N Bond Light
Tracing on the Heat n’ Bond

Next up, I dug into my scrap drawers for fabrics that might make a good Cornucopia and for the various vegetables and leaves. I found some excellent pieces to use for the leaves, and I added probably more than the pattern called for, but I just “wanted to”. Initially, I used the leaf pattern but then I picked out some leaves on a scrap I had and fussy cut them out.

Cornucopia Autumn Jubilee
#AutumnJubilee2022

My background fabric is 18″ wide. I made it fairly large so I can decide as this month progresses what I might want to do with the project. Pillow? Table Topper? Wall hanging? Too soon to tell. I did reserve the other half of the yard for a backing of some sort.

I figure some stitching will be in order in the next couple of days. I have another wall hanging, hanging around, that needs the stitching finished on it, and both projects call out for my “cashmere” thread from Superior Threads. (Fantastico #5035 Cashmere Cone). May be time to get another spool on order. Looking at Superior Threads website, I began to drool over all the new colors that might work. Oh…I need to get to a big quilt show and shop in person!!!! Maybe the Hampton Roads show in February. I keep a spreadsheet with all my Superior threads, by type, color and number. There are a couple that are on my list for replacement soon, but others that I picked up “just because” and they languish on the shelf. I wonder if anyone else does that?

I’ll update the progress when I make some! What are you working on this week? Are you “stitching along” with the #AutumnJubilee2022 this month? Lots of other fun things to do as well, so do check it out.

Using up some scraps

Last week I posted about my class project, the To the Nines pattern, where I had a “fat seam allowance”. Those discarded blocks have been turned into something useful! I decided to use them as the basis for my new “tablet sleeve” for my upcoming cruise. Hubby thinks the cover / added keyboard give it protection, but I wanted to make a cover / sleeve for the device.

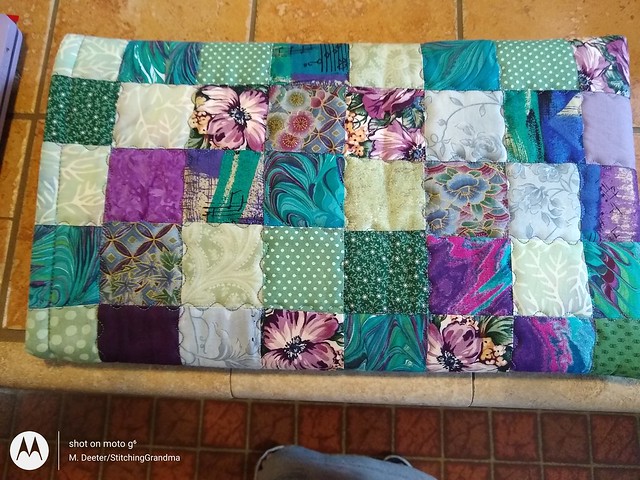
Since I only had 4 orphan/discarded blocks, I knew I would have to make a few more. The tablet is about 8 x 12 and I was using 2.5″ squares. I ended up with 8 squares x 5 squares for the front of the bag, and the same for the back. I quilted it using Bosal In-R-Form for the batting.

Here is the result –

leftover 9 patches

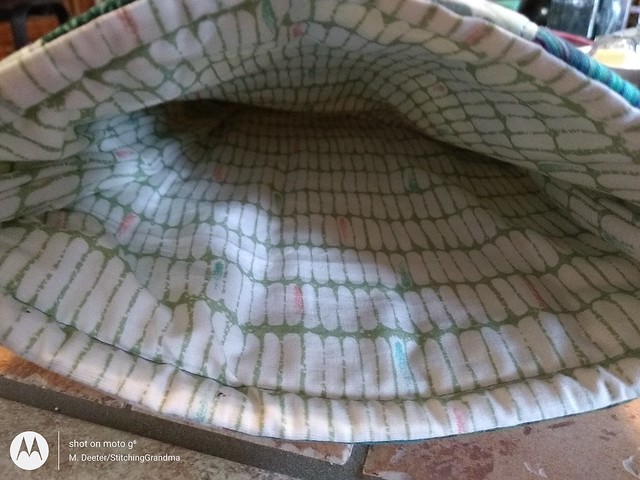
I used a light fabric for the lining.

Snug fit

It is a fairly snug fit with my tablet. It isn’t going to fall out. There is some extra space along the top. Originally I was going to roll the top edge down to make a cuff, but then I decided the cord needed to go in too.

My husband suggested I add a velcro closure and handles, which I did AFTER the sleeve was made. Now, I guess it is a bag not a sleeve!

Handles added

Boy adding the velcro and handles after the bag / sleeve was already made was a pain in the neck!! Lesson to self….think the project all the way through before rushing through the creative process. I probably should have unstitched the top edge of the bag where the lining joins the outside and opened up the side seam….but that would have been too easy. Instead I fought with the narrow opening and my open arm on the sewing machine. I got it done…but I should have thought that through better.

Anyway, I think the colors of the bag go nicely with my lavender tablet.

new tablet
Lavender Tablet with keyboard

I showed my sister the bag I was making and it reminded her of the bag I made for her Kindle years ago. She gave the kindle away to one of the grandkids but still has the little bag. She has a tablet she will be bringing on our trip in a week, and I asked her if it had a sleeve or a bag. It does not, so I offered to make her one. When she sent me a photo of it, it looks like it is the same one I have and similar size. She asked for it to open on the long side like the Kindle bag. She also liked the short handles.

I went to work on her bag, last night after dinner, and pulled some left over half square triangles, and this is what the front panel of the bag will look like.

starting another sleeve

Those half square triangles were the abundance from Addison’s Quilt I made 5 years ago ! (I could have made two quilts with all those leftover blocks!)

I decided to “start bigger” with this bag, box the corners, and add a pocket inside for the charging cables and other “stuff” she might want to carry with it. Her device has the same detachable keyboard, but without having exact measurements, I am erring on the side of caution for size. My bag/sleeve could have been a bit bigger in hindsight.

I started by making two panels for the front and back of the project then stitched them together at what will be the bottom of the bag, then quilted it onto the Bosal In-R-Form. I used the same serpentine stitch with my walking foot for both bags. At the center bottom seam, I did straight stitch in the ditch and 1/4″ on either side of the seam.

my sister's tablet case in progress

When the sides are stitched together it will look something like this —

another tablet case

Of course, there will be handles, and lining and the bottom will be boxed . I think I will add a magnet purse style closure on the bag. It seems that magnetics and electronics aren’t a problem anymore, as the keyboard to my tablet attaches “magnetically”. (My husband loves that connection concept).

I hope to finish this second bag up today. I’ve picked out a print turquoise to go inside for the lining and the handles. She doesn’t want long handles, just something to slip over her arm, not her shoulder.

95% percent scraps used for both bags, just a little additional fabric from the stash for silly things like straps and pockets and lining. Between them both I only used one package of the In-R-Form that I had on hand. Very convenient.

I will take the bag for her tablet with me on my flight to California next Sunday. There simply is not enough time to mail it and ensure she has it before she travels to the port.

Tablet vs phone
Size matters!

I took a picture of my phone next to the tablet to show her how it would be so much easier to see.

Honestly she had forgotten she had it, so yesterday she charged it up and her daughter helped her get some things connected and running. I’m really glad she is bringing her tablet, and my mission is to help her learn to use it, to use her phone as a hot spot, and get all her a favorite websites loaded. She has a serious vision issue due to her stroke last year, and the size of the screen on the phone has been making things challenging for her this year. I hope using it daily on the cruise will reinforce the simplicity of using it when she is at home.

That’s it for today! Are you working with scraps? Have you ever gone full steam ahead like me, only to realize later how you “should have” done something differently?

Linking up to Oh Scrap – Quilting is More fun than housework!

Busy week wrap up

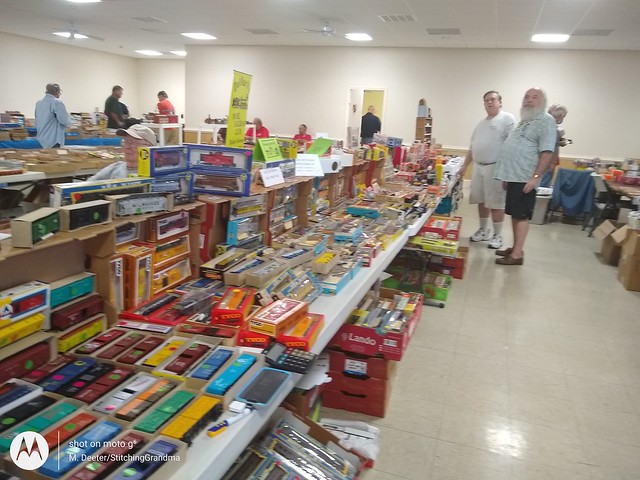
It HAS been a most busy week or two. I don’t feel like I have gotten much done but I have had my hands in the middle of a lot of “stuff”. Hubby had a train sale for his club and we spent several days getting things ready to go. We had to put cello sleeves on the boxes with small parts and he had to figure out pricing on every single item. I can “stick stickers” but didn’t have a clue about value without his explanation. They had a very large collection of HO trains that had been donated this year to DelMarVa Model Railroad Club.

pricing trains for sale

We had to be up early last Saturday morning and at the show by 7:30 to set up all the merchandise.

Train sale

Because we had all our items prices and sorted by types it was fairly easy to set up. The only problem was, not enough room on the table, and NOT enough customers. The sale was poorly attended and as a “vendor” highly disappointing. We had enough merchandise to fill 8 tables, but only had 2 reserved. In hindsight that was probably best. Attendance was dismal at best. We can only guess why….beautiful weather, advertising or people still afraid to spend a dime or go out out in public?

Anyway…I did have some fun this past week in spite of the weekend full of work. I had a gathering of the Queen Bees and we got to meet again at the local library for a day of sewing. FIRST time in 18 months that we could sit and sew together. We were a small but mighty group in a large space and just to hear the hum of the machines and the chatter was wonderful. It felt like old times.

For the bee, I took my squares to work on the blocks that Carole Carter requested for the SAFELIGHT QUILTS. I got a few blocks made to go along with the ones I already have finished. I think I should have enough done to stitch a top together fairly soon and get it in the mail to her. From Carole’s blog post – “This project is going to be ongoing for at least a few months, so if you have time to send a few blocks between now and December, we can use them. If you haven’t seen this project until now, my local guild area is making 60×84″ quilts for the beds at the Safelight Domestic Violence Shelter. We have just a dozen or so quilters, and we need 700 blocks. If you can help with making a few blocks, here’s a pdf of what we need for you to download – Safelight Quilt Blocks. ” The block I am making was originally called the Perkiomen Valley, and I have been making some of these off and on in the last few months. I tripped over a pile of half square triangles, already made, that will go in this block after they are trimmed. The rest is simple squares, and it does go together quickly. I cut the background neutral squares I needed when I was cutting a similar size for the class Carole is teaching at my guild on Tuesday. Having everything cut and in a basket, ready to sew means I can knock a few out at a time with out having to do a lot of planning. Our bee used this pattern a couple of years ago when Carole was collecting quilts for hurricane victims.

At the bee, one of our members was working on the cutest pattern from APQS. I have to say I was so enamored, I looked the pattern up on my phone and saved it right then! I can’t wait to see how hers turns out!

Free pattern

This free pattern is available at the APQS website.

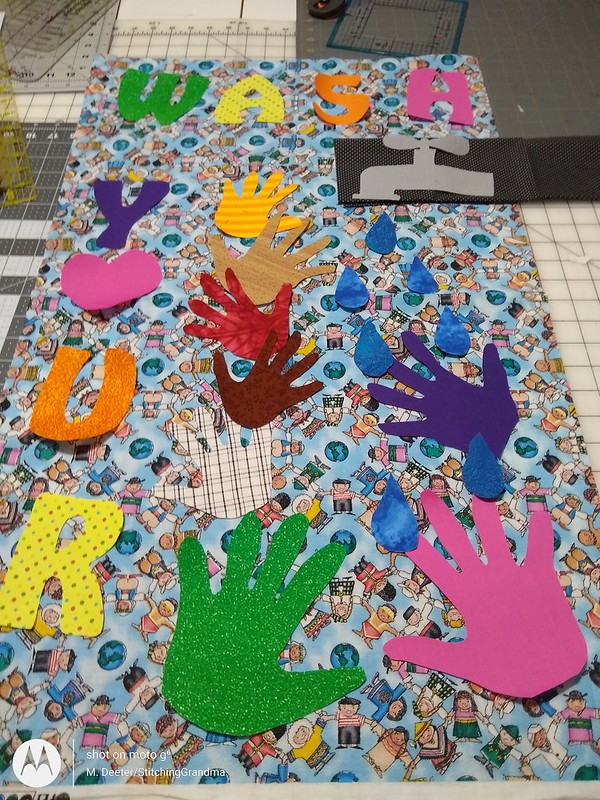
I loved it so much that I got busy the next day and cut out all the applique pieces.

Wash your hands

My hubby and I debated about that faucet and I found some sparkly fabric to overlay on the faucet. Once everything was fused down on the background, I layered the piece with a bit of warm and natural batting and started the top stitching.

blanket stitching

It took a while to get around all those curvy hands but I had a great time doing it.

I managed to get around 3 hands before I gave up for the night. Doing the rest of the stitching took a bit of time on Friday afternoon. I find this a very fun project!

Now that I am finished with the top stitching around the fusible applique, I need to figure out a backing, do a bit of quilting to anchor everything and figure out a plan for hanging it. Considering using few hanging loops for a different look, or maybe put a rod pocket on the back. Not quite sure if I am giving it away or keeping it, but it is fun to make! I’m calling it the “reminder” banner.

Do you ever just see a project you jump into making? The only yardage used on this one is the 1/2 yard for the background. All the other pieces came out of my drawers of scraps. What the heck, I needed another project!!

Coming up this weekend is another Wings and Wheels airplane/car show. This time, the show is in our own community. My hubby has been waxing and polishing his shiny truck to enter in the car show, and I was asked again to help with the Delaware Aviation Museum Foundation booth. We will be up bright and early for that, but no airplane ride for me this time. They asked me to consider to consider becoming a long term volunteer. They are such nice people and I had lots of fun when I flew in Panchito to the show in Hagerstown Maryland earlier in the month. I’ll be interested in seeing what their schedule is for next year and how it fits around my cruise schedule. I know this year they still have 2 other fall shows to do, and my cruise schedule conflicts. But, I am available on Saturday and was already planning to be at the airfield. This show is familiar to me as we have gone several times. Watch for some pictures (from the ground) next week!

Any fall festivals or community events in your area this weekend? Happy October!

Small Town Charm project completed

NOTE — Edited to share the “last” photo.

Edit — The free pattern for Small Town Charm embroidery blocks is no longer available.

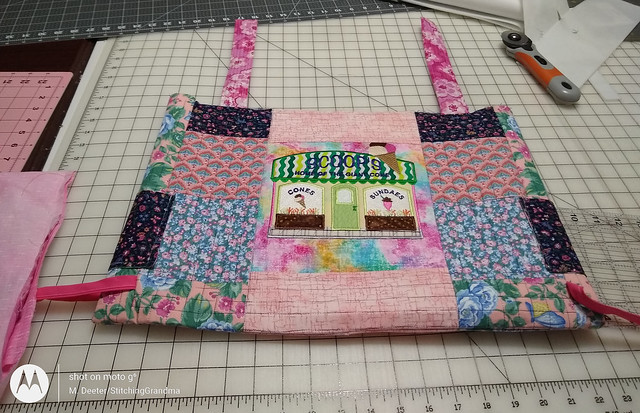
I wanted to share my completed Small Town Charm project with you. The blocks I have shared in previous posts have been incorporated into a tote bag for my friend June. The bag was made with short straps to go over her walker handles, and buttons to hold them in place. It also has ties on the side to keep the bag from swinging while the walker is in ‘motion’.

Before I made this project I took a look at her existing bag and measured it. Those measurements were important as I created the new bag, since I didn’t have a walker handy to test the fit.

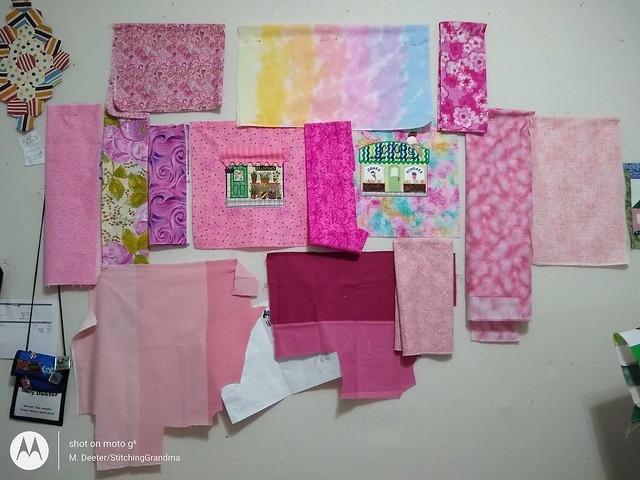
I had fun figuring out which fabrics I wanted to use for the bag, making my choices from that one box of fabric I had dumped out and sorted. I really wanted to make the bag for June using her OWN fabric. My hope is the fabrics will be ones she remembers having. While they don’t have the same elegance as the beautiful blues and golds in the bag picture above, they do remind me of things she likes. And, when I agreed to make the new bag, June didn’t make any color requests. Well…you know that I like things scrappy!

sorting options
Trying out possibilities

I played around with lots of color combinations, and thought about how I wanted to “construct” the bag. Once the decisions were made, the extra bits of fabric came down off the wall, and the construction was pretty simple.

After the front and back of the bag was made, I layered it with Pellon 973F (Fusible Fleece) and did some quilting. I made the straps, and put the bag together.

SMT Tote bag
Waiting for lining

Once the outside of the bag was made, I chose one of those pretty pink fabrics and made the lining. I added pockets for both sides of the lining. I used the fusible fleece in the pockets too, so it has some body.

Construction is similar to lining any tote bag. Once your lining is ready, you slide the main bag inside the lining, with pretty sides (right sides touching). You have to make sure you leave an opening for turning. My opening was on the side, just above the edge of the pockets.

STC Lining
Right sides together

Those little clips are great for holding the edges of the bag together and keeping everything lined up during the sewing process. You can see the stitching of the pockets on the back side of that lining in the photo above.

Below, is the inside of the bag showing the pockets.

INSIDE STC lots of pockets

Once the bag was pulled through the opening and turned “right side out, a quick press along that top seam, and of the lining before top stitching around the upper edges. I use my clips then as well to make sure there is no shifting.

Button holes in the straps for two closing positions, and some bright shiny buttons on the Flower Shop side of the bag.

STC Tote bag
Small town charm bag

The blue bag she had previously had a bit of velcro tab to keep the bag closed. I added a 3″ strip of velcro near the top edge of the new bag, skipping the tab. I also added two pockets on the sides of the bag, where she can keep a packet of tissues if she likes. The ties for the walker on the bottom are made from June’s stash of bias tape binding.

The bag has a “scrappy quilter” look to it I think. My husband, who knows her so well, thinks she is going to “LOVE” the new bag. I had fun making the Small Town Charm embroidery blocks, and building a bag that will be functional for her. I’m glad I have had a little experience making bags in the past few years, or I would never have tackled this without a specific pattern in hand.

If I was making this into a tote / purse for myself, I would not have used the dimensional awning on the flower shop, but I knew the bag would be stationary once attached to the walker, and I think the flower shop will face out, so it won’t get mashed during use. For myself, I would use a magnetic closure, and put a couple of key ring loops inside the bag to have a spot for hooking my car keys. (Hate hunting in the bottom of a bag for keys!) Because of where / how June lives, she really doesn’t use keys.

Do you enjoy bag making? Any tips? Do you have a favorite pattern that you make frequently?

EDIT — bag delivered and installed!

Tote bag installed

#DimeSewAlong

Labels for old projects and Autumn Jubilee

As I was changing out a table runner this summer, I remembered that the project didn’t have a label on it. If I make something I usually put some sort of label on it to remind me later of “when” I made it and “what” I referred to it by on my blog posts, in my photo collections etc. I was also moving a wall hanging his summer and when I looked at the back of it I discovered it was lacking a label. I made a mental note to “make labels” and immediately carried on doing other things.

While I was out in my sewing room, working on the never ending scrap clean up (oh…do I have a mess…..) I took a break from cutting things up and grabbed a piece of fabric and made a couple of labels on my embroidery machine.

I have to tell you I haven’t totally figured out the Janome 11000 that I have been using now for a solid year. I can’t figure out how to get more than one line of text on the screen, so I sat down at the computer to work it out. I am using the software called Embrilliance, in EXPRESS MODE, which is FREE.

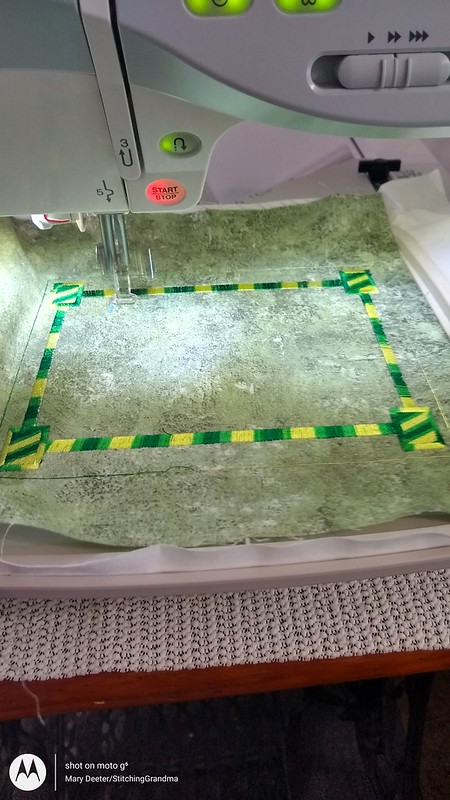
I’m learning more and more all the time about how to use it. When I started with this set of labels, I found a “frame” built in to the software options. I tripped over it while poking around in the program, and can’t tell you where I found it. (Don’t you just hate when you find something cool and can’t repeat it!) Anyway, I had this green and yellow variegated thread already on the machine, and thought it would make a fun stitch out.

Variegated thread frame
fun with variegated thread
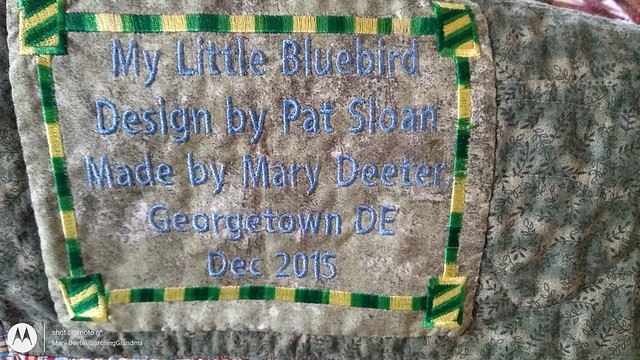
Blue bird label with frame
Finished label

I am having a little “bobbin thread” issue, with the bobbin thread showing on top with this blue thread for the words, but I’m not going to sweat the little stuff…the label is finished, stitched on.

My Little bluebird

I use the same method all the time when making a label to have a nice “finished” edge. I mentioned before that I learned the technique from Pat Sloan https://www.patsloan.com/ when she taught how to make a nice ‘circle’ for an applique project.

Essentially, you lay a piece of fusible pellon over your label, with the glue side facing the RIGHT side of your label. You stitch all around the edges, then cut a slit in the pellon and turn it “right side out. You smooth the edge where the pellon is stitched to your fabric with your finger tip and you have a nice finished edge. I iron the label to the project, then hand stitch around the edges. Most of the time two edges are enclosed in the binding, but since this was adhered after the project was made, I had to hand stitch all the way around. The beauty of the fusing is it holds your label in place while you stitch; no pins! Also, it is an extra security to keeping your label on the project. Not quite so easy to remove, depending on the type of pellon you choose to use.

circles on bluebird
Circles for applique
Close up blue bird
Lots of circles with this machine applique project

The circle turning method was used on the wall hanging the label went on. So, after 5 years of hanging around with no label, it is “FINISHED”. I did this project in a class with Pat Sloan and wrote about it several times https://stitchinggrandma.wordpress.com/2015/11/12/wild-and-free-and-bluebirds/ while it was “in progress”.

The second label I made was for my FIRE AND ICE table runner. I used the same green fabric, but switched to bright orange thread to complement the “fire’ on the runner. It’s a funny name for a project, but the ice blue and the bright oranges were the inspiration for the name.

Fire and Ice label
label ready to stitch on

I had pins in it all around because I thought I would bring it in the house, pin to the back of the runner and hand stitch on last night. I decided to wait, and get the runner out of the closet and bring it to the sewing room to press on first. I hate to battle pins! And, I think the edge will be much sharper and crisper when I press it on first.

Note, this time I had NO problem with the bobbin thread peaking through. Sometimes those machines can be a bit finicky.

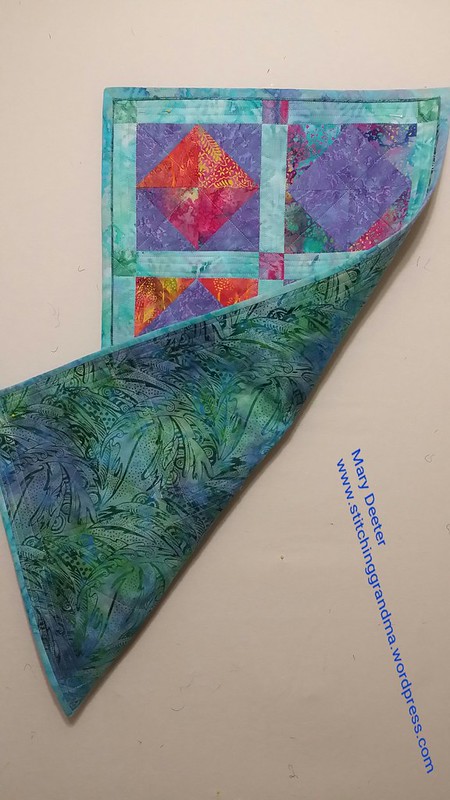
Batik table runner Fire and Ice
Fire and Ice table runner
Back of the table runner
Back of the runner

To see more about this runner, look for my previous post – https://stitchinggrandma.wordpress.com/2018/08/27/fire-and-ice-batik-table-runner/

It’s been fun looking back on older projects, and getting the labels done.

Batik placemats
2018 batik placemats

I just love the different bright colors in batiks. Some can feel really dark, so they have to be used “sparingly” I think.

More placemat fun
Placemats in 2018

I can’t remember if I made 12 or more of these placemats back in 2018. I think I had given them all away to my daughters. When I was looking for a piece of fabric to use for the 2 labels I tripped over a basket of “partially made” placemats. That basket has been sitting around since 2018, so I must have thought about making more. I need a dozen for my “summer” table. I think they will all be a bit different from these I made early on. Something else to go out and work on I think. I really have to get rid of these baskets of partial projects in my next “effort” in my never ending clean up.

I am lucky to have the space, but the “clutter” is bogging me down. I am trying to spend a few hours every day this week to clear up and clean up a bit. I am on a self imposed deadline. Next week starts “Autumn Jubilee on the FROM MY CAROLINA HOME ” blog, and I always look forward to working with fall colors. Carole Carter did a Facebook Live Chat on the Friends of From My Carolina Home page (https://www.facebook.com/groups/591941124470566 ) last week and gave us a hint at what she has planned for October. She mentioned we might want to get a small “leaf” print, at least 1/2 yard in fall colors. I was able to pick up a piece this week that I hope will work. When the shop was unrolling it from the bolt, I realized it was the “end of the bolt” and took what was left. I got about 1 3/4 yard, so I will have plenty.

fabric for Autumn Jubilee 2020
Small print leaves for Autumn Jubilee

Since Carole has been doing Autumn Jubilee, I have kept a container with fall fabrics, and her patterns. It was always my “go box” when I had a quilt bee. I worked on bits and pieces for fall projects for years, and have made plenty of table runners and placemats. This week I took the bin out, sorted things, refolded and assessed what I had on hand. I have another similar sized tote with fall colors that were not “specifically” for Autumn Jubilee. I know I have used up my favorites over the years. Next blog post will be a compilation of my Autumn Jubilee projects from previous years, while I wait for the 2020 edition. I heard there will be opportunity for “machine embroidery” to be included, and I am excited to start something new. Meanwhile, I best get busy cutting up scraps and finishing up another old project left lying around.

What is happening in your sewing room this week?


Fun with kids and a final finish

Had some fun this week with a grandchild. My very youngest granddaughter  (age 4)  and her mom invited me for a bike ride around our favorite trail. The weather was perfect for getting out and getting some fresh air.  The state parks require you to still bring a mask and wear it whenever you are near other park users.  It gets a little tricky to pull the mask up over your mouth and nose when riding, but we managed. Sadly, not another person we saw had masks, around their neck, on their face at all. The park has big signs when you enter, but virtually ignored. We try to do the right thing, and that’s the best we can do.  My daughter and I feel like we don’t want to hear about people complaining about those “bike riders”, so we follow the rules.  Anyway, we had a great mid day ride, and then treated ourselves to a “take out lunch”.

a little exercise

Our take out lunch was from a little restaurant downtown (Cafe on the Circle, Georgetown DE). I phoned ahead and ordered the special for the day. It was a wonderful grilled chicken with avocado, bacon and ranch on a soft kaiser roll. My daughter chose potato salad and I chose coleslaw. The sides were both delicious. The Cafe on the Circle has lovely outdoor seating behind the restaurant.  Highly recommend if you are looking for a take out lunch. I’m planning to pick up lunch again later this week. (We have only done take out twice since March, and I am SO ready to not be cooking every day!) 

After lunch, my granddaughter and I went up to my sewing room to see about repairs to a much loved “unicorn backpack”.  It seems that the poor unicorn had lost a leg, in what her mother referred to as a “shark attack”. (Kid shark, baby shark, doggie shark???) The bag also had a critical “loop” come undone that helped hold the straps in place.  My granddaughter helped me with the sewing while her mommy took pictures. 

Sewing with a 4 year old

  It only took me two tries to get it right….Goofy Moofie!  I forgot the first time thru to loop the plastic bit over the strap, so we did a little unsewing and re-sewing. She loved the pink thread I used to close up the lining.  I did do a little reinforcement stitching on the other straps attachments. (Makes you wonder why they weren’t tacked down better!)

Then, we had to figure out what to do for the poor unicorn who had lost it’s leg in that “shark attack”.  Did we want to make a new leg, remove the remaining leg, or perhaps we could learn about differently abled bodied unicorns…..Mommy and child discussed and we repaired where the leg had come off, and she has a great tale to tell of her one legged unicorn!

A little hand sewing

We learned how to use a needle threader and she and I stitched together, sewing up the wounded parts, just like a doctor would. Four years old and wanting to sew. Those little fingers did a great job holding on to the needle and thread. She got the concept pretty quickly of pushing the needle through. 

All and all a great kind of Stitching Grandma day!  (Don’t judge the messy sewing room….)

Finished the binding on Mama’s Garden and hand stitched the label and hanging sleeve too! I did the “binding with the flange” also known as Susie’s Magic Binding.  

Binding on Mama's Garden

Just love the way that little pop of color looks.  

mama's garden completed

Mama’s Garden is officially complete!

  Just in time to take to the Material Girls Quilt bee on Wednesday morning!  We are having an “outside” / “in the garage in case of rain” quilt bee with appropriate social distancing and wearing our wonderful hand made masks!  It will be fun to have “something finished” to show !  It will be nice to catch up in person with conversations, and see how others are coping. 

It is fun teaching a young person to do something you love!  Last week I babysat and taught two grandchildren how to play backgammon. (They both beat me!).  A year and a half ago I taught my husband to play while we were on a cruise.  I love the game, and it is very fun to play.  Next time I play with the grandkids, I am not going to give them all my “favorite moves”….but while they were learning the ins and outs, they learned all my secrets!

We are keeping our family circles pretty tight for a while, when things are starting to “open back up”.  None of us want to be the guinea pig for the COVID-19 virus, so we are taking steps to ease back into community life very carefully, and not put the rest of the family at unnecessary risk. This way, we can spend time together, which we desperately missed in the months of March, April and May.  We are “bouncing contact situations” off of each other to make certain none of us do anything the others are not comfortable with. It is MUCH more fun to see them in person than over a video chat!  Social distancing from friends is not fun, but as long as we can see “each other” in the family, it is tolerable.  We will “avoid” restaurants and hair salons, and such for just a little longer to see how the area responds to things opening up. My enjoyment of food is getting kicked up a notch with the take out lunch following the bike ride, and family dinner with pizza made by someone else, and NOT out of the freezer!!!  

 How are you doing with the “distancing”??  Have you had any fun with a project lately?  Taught a youngster a thing or two?? Â