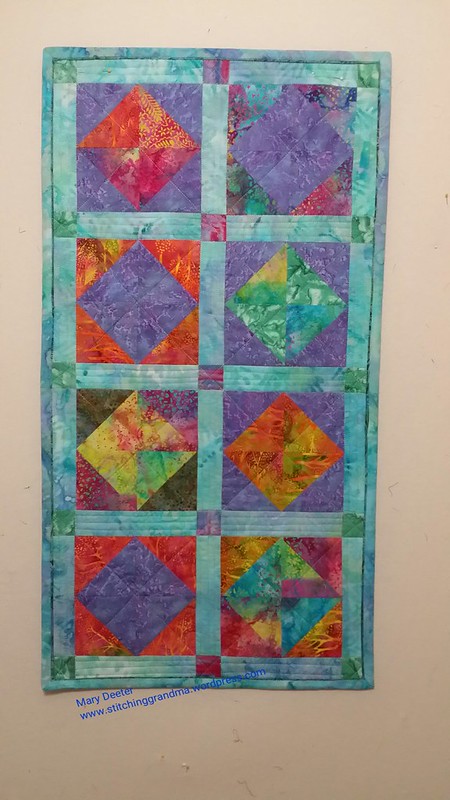
Fire and Ice Batik Table Runner

My sewing room has visitors off and on all last week.  We had 4 helpers for 2nd Time Around prep on Friday working hard for the benefit of the guild.  One member, Arlene, took home a partially made project that she found in the donations and came back on Saturday to lay it out on my big table and get it pin basted. She had taken something that someone else discarded, added a little time and effort and borders, and now has a baby quilt ready to donate to one of the many charity groups Ocean Waves Quilt Guild supports.

Another friend, Karen, came over and laid her languishing quilt top on my big table, and we measured the dimension, and then measured her available fabric for the back.  We tossed around ideas for increasing the size of her backing with some pieced blocks and extra bits.  I can’t wait to see how she proceeds. She had 5 wonderful paper pieced blocks she wanted to incorporate on the back, and we worked through how she could do that.   Of course, we needed my design wall blank, so before she arrived I cleared my design wall of those batiks that have been hanging around since the end of July.

Batiks hanging out

I wrote about them here – small-projects-and-small-bits and here Batik Fun .

I can’t share what she is working on, but after she finishes and the gift is received, I will.  

Anyway, I had stacked up all those pieces from the design wall onto my sewing machine while we worked on her project.  After she left, I decide it was time to do something with the table runner.  I dug in my bin of greens and blues and found a nice batik that I had “just enough” of a piece for backing and binding.  I also dug in my bin of scrap batting and pulled out a chunk that was “just enough” for a table runner.

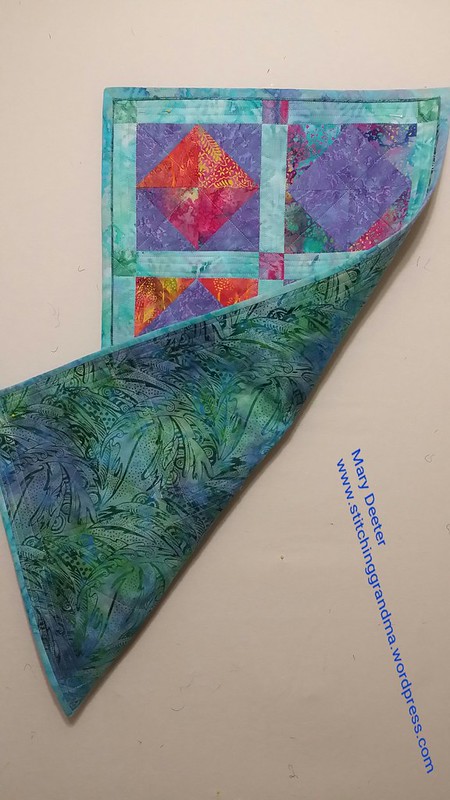
I layered up the table runner, batting and backing, pinned it and put on my walking foot again for machine quilting.  (Most of you know that I am still terrified of free motion quilting (FMQ) but have had good success with straight line walking foot quilting!)  (All right, I debated FMQ, but quickly shook my head no.  I think I will get some practice in on those placemats….later).  I previewed 2 threads and chose Superior Fantastico thread #5025, which is a variegated, pink, blue, yellow, and green thread.  I used it in the bobbin as well as on top.  It actually shows more on the back than I like, and now I wished I had stuck to silver for the bobbin!

I stitched across each block and though the cornerstones making and X.  Then I did some channel quilting in the sashing.  Honestly, the quilting in the sashing took me the longest, because I had to stop at every cornerstone.  I also stitched in the ditch between the blocks and the sashing.  There is “enough”  quilting to keep the table runner nice and flat, but it is not heavily quilted.  I kept debating going back and doing something in the “triangles” on each section with either straight lines or the hopper foot. By the time the channel quilting was finished, so was I.  My “go make dinner” alarm went off, and I shut off the machine.  

After dinner, I was re energized and  hubby and I went back out to the garage. I was just going to cut and make the binding.   He is working on building a “test track” on a shelf for “speed matching” his locomotives……(He needs a blog!)  I might take a picture or two when he gives me the ok!  I had a great audio book going and time ran on, as it often does.

I made up my binding using my favorite “Susie’s Magic Binding” method,.  I continued to sew while listening to the book, and got it the binding on the runner.  I like the way it turned out.  Hubby always tells me he likes the added “pop” of color the binding adds.  I used the smaller of the TQM Binding tools to join the ends and I got the “BEST” join ever on this project.  (Note, because of the piping/flange, I baste the join, check to see if it lines up and adjust if need be.  I made one slight adjustment and it is perfect!)  I think using the smaller binding tool helped.  Or, I had more patience and lots of practice from all those placemats!   If you have trouble with the join, try basting it first.  The link for the binding method shows written directions and a video!

Table runner bound

The fabric from the back of the runner is the same fabric I used in the “flange” on the binding.

Back of the table runner

I mentioned in a comment to a reader this weekend that this binding is a joy to make, not a chore.  I love it because there is NO hand sewing!

I was trying to remember where I had used that batik for the back of the runner before, and it just occurred to me…my Sensational Silk wall hanging, borders and backing (more about it here – In Betweens  ).  There is just about enough left to use for the back of one of those placemats in the stack.

Hubby said to me after the table runner was bound, looking at it in the sewing room, that he thought it was “too small”.  It measures about 19″ x 35″.

I had to bring it in the house and put it on the dining room table to get a look.  (That meant I took all those Autumn Jubilee placemats off for a while!) The dining room table is 40″ x 80″ so I think it floats well in the center.  I like the finished size.  I have made longer runners, but this works for me for now.

Fire and Ice table runner on the table

I decided to call it “Fire and Ice” because it feels HOT with all the orange and cool with all the turquoise and green and purple.

Time for me to get busy labeling projects!  Do you put labels on “everything” ?  I didn’t on my placemats, but will on the runner.  I need to make a label for my Grandma’s Kitchen quilt too.  Time for me to tackle the reset of the stack of batik placemats.  I had wondered what others thought of using muslin for the back of placemats in a previous post.  My friend Nancy has a couple of nice batik pieces she is going to share, and I am digging around in my bins for more batik yardage and fat quarters.   (I do think I will practice some FMQ on those….wish me luck!)

Do you name your projects? It is fun to “FINISH” some smaller projects.

Stinky donated fabric

Regular readers know that I do the Second Time Around for my quilt guild. We take in donations, and preparing it to be resold to guild members at our monthly meetings.  I’m in my 3rd year of this activity, and I have run into a BIG problem!

I want / need ADVICE  —  Backstory – I picked up a giant container of fabric donated to the guild.  A SMOKER donated it to the church, who donated to the guild. Thankfully, the secretary at the church warned me it was smelly.  The container was so big and heavy, it took two of us and a cart to get it to the car, and then we split it into 3 containers, so we could lift them. We got our first whiff while we were standing in the parking lot.  I made sure to close the containers tightly when we put them in the back of the SUV.

When I got home, I had to get it out of my car and out of the garage due to the stench.  I opened the containers outside and further split the piles of fabric to get some fresh air around the fabrics.   It made my eyes water, and started me sneezing and coughing. I let it sit outside my garage for 4 hours in the fresh air.  Those boxes are going outside again this morning for another round of fresh air.

I did a little google research and discovered that VINEGAR is the trick, if the item is washable.  The recommendation was 1 cup of vinegar to a load.  (My hubby has lots of vinegar in the garage because he makes weed spray with it..another Google research project).

I sorted out one color, GREEN, and brought it in the house to wash. I soaked it for 2 hours in the washer with hot water, and 4 cups of vinegar.  I increased the quantity of vinegar because the stench was terrible.  After it soaked, and rinsed, I washed it with hot water and laundry soap, and softener.  I also put in 4 color catchers during the 1st soak. (Good thing too!!).   After the 2nd wash it did not smell, so I put it in the dryer, on the anti-bacterial setting, and added about 4 dryer sheets.  That setting is very hot and runs for about 1 1/2 hours.

I have to report it no longer smells like anything at all!   No smoke smell, and no smell from the liquid fabric softener or the dryer sheets.  I had to do some “fluffing and folding” because some of the really big pieces got twisted up. There were some 3 & 4 yard pieces, and they got a little tangled and the expected strings, but really, not to bad considering I had the washer on heavy duty/deep water wash.   There must have been 25 yards of fabric in just this one load. I considered the method a success, and since there was so much fabric, I think it was worth saving.

Down side to my new washer (Maytag top loader with no agitator) is that it doesn’t “fill up” above the fabric. It “senses” how much water needs to go in.   I cheated the machine, and added 3 “buckets” of extra water, to make sure everything was covered. I’m sure I confused the brain of the washer, but I feel like it needed that extra depth.

Green fabric

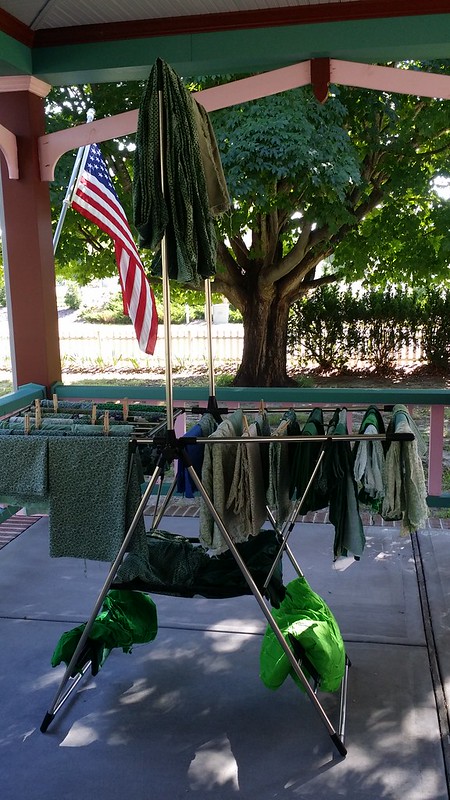
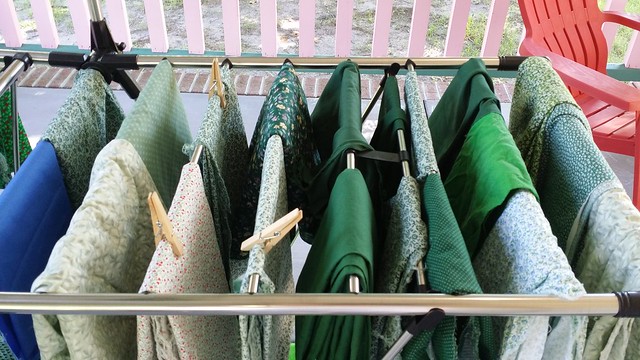
I decided to finish this pile up by putting the pieces outside on the porch, in the shade to continue to air.

Airing of the greens

There really were some very pretty pieces!

Pretty greens

I know it doesn’t look like much now, but this is a lovely batik!

3 or more yards of batik

Several yards of that batik, so WORTH the effort I think!

I’ve started the next “SOAK” load.  The pile of reds is in the washer, with the 4 cups of vinegar and a little OXYCLEAN. (I put that it, because 3 or 4 pieces had a bit of “stain” at the fold line.) Not as large a volume of fabric, but some good piece, worth the effort to save from the “stinky smoke”..

Now the question —-  HOW do I get the stench of smoke out of the small pieces??  From what I could see, on the first dig through the bins, there are squares, and blocks and strips .  I’ve got lingerie bags, but I wonder if there is a way to get the stink out WITHOUT washing those small pieces, and without really “touching them”.   I’m afraid that doing the heavy soak and heavy wash that I am doing with the large pieces will just leave me with a bag of strings and fuzz.  I am highly allergic to the smell, and don’t want to over handle the pieces if possible until they are neutralized.  So, share your wisdom and experience, please!!  

My volunteers will be steam pressing, trimming, measuring and folding the first 25 yards or more and getting it ready to sell at the September guild meeting in the next few weeks.

My daughter & I chatted about the Pros & cons of washing all this fabric. It is worth it, IF the ends justify the means.  Well, I think it was worth the washing, in spite of the the wrinkles, the cost of the washing machine wear and tear, hot water, drying, and laundry products.  Our Second Time Around sales at the guild meetings average over $400 at each meeting, so the effort pays off.  The members LOVE to shop our tables, where we are selling fabric for $2/yard.

Looking forward to hearing any and all advice.

ps…I’m sure most smokers don’t even realise how the smoke in the air clings to their fabrics.  I was married to a smoker for nearly 30 years, and he had no idea how bad the smell was, and didn’t believe what it did to his body. His death from Kidney cancer was attributed to smoking at age 53.  If you need help stopping, talk to a medical professional.  For your sake first and foremost, and for the sake of those who love you.

The final chapter of my April travel adventures (and a FINISHED Quilt!)

PHOTO INTENSE POST – fair warning…..

If you have been hanging around reading over the last 2 months, you are aware that I took a lovely cruise for 10 days in April along Baja California and the Sea of Cortez, also known as the Gulf of California.  This cruise returned to the Port of San Pedro California.  My next adventure began when my brother Rich and his lovely wife, Carolyn (AKA – http://www.OneBlockWonderWoman.wordpress.com) picked me up at the port and transported me (and all my luggage) North of Los Angeles to their lovely home in Monterey County California for a brief stay.  

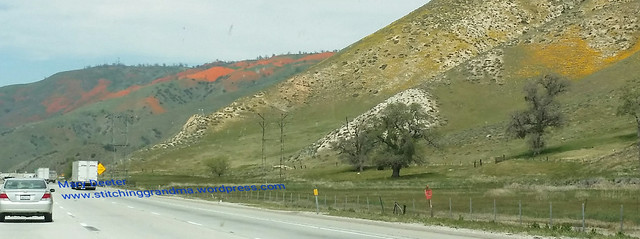
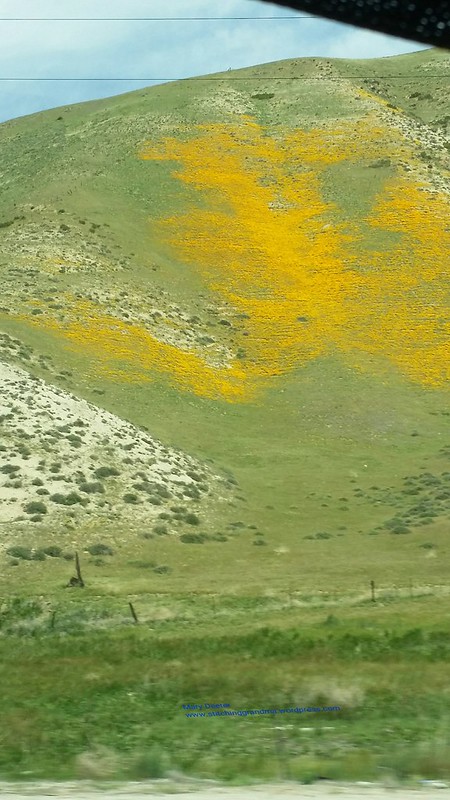
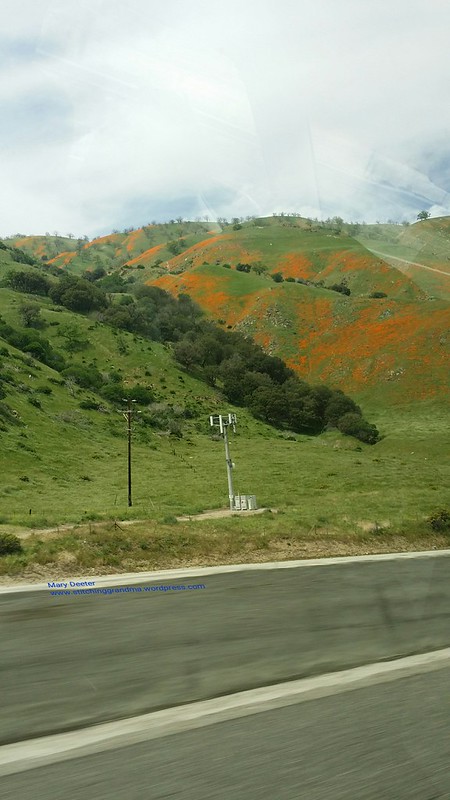
There are a few different routes to take but my brother chose I-5 North out of Los Angeles.  Boy was I glad he did that!  We got to see the hills ablaze with California Poppies.  Disclaimer – I grew up in the Los Angeles area, and I vaguely remember seeing the poppies as a child traveling to see my grandmother.  Well, did we have a great show on the ride North.  Get ready – some of the photo’s appear a little hazy, because we were moving along at 65+ mph, and I was shooting thru the windshield from the back seat or the side window, so I apologize ahead of time.  Too pretty not to share!

Bright orange poppies

Poppies on the Grapevine

Can you believe the various colors in the hillsides?   All that orange and gold and (GULP) GREEN!!!

swaths of poppies

Golden hillside

Poppies and green hills

It is not vary often you see the hillsides in California SO green.  Spring must have been kind with the rains.

Hills ablaze in poppies

I remember when I lived other places, my mother would go on and on during phone calls about the poppies.  I honestly don’t think I have ever seen them until now.  I really timed my visit “just right”.

Now, if you are a “travel person” reading my blog, I am about to change lanes and return to my normal activities….and that is QUILTING.  I invite you to hang around, you might enjoy the rest of the photos or the story.

Those regular readers who have followed for any length of time might be aware that earlier in the year, I finished a rather LARGE quilt and planned to visit by brother and his wife and work on quilting it on her long arm quilting machine.  This is WHY they picked me up.  (Sweet of them to drive 4 hours to get me and 4 hours to take me home! )  California is a very big state!  I offered a night in a hotel so they didn’t do all the driving in one day….after all, Rich is my OLDER brother…giggle…..I booked them a room on the Queen Mary in Long Beach. I figured they should enjoy a night “on board a ship” since they were picking me up from a ship.  There cabin on the QM was MUCH nicer than a modern cruise ship cabin.( Oh to go back to the old days on ships!!) If Carolyn (aka oneblockwonderwoman) ever posts her photo’s, I will link to them.

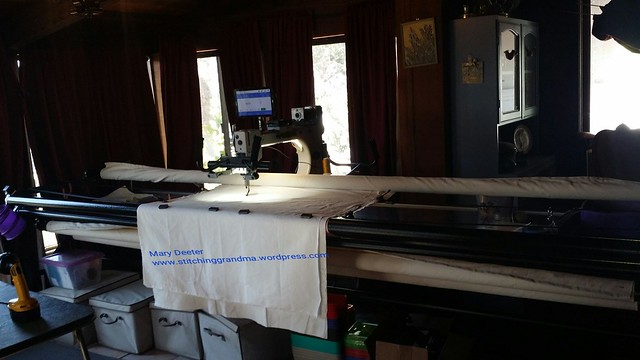
Now, back to the story – I packed up my quilt top, and the backing (see the post – In Betweens – for that story) and shipped it to California before my cruise, so it was waiting on my arrival. Dear Carolyn had thoughtfully taken it out of the package and hung both parts to “relax” when she got the package.  Since we arrived late Tuesday afternoon, and I was flying home on Sunday, our time together was very short.  We got busy and loaded a practice piece to quilt .  I learned a lot about loading a quilt, and using the leaders and basting the top and sides, and floating the quilt, and how to use the size clamps.  By 10 am the next day we were set up to stitch on Greta, her new Gammill long arm quilting machine.  I had LOTS of practice before we loaded my quilt.

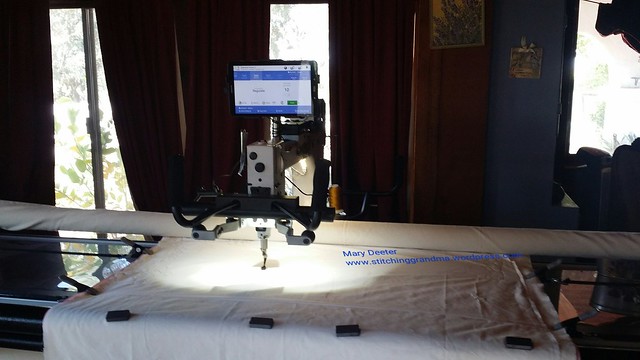
Greta the Gammill

This is her dining room, with windows on 3 sides.  The sun is so bright that she has heavy drapes to block the glare.

Time to practice

Greta the Gammill has great LED lights.

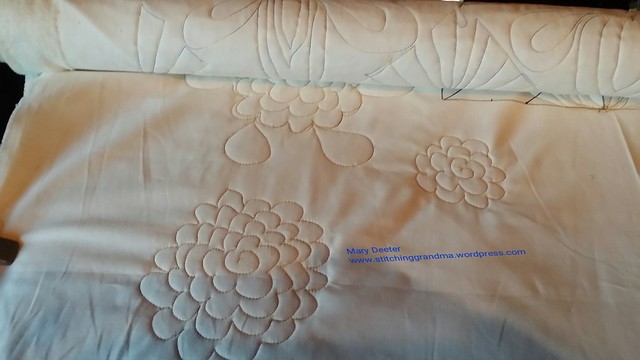
Practice on plain muslin

Carolyn taught me some of her favorite stitching elements.  I wanted to tackle each block independently and I had fun learning to operate the machine, and not drive it like a drunken sailor. Thank goodness for a great stitch regulator!  She even taught me how to work with a ruler –

Practice and planning

I decided I needed to “draw” a couple of quilt blocks so I could get a better handle on exactly where the needle was stopping and planning out some layouts for various blocks.

Since time was short, after 2 practice pieces (and lunch), we loaded my quilt on Greta’s frame.  That took us over an hour, getting everything “just right”.

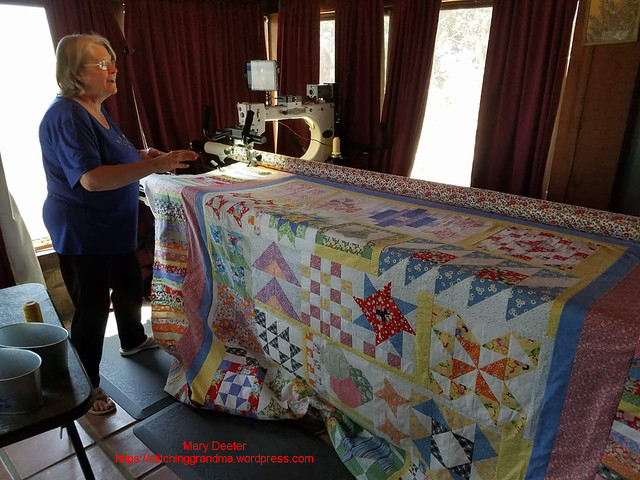
Quilting at Carolyn's on Greta the Gammill

This is not a small quilt and nearly fills her frame.  I can see why my brother is often referred to as the “Quilters Assistant”.  It really seems like a 2 person job getting the quilt, the batting and the backing all set up right.  Because I had a pieced backing, I was extremely careful about the placement of the backing on the machine so the quilt top would be centered.

I won’t bore you with all the close up photo’s of the quilting.  Let me just say, if you really want to see them, they are in an album all together with the quilt construction photos, and you are welcome to browse through them.  Grandma’s Kitchen Blocks  .  There are lots of notes in the album about the various names of the blocks etc.  I quilted each block taking into consideration the elements of the block.  99% was done free motion with no stencils, drawings, markings.  2 blocks were done with ruler work.  We spent a lot of time working on the quilt.  I took a shot of the screen on Saturday –

LOTS of stitches

Even though we had been working since Wednesday, the machine said we had an actual 6 hours of stitching time, with over 152,000 stitches in the quilting. The “timer” only clocks when the needle is going up & down, not when the machine is on. (Has something to do with time for oil and cleaning if I remember correctly). There is a lot of “in between time” that happens.  Advancing the quilt, taking practice stitches along the side, and the distractions of where I was in California.  Their home is on several acres with gardens and meadows and the weather was perfect.  The home was constructed in the manor of a California Adobe, with tiled roof, walled garden area and arches.  The view out the windows is amazing.  What a great place for a break and a stretch!

In the courtyard

The sound of the fountain was so relaxing –

View from the window while quilting

Those of you who follow Carolyn on her blog – https://oneblockwonderwoman.wordpress.com know about what lies in wait on the other side of the gate in the grape arbor, just outside the courtyard wall.

Grape Arbor

And of course, in between times, we had to eat breakfast lunch, dinner, drink wine and go for walks.   Check out the great area they live in – quietly nestled in a little valley down a dirt lane.  There are vineyards and cattle and farmers all around. It was good to get out, stretch my legs and enjoy the beautiful Central Coastal California.

Enjoying a walk

My sister-in-law is well known among her neighbors and has several quilting friends that stopped over to meet me. It was so fun to visit with the people I had heard so much about who get to share time with Carolyn all the time!  (Thanks for sharing Mona!!)

We ran out of time on Saturday when all of a sudden the top tension went nuts when we changed bobbins, and nothing Carolyn adjusted could make the machine sew right. There were big loops on the bottom (thankfully I had an extra 6″ of backing all around and she had a place to test stitch.) Many phone calls to her dealer tech rep, and to a friend with a Gammill still left us unable to stitch.  So, we stopped, left the quilt on the frame and the next day, I had to fly home.

After 2 weeks of “adjustments, and a visit by her friends with a Gammill; she was able to finally get things working again, and she finished up my quilt.  Carolyn did the center of one block, and finished the last 2 blocks and quilted the border for me.  I was very thankful that she was able to do this and ship it home.    She trimmed the quilt for me and saved the cutaway backing pieces. She knew I was planning to use them for the binding.

 I spent a couple of evenings with the seam ripper removing the stray stitches on those saved pieces and made my “Susie’s Magic Binding”.  I got the quilt bound just in time to put it on the guest room bed!  I had family coming and I want them to be cozy under a new quilt!  I finally got to show it at the Material Girls Quilt Bee this week.  Still needs a label, but the hanging pocket is on already. I will enter it in our next  Ocean Waves Quilt Guild Show April 2019

My quilting is a novice attempt, so I will enter in the non-judged category.  Overall, I love the outcome, and I declare the project FINISHED!!!

Grandma's Kitchen - queen size

                            GRANDMA’S KITCHEN by Mary Deeter

Note – Pattern is by Pat Sloan, block of the week quilt along (Jun-Dec 2017).

Hope you enjoy the pictures included in this post and take time to check out the link to the FLICKR photo album.

Have you had any fun travel or quilting adventures lately?

Retreat and UFO

Every year, since I have been a member of Ocean Waves Quilt Guild, there has been a retreat in early February.  I’ve attended many of these retreats and always enjoy the time spent with so many creative, talented people. As in the past, we meet at a lovely beach front hotel in Ocean City Maryland, where we are greeted most mornings with spectacular sunrises in our ocean front rooms. 

640 Dawn's early light - Ocean City MD Sunrise

There are 9 more photo’s in this sunrise series you can see hereOcean City Sunrise photo’s

It is inspiring to wake up early at this retreat, so you don’t miss the glorious sunrise.  Breakfast is at 7:30, and we are sewing by 9 am !

I took with me many items to work on at the retreat.  Turns out, only ONE project captured most of my time and energy.  I dug out one of my oldest UFO’s and brought it along, with the intent of quilting.  Just how old is it?   You can read about it back in 2012 here – https://stitchinggrandma.wordpress.com/2013/11/25/unfinished-projects-starting-to-bug-me/

and here https://stitchinggrandma.wordpress.com/2013/01/18/crossroads-pattern/

and here-  https://stitchinggrandma.wordpress.com/2013/01/18/playing-with-borders/

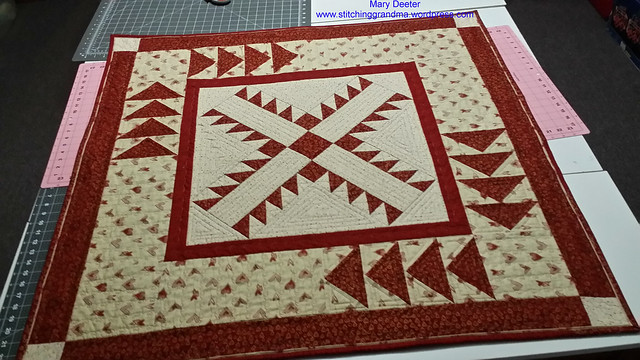
About a year ago, I came across a bit of fabric that was in the same deep red/brown tones and I tucked it into the box for backing of this project.  So, when I pulled it out to take to retreat, I just needed a bit of batting.  This project was about 44″ square.  I am happy to say I finished all the quilting during the retreat. I cut the backing and batting and pin basted in our hotel suite on Tuesday night, so I was ready to start stitching when the classroom opened on Wednesday morning.  I worked two solid days quilting this, and thought it is small, there were TONS of starts and stops, and turning constantly. I decided right away I was going to “pull up” the bobbin thread, and use my lock stitch on my Janome for my start & stops, and not burying all those threads. It’s a wall hanging and a 6 year old UFO !  (I’m not putting it in a show, so hush you quilt police)  (Oh, and by the way, I KNOW there are a few crappy HST and a few geese that lost their points in this project….they jumped out at me while quilting….hey it was before I knew what I was doing…..)

Quilted and bound


I did most of the quilting using my walking foot. The exception is in the wide border of hearts, I used a stitch that is connected hearts, and in the narrow red border I did the same stitch.  On the outer red heart border I did some wavy stitching.  I like to use these built in to the machine stitches if possible.  They make quilting a lot easier.  If you want to see close-ups of the various quilting that I did, look at the photo’s here – UFO Finish  .  (There is also a photo of the back where the techniques I used really show). 

Yesterday,  I trimmed it down to about 40″ square, as I felt the final borders were TOO wide.  I used up a bunch of left over bits of the red to make a scrappy binding, and did the Susie’s Magic Binding technique. (Some call it binding with a flange or piping) If you have never tried this method, check out the tutorial here – Susie’s Magic Binding Tutorial(Watch the video’s too…)

I used the same fabric that is in the area around the flying geese in the flange for the binding. I love that little pop of color along the edge. I added a hanging sleeve while I was doing the binding, and the last thing that needs to be finished is to hand stitch the bottom and ends of the hanging sleeve and make a label!

Since this was the “big deal” for me at the retreat, I will stop here and ask – what is the OLDEST UFO you have sitting around, and WHY didn’t you finish what you started?  

I will tell you why this went “in the box”.  We were doing a new project every week in the class and I was overwhelmed.  I also could not figure out how to “finish”.  Our instructor had scaled the pattern in Pat Sloan’s “I Can’t Believe I’m Quilting” down to just a 1 block project instead of a whole quilt, and I didn’t “know” what to do at the time.  Of course, a few years of experience were needed under my belt before I could say, enough is enough and a wall hanging is just “fine”.  🙂

More about the retreat in the next post!


Small projects for gifts

I finally found my sewing room again at the end of last week.  Yes, just a few days before Christmas, I managed to steal some time for myself and just play around a little.

You might remember in a previous post I mentioned having the Queen Bees for a holiday luncheon and a card making session.  Well, one of those lovely Queen Bee members left a little gift behind for me.  I was delighted to find a pretty set of coasters.

15 Minute Coaster

The coasters were made following a pattern found at Cool Cottons  .  The pattern was familiar, because the Queen Bees had done this for a project at one of the bees in 2016, and during our guild luncheon in early December, everyone was given a little “kit” of fabric squares and the directions.  My friend Dee, was so sweet to sew a set and give them to me.  How did she know that I never “got around” to making some for myself.  (I might have said something about that during the luncheon, as we were seated next to each other!)  I remember that bee pretty well.  We had a new member who was “learning” to use a rotary cutter and ruler, and I spent my time assisting her.  I think my “test coaster” is still in the bottom of a busy box somewhere.  Anyway, I love these bright cheery colors, and they inspired me to get busy and make some for gifts.  I did another “test coaster” with the kit we got at the luncheon, and now the hubby  has a cheery coaster on his hobby desk.

I deviated slightly from the pattern.  I used 5″ squares.  I also top stitched.  (I like that they lay a bit flatter when they are top stitched).  I used a charm pack of 5″ Christmas fabric squares, and then I went diving into my “scrap storage system” for more 5″ squares.  I also dug into the scrap bin for more holiday fabrics.    All said and done, I made 8 sets of 4 for gifts.

Six sets of coasters to gift

Two sets were already gifted before I got this photo taken!  I love all the fun fabrics!  I did 2 sets in spring fabrics.  Check out the backs –

Back of the coasters

The pattern is fairly easy to follow, but if you are like me, sometimes a visual tutorial is handy.  Today, I was browsing around on you-tube and found multiple “methods” for these type of coasters. Some use 1 additional piece of fabric, and they vary in size from 4 to 5″ squares as the basis for the coasters. Some don’t include batting, but I like a nice piece of batting inside to help with any moisture that might be on your glass.

One of the BEST tutorials on you – tube is with the Gourmet Quilter – Gourmet Quilter Tips and Techniques 002 

Susan Claire gives such good instructions, and if you are a “visual” learner, this is a good one to watch.

I found another tutorial on you tube that had some variety in the way the coasters were made, so take a look at this video if you want to up your “style” a little – Craft Genie Folded fabric coasters  . She starts you out with the style I made, but without batting.  Then she ventures off onto other “shapes” that are quite fun.  I hope you find her tutorial easy to follow also.

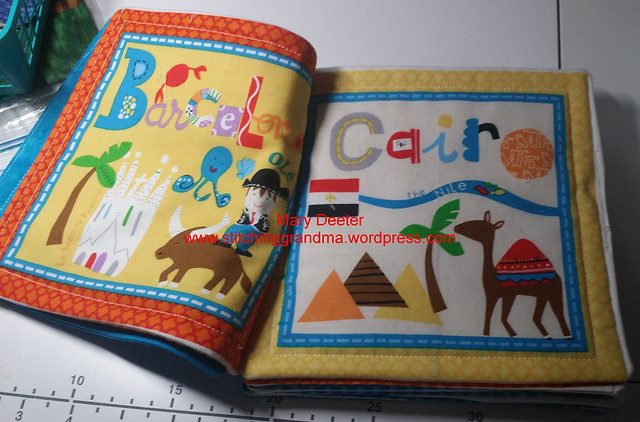
Post Christmas I was able to spend some time working with a panel that I was given.  My dear friend Nancy B. picked out a panel for me when she was on a shopping expedition in Lancaster PA.  I got busy and got it all cut up and made into a little story book for my youngest granddaughter.  I used my embroidery machine to make a cover for the book.

Around the world fabric book

A is for Amsterdam

Barcelona and Cairo

Back cover

and so forth.  There were a lot of pages!  Such cute designs for cities around the world.  More pictures can be found in my FLICKR album – Sewing for the Grandkids

As I was working with this panel, I was challenged by the “stamping” of the fabric.  Nothing on panels is ever square, so no matter how you “size” the piece, you might end up with a bit of white showing through. I didn’t want to cut off too much of the color so I went with the best possible size, and have touches of white peeking through.  I don’t think the not nearly 2 child will care too much.  This panel wasn’t designed to be made into a book, but that is what I chose to do with it.  I was challenged by “how to assemble” it, and decided today to make buttonholes on each page and thread ribbon thru the buttonholes.  I think the ribbon is securely knotted, and should hold up to the rigors of childhood.  If not, I can always “thread new ribbon”.  (I doubled it through the button holes so I am keeping my fingers crossed.  The pages are assembled with a square of quilt batting in between the pages.  It is completely washable, which I have learned, is a priority to my daughters!

I have several other panels out of the bins, waiting for me to get busy with them, and I think I might sew tomorrow afternoon too.  I get to babysit for the recipient of this book tomorrow for a bit, and will send the book home with her.

I am enjoying these little projects that have been set to the side for a very long time. In the back of my mind my list of UFO’s is sitting, waiting for me to tackle them…..one at a time.  Meanwhile, I have re-acquired the Second Time Around for the quilt guild, and have spent some time sorting through the donations. I think most of that is in good shape to take to guild on Jan 8th.

Of course, I still have over 40 boxes of stuff from my friend who moved to assisted living.  I have been taking bits and pieces to her at her new apartment, and know that she is wishing she had it all.  I’ve inventoried a dozen boxes, and labeled them.  We are trying to figure out a way to get together at the assisted living facility and sew.  I imagine making kits, already cut, for her will satisfy her for a bit. I tried to get the activities director to call me, as I would be willing to lead a small group at the facility.  Perhaps after the first of the year, she will call so we can come up with a plan!  If you have ever led a quilting group with “senior” senior citizens, please let me know what type of projects you worked on.

I hope you are able to stay warm where ever you are this night.  Our temps were down to 14 deg fahrenheit last night, and never got above 25 deg today.  Keeping my sewing room warm enough to work in out over the garage is tricky at best.

Happy stitching!

Busy December days

I know…when are you ever going to get back to the sewing room???  I keep asking myself that question! Have no fear, the weather is above 40 degrees today, and I might brave the winter temp and wander out.  It’s been downright cold around here, and I have had plenty to keep me busy!  (Note – this post is FULL of photos!!)  Grab a cup of your favorite warm beverage!

Snow on Dec 9 2017 Delaware

Two weeks of what I call “Quilt Guild Time”.  First Monday of the month was the guild meeting, and there was a board meeting on Thursday. The snow came on Friday.  (Thank goodness).

The program for the meeting was our annual holiday luncheon and show & tell.  Frankly, I had nothing “ready” to show, that I could wrap my head around. You see, we were coming off 2 weekends in a row of “model rail road club open house”, and I just could not think what to bring. Between an ear infection for me, and hubby coming down with a cold, and long days at the train club, I was just not ready.  Late Sunday evening I remembered that  I had to bring a dish of food to share, and was NOT ready for that either.  An early morning run to the local super market provided some wonderful frozen meatballs, and a few jars of marina sauce.  I popped those meatballs in the oven to heat, the marinara sauce in the microwave, heated up the crock pot, and in under an hour, had them ready to go, and I got out the door by 9 am.  (Note to self….keep those meatballs/sauce on hand for the next food crisis!).  Really, my own fault, as I took the hubby out to dinner on Sunday night with some friends for his birthday, and failed to prepare.   Anyway…the meatballs were a hit, only a few left at the bottom of a very empty crock pot, and nobody cared that I didn’t have a show & tell.  (PHEW….).  I did get to relax and have a little fun at the luncheon, and enjoyed visiting and conversations with members I don’t often get a chance to speak with at meetings.

The feeding continued following our monthly board meeting, where our host provided a delightful brunch.  This is a group of about 20, and again a delight to sit and visit during this busy month.  The snow arrived on Friday, and pretty much kept us at home through the weekend.  Somebody said we got 6″ of snow, heavy and wet.  Luckily the roads were still warm, and it did not stick around long.  Hubby and I spent the weekend finishing up decorating for Christmas.

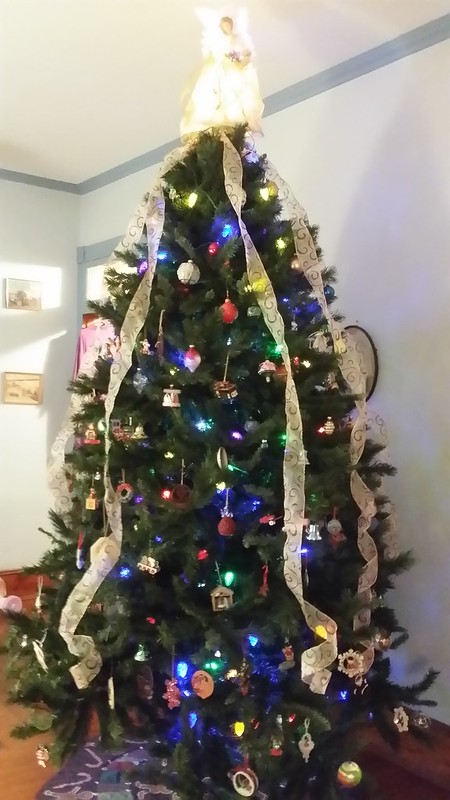
2017 Christmas Tree

Took me all week to get the tree up and the lights on and the decorations on.  Hubby suffered quietly with a cold and emerged long enough to get the angel on top and some of the highest ornaments on.  Every year we decorate a little differently, and this year, the lights seem “dim” to me.  I realised after I was finished,  I only used half as many lights as last year.  (I think I was burnt out).  The LED bulbs are not as bright as the old fashion type either.

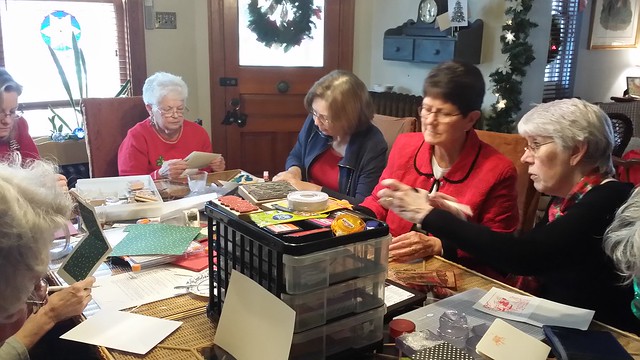
Tuesday I hosted the Queen Bees for a luncheon/Christmas party.   I decided that I would ask them to help with a card making project that Carole / From My Carolina Home    asked for help with.  On her Dec 8th post, she invited others to take part in making cards for a woman’s shelter.  So, when I asked my Queen Bee’s, they all agreed.  I put some supplies on the table, and they got busy!

An artistic group

Crafting and creating Queen Bees

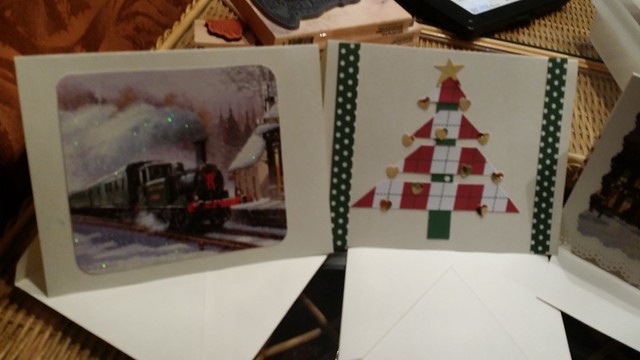
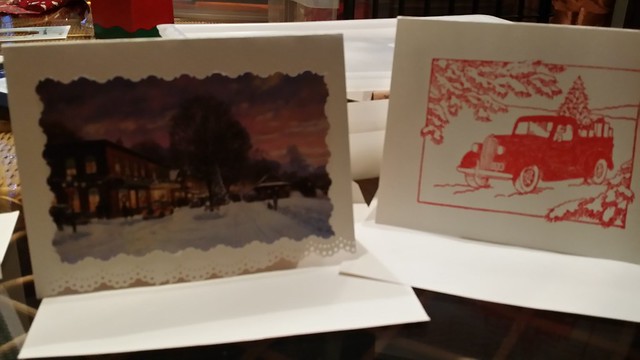
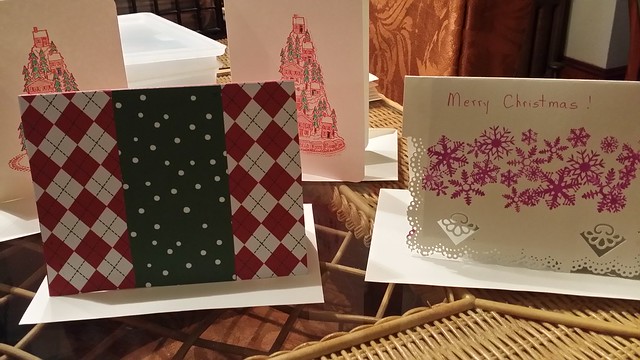
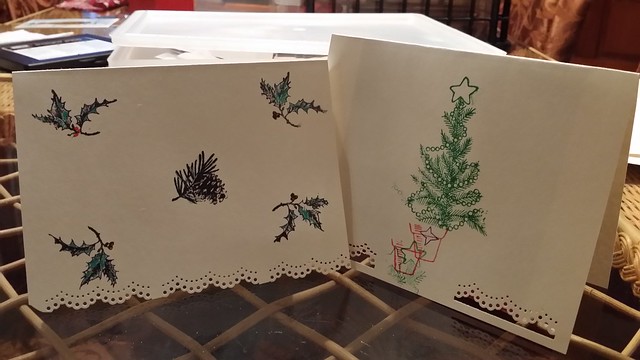
They created 12 cards in just under an hour!  They used cardstock, punches, old greeting cards, stamps, pens, tape runners etc to create these cards.

Fun creations

Special cards made by the Queen Bees

More special cars

Holiday greeting cards

Greeting cards made by bee

Some of these women had never done any “paper crafting” of this sort before, but were eager to prepare cards with heartfelt messages inside.

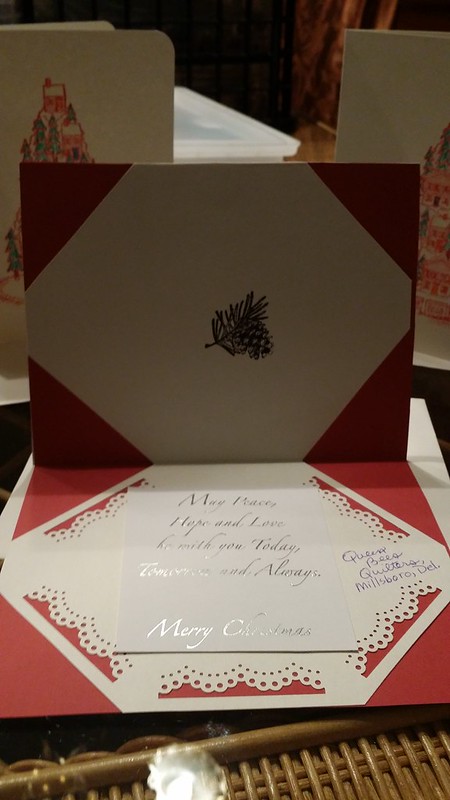
Sentiment inside

We have so many talented women in this group, and I love the way this card was done inside.    We got the dozen cards out in the mail to Carole to meet her deadline.  I think the Queen Bees enjoyed the project, although it wasn’t quilting, it went for a very good purpose.  Two of the women in the Queen Bees knew about Carole’s project, because they follow her blog.

I got to follow-up a great lunch on Tuesday with the Queen Bees by attending another lunch with the Material Girls Bee on Wednesday.  It was hard to remember to take “small portions” but I did!!

The Queen Bees inspired me and I spent the rest of the week with my own card crafting. I had a birthday card to make and Christmas cards I wanted to do.  I was so inspired I made a trip to Michael’s Craft Store and purchased more “card blanks & envelopes” and treated myself to a heat gun and embossing powder.  I picked up a BUNCH more stamps at Tuesday Morning too.  More about those cards “next time”…as I want to give the recipients a chance to receive them before I spoil the surprise.  

I did make it to the garage on Sunday afternoon for a few hours.  I managed to help the hubby “move” a table back into “my area”, and do a little “cleaning up”  of patterns and files, and stuff.  I actually turned on my machine, and repaired the velcro and snaps on some baby items for my daughter. I wasted 30 minutes fighting with 1″ sticky back loop velcro before I threw it away, and got out the 3/4″ sew in loop velcro I had on hand. Not as wide as I wanted, but it will have to do.  I ended up throwing away a heavy-duty needle that was immediately gummed up too with that sticky back velcro.  GRRRR……..hate that stuff……

So, I am “ready to sew” my own stuff again after nearly 2 months out of my sewing room.  What to work on today?  ?  ?

What are you doing to get ready for Christmas?


Block 12 and other bits and pieces

Welcome to new readers! I have had several new followers this week, and I haven’t written anything. It’s that busy Quilt Guild meeting week syndrome.  We had our “first meeting” of the fiscal year on Monday at Ocean Waves Quilt Guild in Lewes DE where the new officers were “sworn in”, and it was membership renewal time.  Guess who is one of the co-chairs?  Yes…..(hard word to stop saying)…..At least I am sharing the job, and I don’t have a lot of “STUFF” to cart home!  We have 250+ members and over 1/2 renewed during the hour before the meeting began. Thank goodness for great volunteers, who worked the tables and who accepted checks, handed out membership cards and checked details for the roster. They did all the work while my co-chair and I helped 7 new members !  So exciting to see the guild continuing to grow.  If you are in our little part of the world, and you are looking for a guild, find our website Ocean Waves Quilt Guild Lewes DE.

Of course, along with the membership rosters to update, I had to “balance the books” with the receipts for the day, and spent Tuesday afternoon with the Treasurer getting checks ready for deposit. We got together at a local quilt shop, Serendipity Quilt Shop in Dagsboro DE, and filled out deposit slips etc.  Before she arrived, I did manage a little shopping.  I have a class coming up in Dover with Sandi Blackwell.  The workshop is called “Spiral Out Workshop” .  The pattern in the workshop instructions showed Christmas colors, and I decided that is what I would use as well.  I managed to get everything pre-washed, ironed, and pre-cut as instructed. It is all in a basket, and ready for Tuesday, a week from now.  Watch for that project in an upcoming blog post!  (This class is sponsored by Helping Hands Quilt Guild, Dover DE. )

Wednesday is the release for Pat Sloan’s block of the week, Grandma’s Kitchen.  This week she talked about the kitchen door leading outside from Grandma’s kitchen. Sorry, not  1 kitchen door story comes to mind.  My Grandma Bessie lived in an old fashioned trailer with a few rooms attached, and the door from the kitchen area led right out into the living room. Pat talked about setting out all your blocks and looking for colors that needed more representation if you were using more than 2 or 3 colors.  I did that before I chose my colors, but I pretty well decided after block 11 what would be next, regardless of the pattern.  I knew I wanted more yellow and more orange.

12 out of 25 Grandma's kitchen

I think there is a fair amount of red, pink blue green and purple already in the project. That yellow from block one, upper left corner, needed to be used again, and I played a bit with “which orange” to use. I wanted it to show as the “dark color”, so I chose the deeper orange.  I liked this one in particular because it had a touch of blue, and there is a lot of blue elements showing in the yellow patterns.  I used a tone on tone white floral again for the background, the same one as the “apron” block.

Block 12 of 25 Grandma's Kitchen


I also was able to get my applique stitching done on block 11 and block 8, since my JANOME  8900 is finally home from the repair. (She is purring like a kitten!!)  I am happy to be caught up again!

I got a chance to go on a bus trip on Thursday, with the Ocean Waves Quilt Guild, to the Pennsylvania National Quilt Extravaganza. It was held at the Greater Philadelphia Expo Center in Oaks PA.  Huge place!  Lots of quilts and lots of shopping opportunity.  Since I had a “big day” shopping for fabric on Tuesday, I restrained myself.  I did pick up 3 more red 1930’s reproduction pieces.  I am saving those for another block!

I took my “list” of Superior Threads on hand/needed, and only bought 1 cone of thread, and two packs of needles at their booth.  Usually I buy in bundles of 3, to save about $3-5 per cone. I had stocked up at the Hershey show in July, so I just needed 1 color.  (Talk about restraint, I wanted one of EVERYTHING).  I did treat myself to some “1 yard cuts” of fabric from a vendor who is “getting out of the cotton and going to wool” business.  You can’t pass up $5 / yard quilt fabric.  He was also selling his fat quarters for $1.25 which is about 1/3 of the price everyone else was charging.  I did pick up a few from him.  I was shopping for floral though, and he really did not have what I wanted in fat quarters.  I did find a vendor that had just what I was looking for, and I got 8 or 10. I then found another “bundle” at that same dealer, that had a lovely collection, and I couldn’t resist. No self restraint there.

My plan for the floral fabric is another log cabin cross wall hanging. I did all the cutting on Friday.  On Saturday, I managed to get 2 rectangular sections made. Then, I realized I had done 2 identical units, and they needed to be opposing units.  BIG SIGH.  The pattern I am following is one I have made twice before. You would have thought I would know better. I guess, since it was 2 years ago, I can forgive myself.  Last time I made this pattern, I wrote about it here –  New Log Cabin Cross Banner .

Oh well, I cut more fabric, and made different fabric choices too.  Before I started cutting more fabric, I decided to eliminate the pinks, and went with yellows.  By the end of the evening Sunday, I have the top ready to layer and quilt.  I’m much happier with the fabric choices too.

Log Cabin Cross

Course, I still have those 2 blue & pink rectangle log cabin blocks that I have to come up with “a plan” for.  Hubby said I should figure out how to use them on the back of this project!  Not sure about that idea, but I am sure I can ind a way to use them for something.

What did you work on this past week?  Anything exciting in the coming week???

A Good week for quilting

Last week was a very quilty kind of week!  Monday was the monthly Ocean Waves Quilt Guild meeting.  Instead of a speaker & trunk show, we had a full morning of sewing for our various Community Service Projects.   Community Service Sew In is something we do every year.  Some years every Community Service Group we sponsor is represented, and other years the chairman of the Community Service Committee picks 3 or 4 groups that could use a massive boost!  This year we focused on just 3 groups.  Don’t worry, we are still supporting the other groups all year long!!  This was a great day to pick a project and sit and sew. First I worked on blocks for Quilts of Valor (QOV).  When QOV ran out of kits, I picked up a kit from the Quilts of Love table and set to work on it.  Silly me, I forgot to take any photo’s of the QOV blocks.

Before you knew it, time was up, and I hadn’t finished my little baby quilt.   (I must have been chattering too much!)  I took the kit home and finished it up last week.  I love the organization involved with preparing all the kits for the guild members to work on.  This was a cute and fun project to work on!

Quilts of Love baby quilt

I chose to do a simple straight line quilting across the quilt instead of tying the quilt with floss.  I also chose to make my own binding, using Susie’s Magic Binding method.  I pulled some bright gold yardage out of my stash, but had plenty of the blue backing to get the needed strips for the binding.  The backs were oversized  for a “no binding” style quilt, but I much prefer making my own.

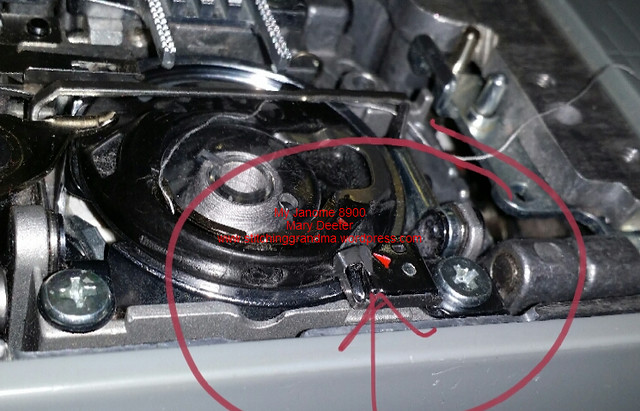
While I was working at home, on this little quilt, my Janome 8900 started skipping stitches.  I did everything I could to fix the problem, and finally gave up and switched to my “little” Brother CS6000i, to finish the binding. I took the Janome into the shop on Saturday morning for servicing, when my efforts were unsuccessful. I had “re-threaded”; “cleaned the bobbin case”; “installed a new needle” ; “wound new bobbins,” “re-threaded again” etc.  The top thread was getting hung up in the race, and I could see where it was catching, but couldn’t figure out why.  No amount of head banging was going to fix the poor ol’ girl.

While at the shop, I took a photo of the inside of the bobbin case on the floor model.  The first picture is the shop’s floor model (which needs some cleaning I think!).  See that area I circled in red.  Well look at the little red arrow, and then to the left of it.  That’s what it SHOULD look like.

Janome 8900 bobbin area

The picture below is MY machine, and now look at that strange thing next to the red arrow!

My Janome 8900 not working!

That little hook near the arrow I drew was catching everything.  How in the world did it get up above the bobbin case ???  Definitely what my thread was hanging up on!  Because I couldn’t find any “close up photo’s” of how it “SHOULD BE”, I couldn’t explain to the hubby what was wrong.  He would have dissected the machine and attempted a repair.

Now, here is a question for you………….How often do you clean your bobbin area?  Do you always take out the bobbin case and clean underneath? Do you use a brush or canned air or a mini-vac?

I’ve had one friend tell me the repair shop told her canned air is ok to use, yet on many websites, I read NOT to use it, as it could add moisture around electronics and / you can blow lint back into place you just can’t reach to extract it with a brush or tweezer or vacuum.  So, what’s the real answer???

Meanwhile, the machine is down and out for the count for at least a week or maybe two.  I had my 2 blocks to catch up on from Pat Sloan’s pattern – Grandma’s Kitchen.  Once I got over my machine repair angst and got the blocks cut out, I got busy sewing them.  For some reason, I did block 7 first.  I fussy cut the centers of the stars.  I’ve seen lots of these blocks done on-line this week, and lots of variations with color placement.

Block 7 Grandma's Kitchen, pattern by Pat Sloan

I stuck with just the light background, medium centers and dark star points, and tried to keep the block consistent.  Several posts I saw on Facebook showed different colors being used for each star, and some for each star point.  I tried to keep it simple.

Black and White Version –

B&W of block 7

Pat Sloan called this her “Oh My Stars” block.  Famous words from a grandmother.

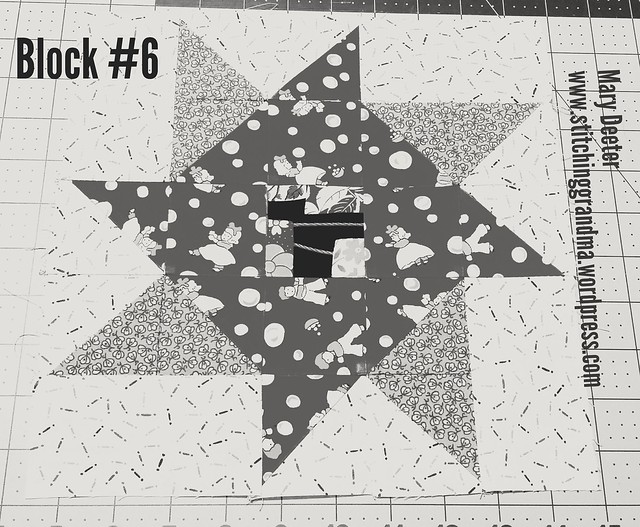
Block 6 is called “Wash Day“.  This block gave me trouble, only because I chose not to read the directions; when sewing the half square triangles (HST) or assembling the block.  (NOTE to self; after fighting with the machine, and working LATE, give it up and stop for the night!)

I had a great “fat 8th” of laundry on the clothesline fabric in the 1930’s reproductions.  Well, let’s say this – I have now got a container of “WHOOPS” blocks.  I ended up going back to the red from block #7 for my dark, and was only able to use one square of my clothesline fabric as the center square.  (INSERT SAD FACE HERE).  I decided when all was said and done, you would not be able to tell what the fabric was representing, as the piecework is so small ! And, I used up what I had, so (INSERT SAD FACE HERE).  I was “hoarding’ that fat 8th since I bought it 3 years ago…………it was something I had not seen before, or since.

Anyway, back to the red for the inner star, those circles look like soap bubbles, right??  I had to recut to make those red and blue HST’s, and the red and white HST’s after I discovered I screwed up!  At that point, I decided to lay out the block and call it a night!

Block #6 - Wash Day

I was a little apprehensive using the blue for the medium, but in the B&W photo below it really works.

B&W block 6

So, I am caught up with the Pat Sloan – Grandma’s Kitchen for now, even using the back up machine.

Here they all are:

Seven blocks Grandma's Kitchen pattern by Pat Sloan

Thinking ahead to getting some more of that great yellow and green into one of the next few blocks!  Oh, and those black and whites I have pulled out with scottie dogs….

I went on an internet search today for the little bit of clothesline fabric!  First I searched at a place Bonnie Hunter had recently visited on a trip to Minnesota – Reproduction Fabrics – Northfield MN, but no luck.

So, I dug in the “dog bed stuffing pile” and pulled out the selvedges.  I tried a new search tactic. 

 I found it….and bought all I could get….not quite a full yard (like 31″) for $8.25.  I am thrilled.  What I love about this piece is it is all 1930’s reproduction fabrics hanging on the clothes line.

 So, THANKS to Two Bees Fabric of Texas for having the Sara Morgan Circa 1930 for Blue Hill Fabrics .

– 

“Two Bees Fabrics – you will find the traditional 1800s/Civil War reproduction fabrics along with the 30’s depression reproductions.  Look for the French influenced floral and toile fabrics too.  “

So now, I have this “snippet (30+ inches) of fabric” coming by mail and I will hoard it again until the “right block” presents itself.  I do hope Pat Sloan will give us a couple of blocks that will show off the larger prints in this pattern. If not, well, back to the 30’s bin it will go for future use.

There you have it, the drama of the (insert sad face) sick sewing machine, and the multiple attempts at building block 6, along with the JOY of knowing I could get another bit of the clothesline fabric.

 While I was at the Delaware Sewing Center store with my machine, I grew slightly overjoyed that I purchased my Janome 8900 when I did, as the price has gone up by $1000 since I purchased it in 2013.  (How does that happen??)  The sweet lady in the store did her best to sell me on one of the machines that had a feature “she” loved….but the throat of the machine was too small for me.  I just hope the cost to fix the machine is not too high. Keep your fingers crossed.  Meanwhile, I will slog away on the ol’ Brother CS6000i.  If it irritates me, I will bring my traveling Singer Featherweight up stairs to sew on.  

Time to sort some scraps!  Happy stitching.  


Trip to Quilt Odyssey Show – Hershey PA and a week of fun

Last Sunday, I made an early start, with 2 friends along for the ride and journeyed up to Hershey PA for the Quilt Odyssey Show.  My purpose in going was to see the Bonnie Hunter quilts on display!  A lot of “Bonnie” Quilts, all in one place, up close where you can study the detail, the fabrics, the piecing, the colors at leisure.  My friend Nancy said to me before that Bonnie’s quilts had “too many little pieces”.  I love working with scraps so seeing how she selects her neutrals (from white to brown paper bag), and putting them to work was inspiring.  Bonnie wrote a blog post about the exhibition here —http://quiltville.blogspot.com/2017/07/while-quilters-away.html

I didn’t take any photo’s of her quilts, as she asked others to  ONLY take for personal use, and you can easily see the photo’s on her blog.  I am familiar with several from the exposition, as I have worked from Bonnie Hunter’s wonderful patterns.

We also got to see the award winning quilt by Bethanne Nemesh – Into the Westward Sun – where Bethanne got a FIRST PLACE Blue Ribbon for Wall Quilt/predominately pieced.  I linked to the page on Bethanne’s website that shows this beautiful quilt. My photo’s don’t do it justice.  I did zoom in on one section of the quilt to show some detail —

Into the Westward Sun (2016) Bethanne Nemesh

I saw this quilt this Spring at the Helping Hands Quilt Guild meeting, in person, and enjoyed the talk that Bethanne gave about her artistic approach to the quilting.

One other quilt, worthy of a photo was this one —

The Greeter by Diane L Campbell

He is called “The Greeter, by Dian L. Campbell.  (I am currently in love with cat quilts).

Really, there were terrific quilts in the show, and many just to breathtaking to do more than study the piecing, the quilting and the overall design.  Of course, what would a quilt show be without shopping?   I did a “little” more shopping for 30’s reproduction fabrics at the.  I needed just a few more, and added 19 more fat quarters to the collection.  I can honestly say, now I have enough!

Monday brought an afternoon class at Helping Hands Quilt Guild, Dover DE with Heather Kojan!  I had taken a class with Heather 3 years ago at Ocean Waves Quilt Guild, and still had a “project” in the box.  So, I signed up and went and loved the opportunity to sew again using her improv methods.  I will include some details and photos in a future blog post (meaning, I haven’t got around to taking any photo’s yet…)

Tuesday was the Queen Bees gathering and we worked on some little Santa ornaments for our Christmas in July project.  For some reason, my brain wasn’t connecting the dots, and I had a challenge getting going.  But now that the bee is finished, I have been slightly productive with the project. (Again, details and photo’s to come in a future blog post…)  (Can you sense 2 more UFO’s???)

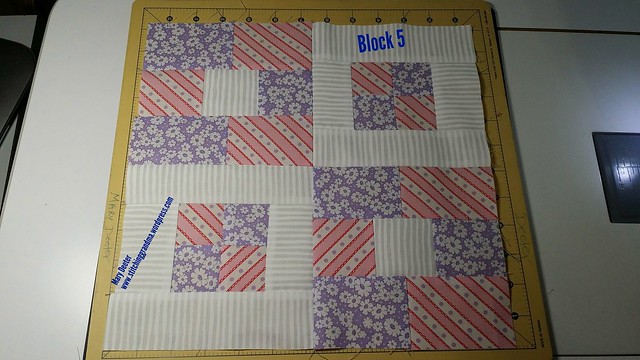
Wednesday means the release of another block in the Grandma’s Kitchen Pattern, published by Pat Sloan.  Block 5 was fairly simple.  I spent more time deciding on which fabrics to use I think than sewing!  I was working with the camera to ensure I had the light, dark, and medium contrast, so I used another B&W photo.

Black and white for contrast  block 5

Block 5 of Grandma's Kitchen,  pattern by Pat Sloan

This block went together very easily.  We are up to Block 5, and I am trying to keep a variety happening in the fabrics.

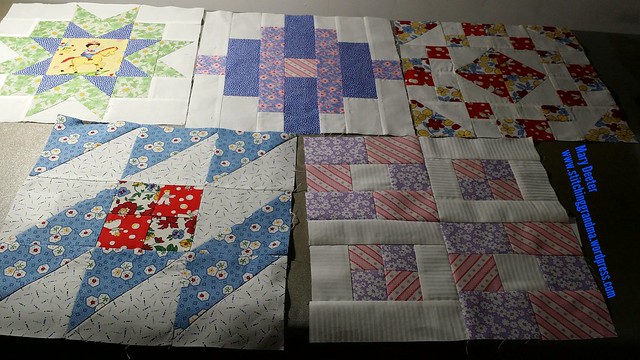
First 5 blocks for the Grandma's Kitchen pattern  by Pat Sloan

Of course, over a week ago there was the release of a mystery quilt final setting, by Carole – From My Carolina Home, and I haven’t touched it yet.   Time will present itself!  Sooner than later.

Meanwhile, I tackled bamboo with the hubby in the yard, along the driveway.  This was step 1 this summer in bamboo containment.  (CURSES to the idiot who planted this stuff 25 years ago…………..) Every year we are fighting the spread.  Of course, the hubby chose the hottest day of the week to get busy…..and when he is willing I dare not say NO!)  I cut the bamboo that was growing in our forsythia and lilacs and  Crape-myrtle .  The only solution we have is to cut it out, and try to abate the regrowth by constant cutting.  It has gotten away from us in the last year.  (My garden looks WAY worse, but just weeds, no bamboo). I might try to do a little work in it in the mornings this week if it is cool enough.

Bamboo battles 2017

Sewing and gardening early in the week were followed by visits from the grandkids along with their parents.  Family photo’s were scheduled this weekend, and we all got dressed up in new outfits and paraded around in a local B&B’s outdoor area and barn while the lovely photographer took hundreds of carefully arranged shots, and some candid ones as well.  We dodged the rain by being flexible with our day, and in the end, it was all terrific. The family looked wonderful in their finery, the children were bribed with ice cream, and all seemed very happy at the end!  The rest of the weekend was ours to play and have fun.  Grandpa had the oldest out in the garage hammering on a “kid’s project from Lowes”, and they put together a corn-hole game set.  The girls came out to the sewing studio and got to play in the scraps that were donated for their entertainment.  They also helped me “sew” a bowl cozy for their mom as a surprise.  They each picked out a fat quarter, I squared the piece up, and cut batting, then they did the quilting, one at a time, and they helped stitch the darts on “their piece”.  I finished up the sewing and they were able to give it to the mommy before they had to head back home this afternoon.   All and all a great weekend!

This stitchinggrandma is headed to the freezer to find the ice cream they left behind, and to put her feet up!  How was your weekend?

Show update

I wanted to share with you that the Ocean Waves Quilt Guild show 2017 was a huge success!  My little corner of the show was busy and we made lots of sales at the 2nd Time Around Booth.  Quilters loved the bargains and bags we filled at check out reflected that!  Lot of merchandise moved on to someone else!

My transfer of inventory has taken place, and my fellow guild member Lois is taking over following the quilt show.  I am “moving on” to another job in the guild.  (I truly believe that 2 years in any volunteer position is long enough.)  My next job is membership chairman , and I admire Melissa for doing it for longer than I have been a member of the guild.

As we wrapped up the show, I thought a lot about the more than 40 volunteers who worked with me in the lead up this week to the show.  Beyond that, in the last year and 1/2, probably another 40 have worked tirelessly preparing fabric for sale at the show and the guild meetings.  It has been fun, and a lot of work, and lots of friendships were made in the process.  My apologies to any & all if I was a tad short tempered by the end of the day today.  By 3 pm today, I just KNEW I needed some time alone and away from the booth, and I spent an hour walking the quilts on display; and admiring the talent and art that was exhibited by the show participants.
I spent a bit of time talking with the representative of the Fiber Arts Center in Denton Maryland after enjoying the 300+ quilts on display.  What an interesting organization!  They are creating a great directory of artists, teachers etc on the DelMarVa peninsula, and we had a wonderful conversation.   Their purpose stated is this:  “The Delmarva region is home to a thriving fiber arts scene! The Fiber Arts Center of the Eastern Shore (FACES) was founded in 2011 to preserve and nurture all forms of fiber arts. From the pre-Colonial era through the Civil War, to today’s modern and fast-paced world, fiber artists have created works that reflect Delmarva’s culture. At FACES, we’re working to preserve this tradition.

We’re also working to build a vibrant community of fiber artists and enthusiasts. Perhaps more than any other visual art form, fiber arts are often social in nature. For centuries, women have joined together for quilting bees, sewing circles, and “stich ‘n bitch” groups. As more and more of our communication moves online, the face-to-face sharing of talent and ideas has become more important than ever.

We invite you to join our community. Become a FACES member, subscribe to our e-newsletter, join our regional directory, or check out an upcoming exhibit or class on our regional event calendar. Happy stitching!  ”  Check out their website – http://www.fiberartscenter.com

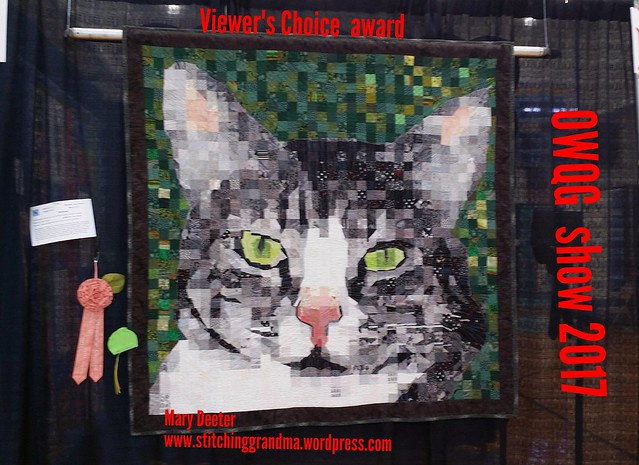
I got pulled “away” from that conversation by the chairs of the show; and was delighted to be told, that my quilt “MITTENS” had won the VIEWER’S CHOICE award.   I was stunned, and overjoyed.  My thanks go out to all who voted for this art quilt. I’m so glad you took 6 steps back from the quilt and looked at it, as it was meant to be viewed.

Mittens wins Viewer's Choice at Ocean Waves Quilt Guild Show

Additionally – I received a 3rd place ribbon for “Addison’s Quilt“.  Now, I am sad to say, I never took a photo while it was hanging at the show with the ribbon beside it! (Insert shamed face here.)  I do have a few photo’s take at the time the quilt was made though —

20160810_201148

Addison’s Quilt” has an interesting reverse side, and I think that is what got it into a prize winning category!

Addison's Quilt back

So, that’s it for my show update.  I spent most of the show behind the cash register, while coordinating volunteers who helped customers during their shopping.

If you want to see more about the Pet Mosaic Project – “MITTENS”, I have a FLICKR album with a ton of photos –Pet Mosaic Project . I also have an album full of photo’s on the  construction   of Addison’s quilt — https://www.flickr.com/photos/92296158@N02/albums/72157666492829803

I’ve made multiple posts here on the blog in the last year on both of these quilts, and you can read more about them if you back track through the older posts.  🙂

Taking a little time off in the morning to head to Hershey PA for the quilt show there and looking for Bonnie Hunter’s exhibit. My reward to myself for hard work (and the hard work of my two friends riding along).

How is your weekend?  Tell me, if you enter a show and it is judge, what do you think about the report given to you????