
I was asked by our Quilt Show committee to be one of the demonstrators during our recent quilt show for Ocean Waves Quilt Guild. They requested I do a Barn Quilt demo.
I had so much fun taking Suzi Parron’s classes in March 2015 that I felt confident I could present something useful. As Suzi comments on her website (just in case you have never heard of these) “Barn quilts are painted quilt squares-usually fashioned on boards and then mounted on a barn or other building. While cloth quilts are usually made up of a series of squares of the same pattern placed together, a barn quilt is almost always a single square “.
My first order of business was to order Suzi’s book Barn Quilts and the American Quilt Trail Movement. Oh my, what a great read!! Yes, there are great photos, but it is so interesting to sit and read. You can order one directly from Suzi’s website – Barn Quilt Info . (I was so busy with my duties as Vice President during Suzi’s visit that I failed to buy a copy of her book when she was here!)
I recently saw a photo of a quilt using a pattern by Eleanor (Quilt in a Day) Burns. She has a book out called Quilt Block on American Barns. What caught my eye on that quilt was the barn in the center, complete with a barn quilt on the barn. It made me laugh, and I had to get her book. Along with the great patterns are some wonderful photo’s of Barn Quilts (yes, the non – fabric; hanging on barns.) Check it out on Amazon! http://www.amazon.com/Quilt-Blocks-American-Barns-Series/dp/1891776401
The next “order of business” was to get the two Barn Quilts I painted in March and check them out and see if they were “quilt show ready”. I had not hung them yet, as I had great intentions of touching them up following the class. (Good intentions but little follow thru!) So, I spent a couple of afternoons working on them, preparing them to be viewed by someone besides me, up close!

-

- Touching up
-

- After the touch up
I realized that there were “paint line ridges” between colors, so I broke out the trusty sand paper, and sanded the lines, and then sanded the entire board lightly. The tricky part was the paint. Suzi had sent us home from class with a container of paint for touch ups. I had “JUST ENOUGH” of my red paint. Along the way, my hubby gave me some paint/tape tips to prevent those ridge lines. I followed his tips and I was very pleased.
The weather was so nice, I set up “shop” on the patio next to the pool. (You have to do SOMETHING while the paint dries!)
The final “order of business” was to get new boards prepped for the demo. My hubby had some 1/2″ oak from a previous project, and I gave it a little light sanding, and 3 coats of exterior latex primer. What a difference that thicker wood was to work with. Heavy for one thing. I did this over a couple of days, and let the primer dry well. Perfect job for sitting out at the pool too!
Once my 2 boards were ready, I decided I should select and lay out a design, taping off areas to paint, and “refreshing my memory” on the process so I could speak about the process easily. My goal was an easy pattern that could start out as a 9 patch. I figured if I had 2 boards prepped, showing different parts of the process, it would make sense. I dug out 3 cans of exterior latex paint, left over from our last round of painting our house, and got it stirred up and portioned out into small containers to take with me to the show. (You should have seen the faces when I pulled out those “laboratory specimen cups” with the paint! Hey, the lids stayed closed, and they were “NEW” when I filled them with paint!)
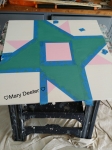
-
- Pattern inspiration
-

- taping for the first coat of first color
-

- Pink is on – 3 coats
-
- taping off and painting 2nd color
-

- color 1 and 2 on; sample board ready for transport
-
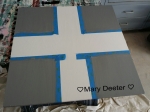
- 2nd sample board, taped off – 1 color
-
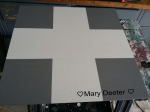
- 2nd board with tape removed
I had fun at the Quilt Show doing the demo, and appreciated the attention and questions I got from those that came to listen. I began my demo explaining that I am not an expert, and I am not an artist. With my handy yardstick, ruler, blue tape and razor knife, I could, however, make a barn quilt. If I could do it, then anybody else could too. As I only had 30 minutes to demonstrate, I taped off just two areas on the sample boards and I asked for paint helpers! The two ladies that painted seemed like they had fun! Overall, I had a successful demo based on the feedback I got from those attending.
Many thanks to my hubby who cut the wood for me, got my photo’s running on a slide show, and helped me get the laptop, the computer monitor, cords, power strips, electric cords, paint, books and samples into the show and set up. Bless his heart for putting up with me & my hobbies! Thanks to my friends Barbara & Elli for sharing their barn quilts from our class in March. Nice to have so many samples to generate interest.
Now that I have the boards back home, perhaps I should finish both of them! (I shouldn’t wait 4 months to look at them!!) And I want to take the original boards and get them hung! One is going on the fence, and one on the garage near the entrance to my quilting studio. Not quite sure what I will do with the two done in oak, but I will get them finished. Maybe I should pick up one more color of paint, just to jazz things up a bit! I put together a handout with general information on how to make your own barn quilt, and lots of links to resources around the web too. Seems there are lots of people making and selling them, both in wood and in metal. They are becoming very popular and they are fun and easy to create, at least in the smaller 2×2 size that I used. Now, if I only had a barn……….
If you are interested in the handout I gave during the demonstration, it is available here: barn quilts
The document is a PDF, and has multiple links for more information.
Happy sewing and painting.


I love, love, love making barn quilts. 🙂 I wish we were neighbors.
LikeLiked by 1 person
Me too!
LikeLike
I love barn quilts. We’ve seen quite a few in our southwestern and central Ohio countryside.
LikeLiked by 1 person