
A couple of months ago I saw a new mask design that claims to be “more breathable – The mask that doesn’t touch your mouth or nose, easier to breathe”. I shared that video in a comment with one of my blog readers, and decided today to try and make the mask. I will post a link to the video at the end of this post. Note, this is NOT my design, but merely a reference to someone else hard work and creativity.
I’ve watched the video multiple times and like the simplicity of the mask. I start with a piece of computer paper (8.5″ x 11″) and a ruler and pen. I stopped the video each time the designer made reference to a measurement, so I could make those “marks” on my paper. I have to admit, it took me a minute to find a ruler with centimeter markings. (Dear hubby had one on his train table in the garage.) The conversions to inches were a pain as not many American rulers have the inches broken down in 1.8″ or 1.18″. It was much easier to just go with the centimeter ruler. The “hardest part” of making the mask was making the template, and that took under five minutes. It really is quite simple.
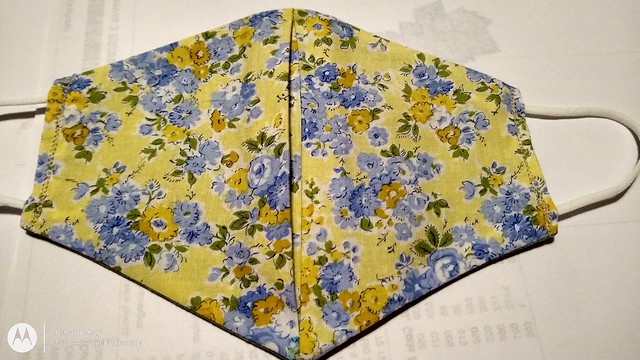
After I cut out the mask “shape” I went off to my sewing room. I had about 35 minutes before my dinner timer was to go off with chicken in the oven. I spent those 35 minutes locating some nice fabric, pressing, cutting, marking, stitching, pressing and finally adding the elastic for the ears. AFTER dinner, I went back to the sewing room, ripped out the stitching by the elastic, shortened it and re-stitched to secure the now shorter elastic in place. Note, for me, I started with a 9″ piece, and shortened it to 7″. For the hubby, I made his with a 9″ piece of elastic for each ear loop. NOTE: Be sure to put a knot at the end of your elastic, and stitch just to the side of the knot. That might help you keep the elastic from pulling out of the seam.


The masks are essentially reversible.
I made a second one after dinner for my husband. It covers his mouth and nose as needed and does not push the fabric into his nose and mouth, which has been a big objection to his mask wearing.
We both wore masks the other day at a gathering and find that wearing for any time longer than 10 minutes they grow tiresome and hot and annoying. I’m hoping this style is one that we can endure for longer bits of time.
I think the shape allows for it to be snug over the bridge of your nose and snug on the sides too, without covering your entire face – just the parts that are necessary!


Note; hubby has a mustache and goatee, and this was fairly comfortable for him to wear.
I found the construction fast and easy, could cut everything with a rotary cutter and ruler once I made the basic pattern. I cut the fabric “on the fold’ of the pattern, which enhanced the rotary cutting. I cut 2 fabrics, 4 layers at once, using my smaller ruler and rotary. I think if you were going to make a lot of these, the cutting would go very quickly. (That has been my big objection with some of the other “shaped” masks). Overall, I give the pattern maker a big thumbs up. I do believe the designer (ART Thao162) has other styles of masks on you-tube, but I suggest if you are looking for a style that doesn’t make you feel claustrophobic, give this one a try.
Video below. Link to you-tube – https://youtu.be/U3nwb9ZTyyU
If you try this, let me know what you think and if you would do something differently.


Interesting design! Thank you for sharing.
LikeLiked by 1 person
Quick and easy. I think it would be easy to add a nose wire or scale up to a larger size
LikeLike
The mask looks great. I will have to try one.
LikeLiked by 1 person
Once the template was made it was very fast to make . I think adding a nose wire would be easy and scaling to a larger size would be easy as well.
LikeLiked by 1 person
Thanks Mary! I’m anxious to try this one. Seems like it would definitely be more breathable!
LikeLiked by 1 person
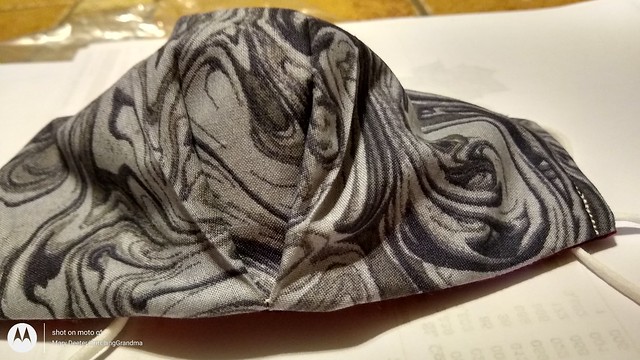
Pam – hope you find it comfortable. The designer has other styles on you-tube that look more complicated. I liked this one because I could cut it out with a rotary cutter quickly. It is pretty fast and if you were making several, they would go quickly. I think you could also scale it up a bit bigger for Paul. I made the first one in florals and tried it on Bill and he was happy with the size. I made the second one with ‘no flowers’ for him.
LikeLike
Looks like a very interesting design!
LikeLiked by 1 person
It’s quite quick to make, easy to rotary cut!
LikeLiked by 1 person
Pingback: Sewing for others | Stitching Grandma