
My sewing room has visitors off and on all last week. We had 4 helpers for 2nd Time Around prep on Friday working hard for the benefit of the guild. One member, Arlene, took home a partially made project that she found in the donations and came back on Saturday to lay it out on my big table and get it pin basted. She had taken something that someone else discarded, added a little time and effort and borders, and now has a baby quilt ready to donate to one of the many charity groups Ocean Waves Quilt Guild supports.
Another friend, Karen, came over and laid her languishing quilt top on my big table, and we measured the dimension, and then measured her available fabric for the back. We tossed around ideas for increasing the size of her backing with some pieced blocks and extra bits. I can’t wait to see how she proceeds. She had 5 wonderful paper pieced blocks she wanted to incorporate on the back, and we worked through how she could do that. Of course, we needed my design wall blank, so before she arrived I cleared my design wall of those batiks that have been hanging around since the end of July.

I wrote about them here – small-projects-and-small-bits and here Batik Fun .
I can’t share what she is working on, but after she finishes and the gift is received, I will.
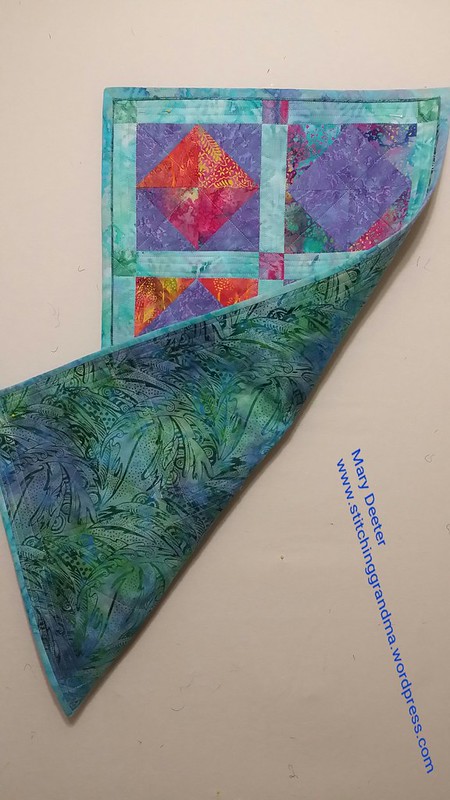
Anyway, I had stacked up all those pieces from the design wall onto my sewing machine while we worked on her project. After she left, I decide it was time to do something with the table runner. I dug in my bin of greens and blues and found a nice batik that I had “just enough” of a piece for backing and binding. I also dug in my bin of scrap batting and pulled out a chunk that was “just enough” for a table runner.
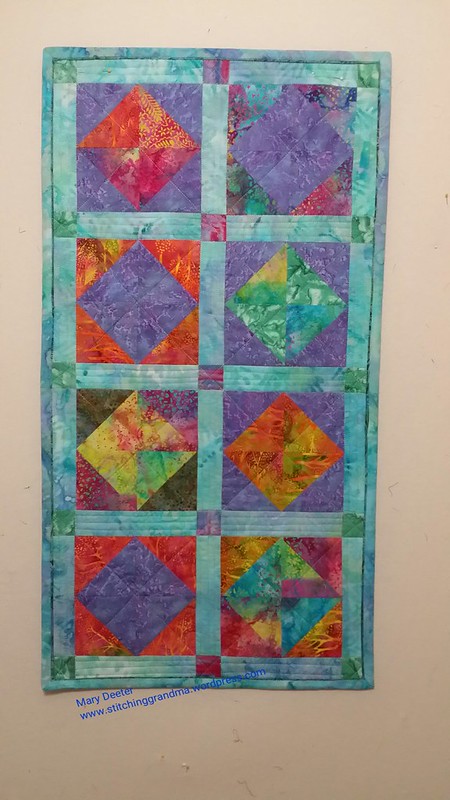
I layered up the table runner, batting and backing, pinned it and put on my walking foot again for machine quilting. (Most of you know that I am still terrified of free motion quilting (FMQ) but have had good success with straight line walking foot quilting!) (All right, I debated FMQ, but quickly shook my head no. I think I will get some practice in on those placemats….later). I previewed 2 threads and chose Superior Fantastico thread #5025, which is a variegated, pink, blue, yellow, and green thread. I used it in the bobbin as well as on top. It actually shows more on the back than I like, and now I wished I had stuck to silver for the bobbin!
I stitched across each block and though the cornerstones making and X. Then I did some channel quilting in the sashing. Honestly, the quilting in the sashing took me the longest, because I had to stop at every cornerstone. I also stitched in the ditch between the blocks and the sashing. There is “enough” quilting to keep the table runner nice and flat, but it is not heavily quilted. I kept debating going back and doing something in the “triangles” on each section with either straight lines or the hopper foot. By the time the channel quilting was finished, so was I. My “go make dinner” alarm went off, and I shut off the machine.
After dinner, I was re energized and hubby and I went back out to the garage. I was just going to cut and make the binding. He is working on building a “test track” on a shelf for “speed matching” his locomotives……(He needs a blog!) I might take a picture or two when he gives me the ok! I had a great audio book going and time ran on, as it often does.
I made up my binding using my favorite “Susie’s Magic Binding” method,. I continued to sew while listening to the book, and got it the binding on the runner. I like the way it turned out. Hubby always tells me he likes the added “pop” of color the binding adds. I used the smaller of the TQM Binding tools to join the ends and I got the “BEST” join ever on this project. (Note, because of the piping/flange, I baste the join, check to see if it lines up and adjust if need be. I made one slight adjustment and it is perfect!) I think using the smaller binding tool helped. Or, I had more patience and lots of practice from all those placemats! If you have trouble with the join, try basting it first. The link for the binding method shows written directions and a video!
The fabric from the back of the runner is the same fabric I used in the “flange” on the binding.
I mentioned in a comment to a reader this weekend that this binding is a joy to make, not a chore. I love it because there is NO hand sewing!
I was trying to remember where I had used that batik for the back of the runner before, and it just occurred to me…my Sensational Silk wall hanging, borders and backing (more about it here – In Betweens ). There is just about enough left to use for the back of one of those placemats in the stack.
Hubby said to me after the table runner was bound, looking at it in the sewing room, that he thought it was “too small”. It measures about 19″ x 35″.
I had to bring it in the house and put it on the dining room table to get a look. (That meant I took all those Autumn Jubilee placemats off for a while!) The dining room table is 40″ x 80″ so I think it floats well in the center. I like the finished size. I have made longer runners, but this works for me for now.

I decided to call it “Fire and Ice” because it feels HOT with all the orange and cool with all the turquoise and green and purple.
Time for me to get busy labeling projects! Do you put labels on “everything” ? I didn’t on my placemats, but will on the runner. I need to make a label for my Grandma’s Kitchen quilt too. Time for me to tackle the reset of the stack of batik placemats. I had wondered what others thought of using muslin for the back of placemats in a previous post. My friend Nancy has a couple of nice batik pieces she is going to share, and I am digging around in my bins for more batik yardage and fat quarters. (I do think I will practice some FMQ on those….wish me luck!)
Do you name your projects? It is fun to “FINISH” some smaller projects.


Very nice!
I got my fabric for the Bee 🐝 pin cushion. Yippy!
LikeLiked by 1 person
I am glad to hear someone else is inspired to make one. I used 2 strands of crochet thread,and believe a button on the bottom is a good plan. Be sure to clip the curves and use a short stitch. I can’t wait to see yours!
LikeLiked by 1 person
I like that extra pop of color, too, from the flange that you added. Great table runner! And how nice that you and the Hub can be together while you work on your various projects!
LikeLiked by 1 person
Thanks Laura. We have a big space and I sometimes hear his train whistle, while he tolerates my audio books. Last night he asked me to turn up the volume as the book caught his interest.
LikeLike
That’s beautiful!
LikeLiked by 1 person
Thank you for your kind words, and for taking the time to read and comment on my post .
LikeLiked by 1 person
That is a beautiful table runner. It looks perfect on the table!
LikeLiked by 1 person
Thanks for taking the time to read and comment. Isn’t it amazing what can be done with a few scraps?
LikeLike
It certainly is!
LikeLiked by 1 person
Thank you for the tips.
LikeLiked by 1 person
You are welcome! I have learned so many helpful tips reading quilting blogs. I like to share the ones that have worked for me!
LikeLike
Gorgeous! Hard to go wrong with batiks 🙂
LikeLike
Pingback: Labels for old projects and Autumn Jubilee | Stitching Grandma
Pingback: More placemat fun | Stitching Grandma