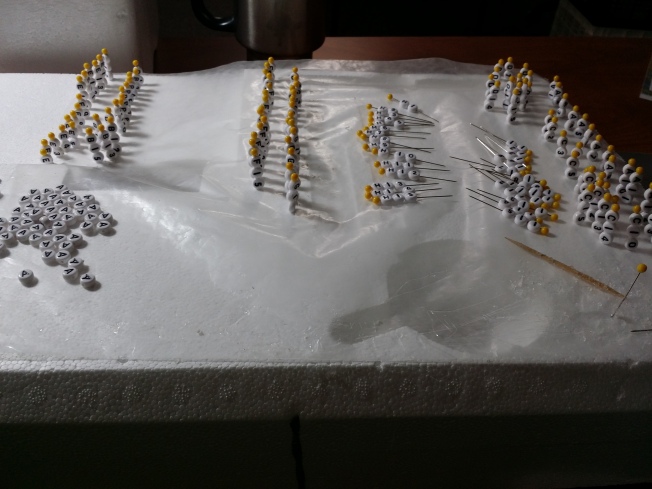
Well, it seems to be working, my little One Block Wonder pin project. E6000 glue; quilt pins (1 3/4″) and small alpha/number beads. Next to solve the storage question. And to build J1-15 to Z1-15!
So, here is how to do this: Sort your letters and numbers and lay a bunch out; ready for glue. Apply a dab of glue to the pin shank above the letter bead and below the letter bead. Then slide the number bead up the pin until it touches the letter. Hold for a brief moment the shove it into wax paper covered stryroam block all the way until it makes contact with the bead. This prevents the bead from slipping down, and any glue that might be excessive will be on the wax paper. They pull easily out of the styrofoam after they are dry.

 Well, it seems to be working, my little project.
UPDATE – It seems that someone else has written a great tutorial for this project -Nancy West has nice graphics and instructions on her blog – My Fancy Nancy Life . I’m not sure if I saw this when I was looking for a method, but her project is similar to mine. Differences is she likes fancy pins, my pins are “very utilitarian” . The pins she used are way more expensive than the yellow headed quilt pins I used. (I was making lots!!!). Of note; I bought my glue, the pins, the beads, numbers and letters, all at Hobby Lobby.


What a good solution! I remember two summers ago trying to help solve this problem and getting nowhere. Then will they live in the foam block all in little rows like soldiers?
LikeLiked by 1 person
My plan is in foam in a box like a pencil box or some such item..maybe a check book box. Trying to find something that I have around to re purpose.
LikeLike
Oh my what work.
LikeLiked by 1 person
I had fun. I spent part of the afternoon assembling some while I listened to an audio book. The glue is a little messy but dries clear and fast. 1/2 finished. 🙂
LikeLiked by 1 person
You have an army of letters ready to fight the good fight. 🙂
LikeLike
Pingback: One Block Wonder Row Marking Pins finished | stitchinggrandma
Why do you use a letter AND a number? Just asking before I make some. 🙂
LikeLiked by 1 person
Columns and rows, a pin for every block. First column is A, first piece in column is 1.
LikeLike
I hope I answered your question. Each column has a letter, each row has a number, so Column A has piece A1, A2, A3 Etc. Column B has B1, B2, B3 etc. That way when you are joining up a row or a column, you know that you have the pieces in the proper order.
Let me know if you have any other questions Suzette. 🙂
LikeLike